



Long curls do not need taming to look Viking.
That’s the part a lot of people miss. Viking hairstyles for long curly hair work because the texture already gives you movement, bulk, and a little bit of wildness, which is half the job. You’re not trying to force curly hair into a neat, glossy shape that fights back all day. You’re trying to build a strong silhouette and let the curls do what they do best.
The old trap is over-smoothing. Pull curls too tight and the style turns flat, which kills the rough, windblown mood that makes these looks feel right. Leave some lift at the crown, keep a few pieces loose around the face, and use braids, twists, or wraps as structure instead of decoration. That structure matters more than people think.
A good Viking-inspired style also respects the curl pattern. Tight coils, ringlets, and big loose waves all behave differently, so section sizes, pinning, and product choice change a little each time. The best versions are the ones that look sturdy up close and a little unruly from across the room. That’s the sweet spot.
1. Half-Braided Crown for Long Curly Hair
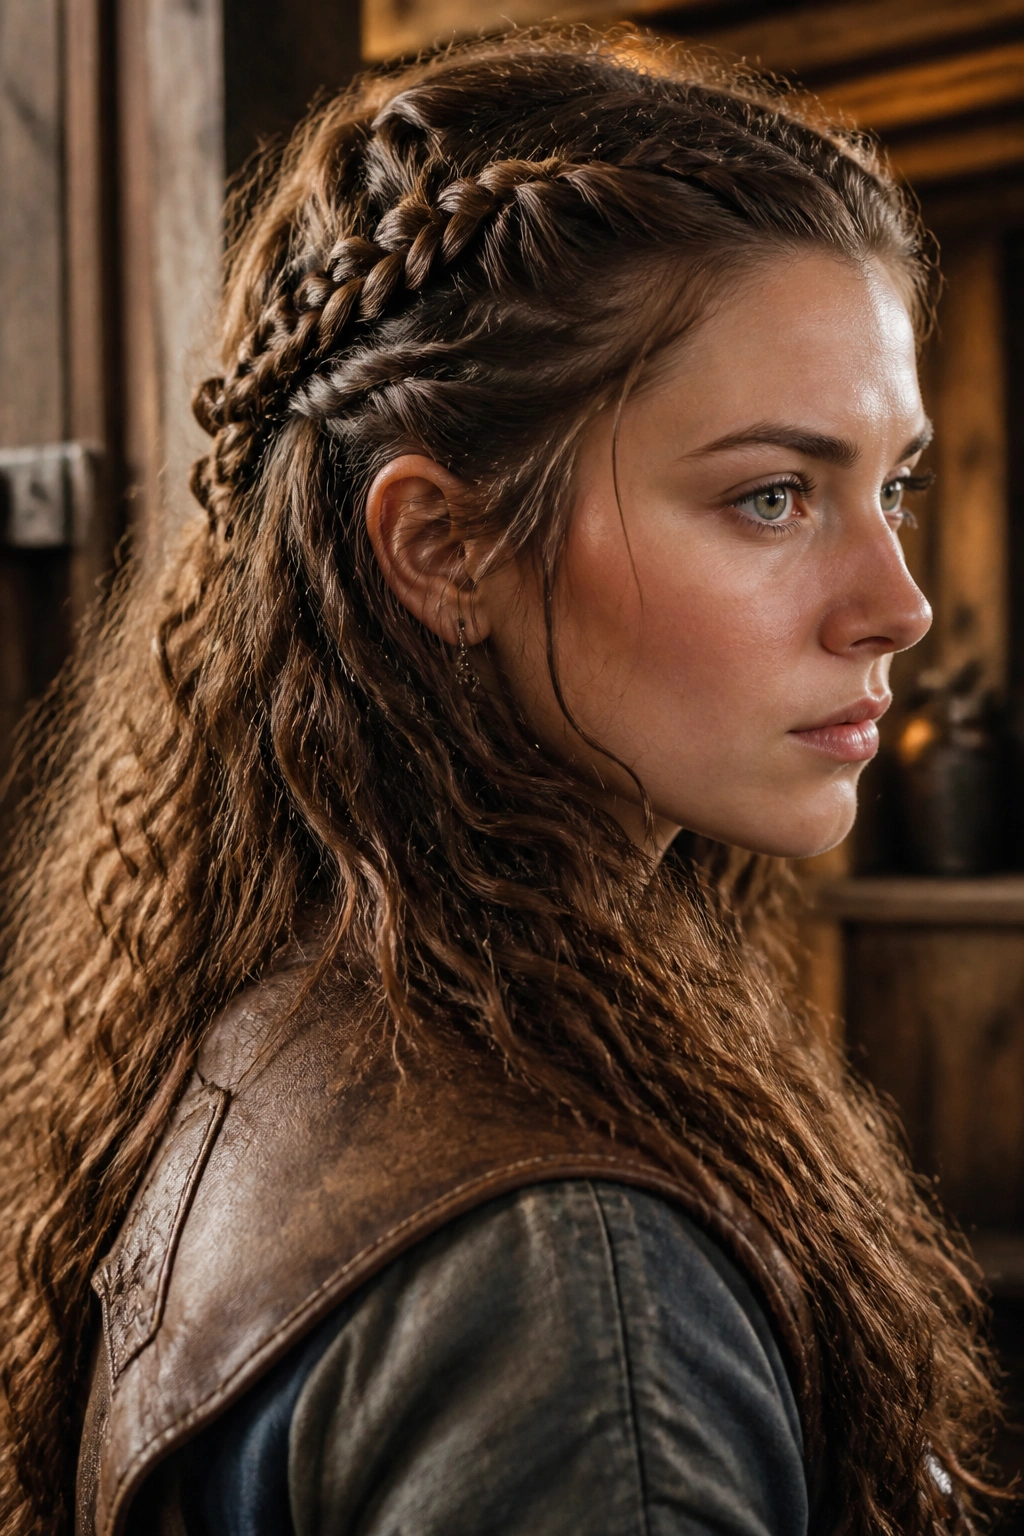
A half-braided crown is one of the easiest ways to make Viking hairstyles for long curly hair feel intentional without burying the curl pattern. You braid only the front and side sections, then let the back fall loose, which keeps the look soft instead of stiff. It has that “warrior who did not spend an hour polishing her hair” energy, and I mean that as a compliment.
Why It Works on Curls
Curly hair already has natural lift at the roots, so a crown braid doesn’t need much help. Start with two sections from the temples, each about 1 to 1.5 inches wide, and braid them back toward the crown. Keep the braid shallow and a little loose. If you pull it tight, you flatten the top and lose the shape.
A tiny bit of curl cream on your fingers helps stop frizz at the braid line. Use maybe a pea-sized amount per side. That’s enough. Too much product makes the front look damp and heavy, which is not the look.
- Best on day-one or day-two curls
- Works well with clear elastics or small matte ties
- Leaves the back free, so your curl length still shows
- Looks stronger when you gently tug the braid edges apart after securing them
Tip: Braid the sides before your curls fully expand. Once curls puff, the braid can get swallowed.
2. Center Warrior Braid With Volume at the Roots
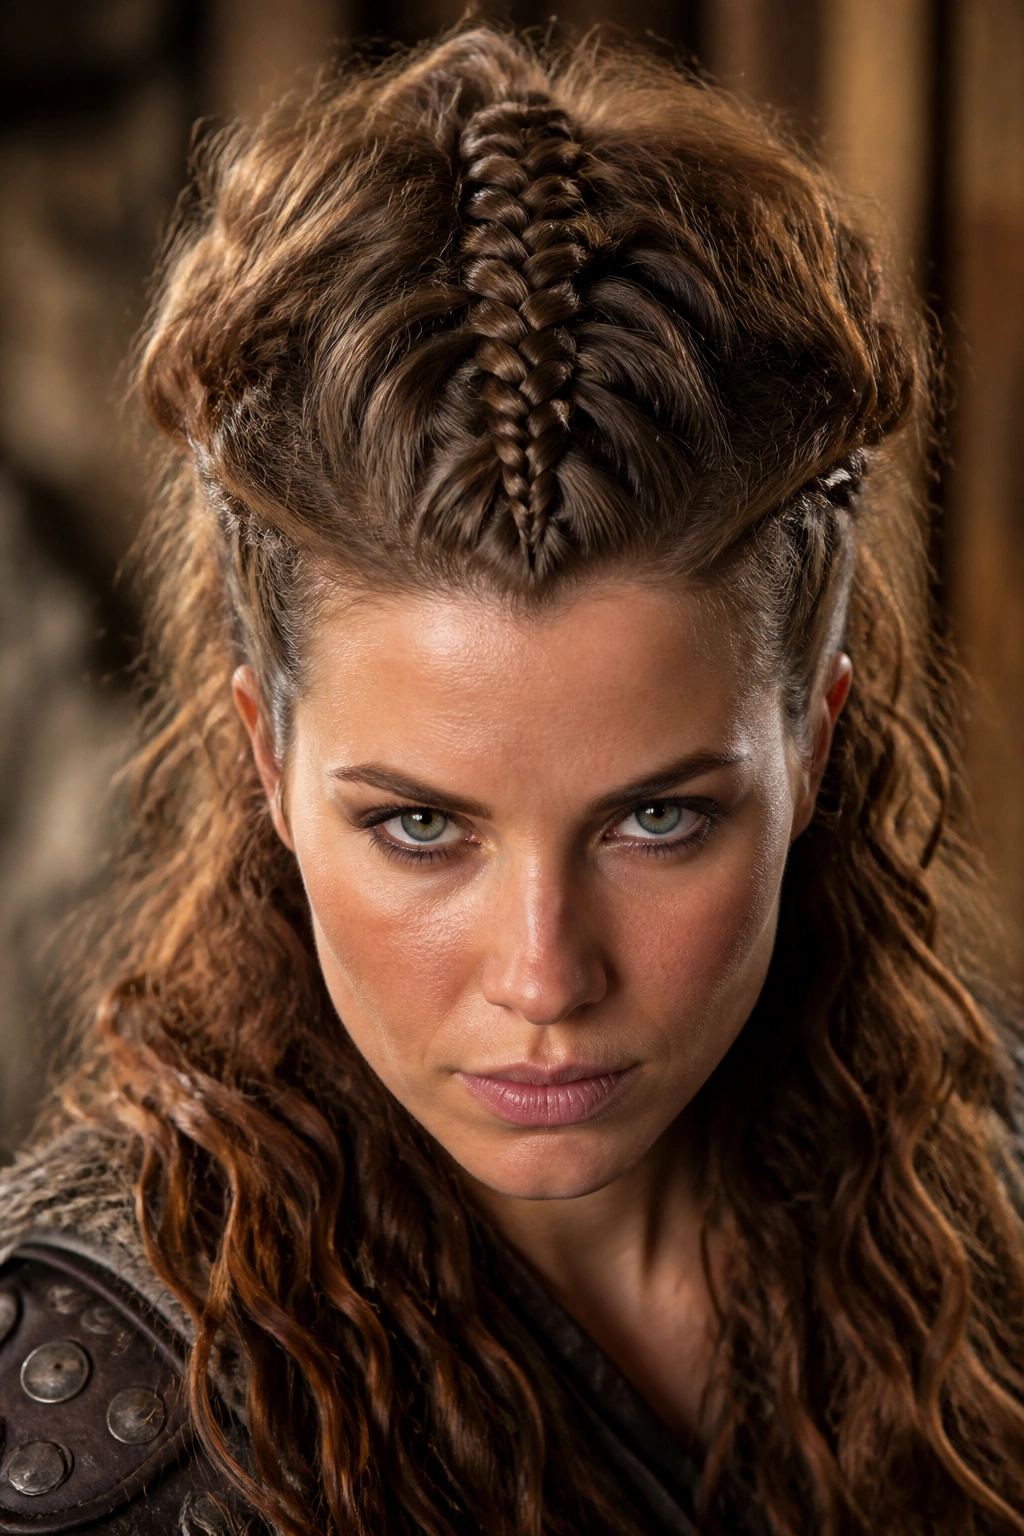
This is the loudest “I mean business” style in the group. A single braid running down the middle of the head creates a strong line, and the volume on both sides makes it feel bigger than it is. On long curly hair, that contrast is the whole trick. The braid gives order; the curls give drama.
Start with a clean center part and section off a strip about 2 inches wide from the front hairline back to the crown. Braid that strip straight down the middle, or stop it at the nape and tie it off with a small band. The rest of the hair stays loose, but the roots should stay lifted. A little teasing at the crown with a fine-tooth comb works, though you only need a few strokes. Don’t turn it into a nest.
If your curls are thick, this style looks best when the braid is thick too. Skinny braids can disappear into the texture. I’d also skip heavy wax near the scalp; it weighs the braid down and makes the top look greasy by the end of the day.
Use this one when you want strong shape, not softness. It reads bold from a distance. Close up, it still feels casual enough to wear outside a costume event.
3. Twin Side Braids and Wild Back Curls
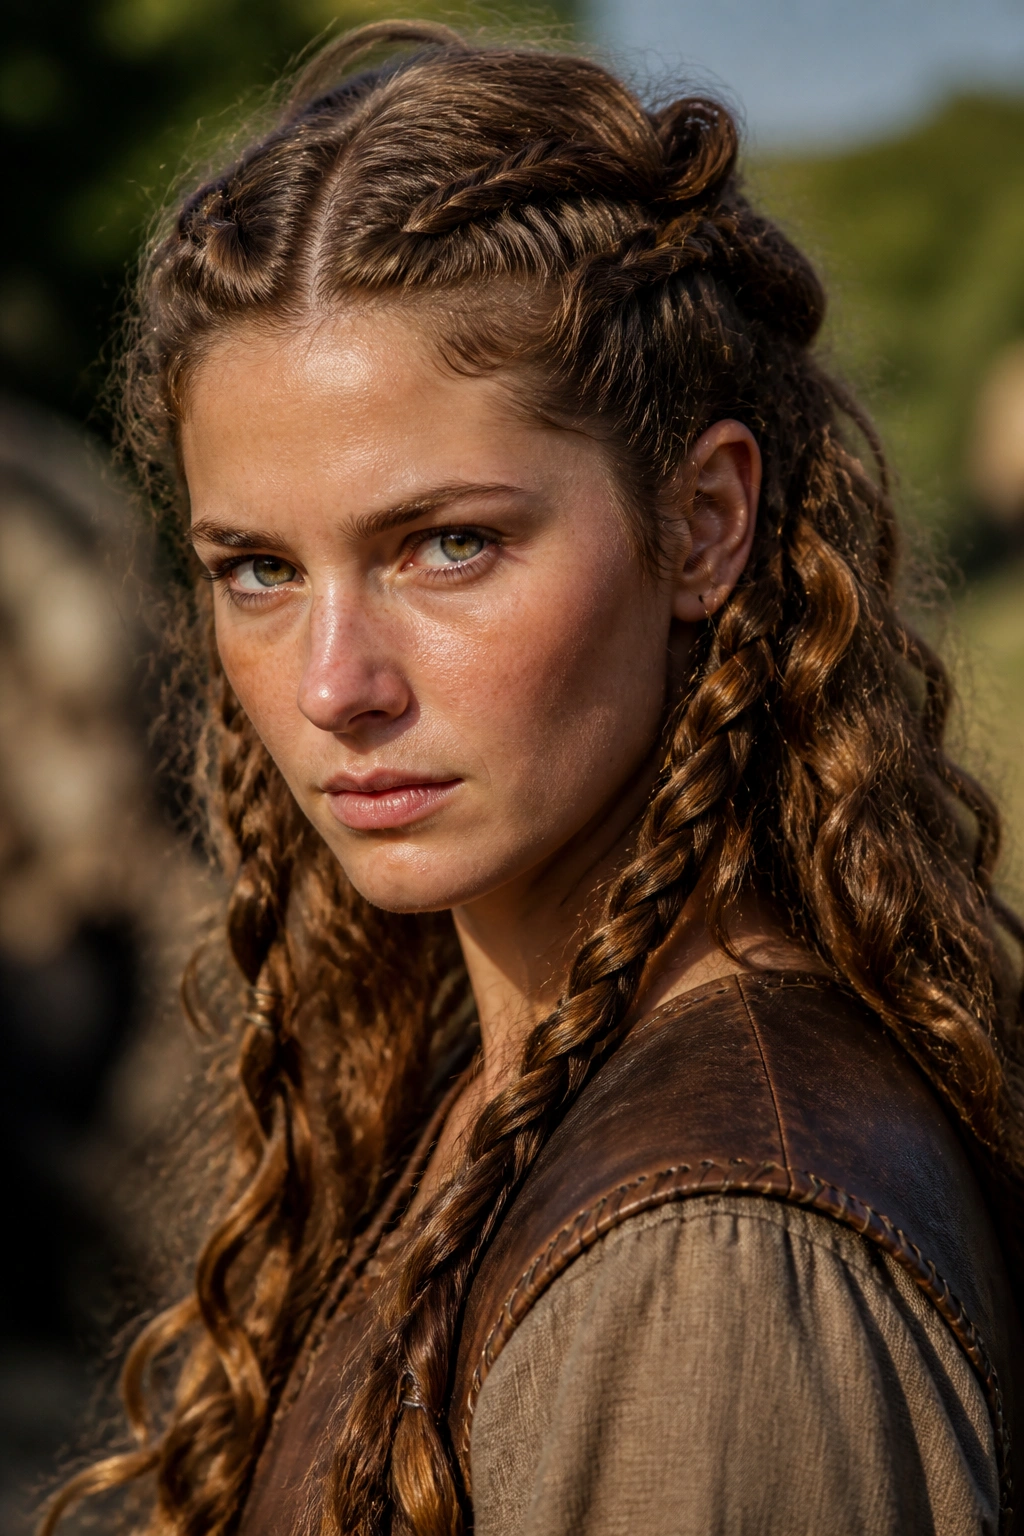
Why does this work so well on curly hair? Because the braids act like anchors while the back keeps its natural volume. The style has a sort of “ready for the ride” feel—practical, but not plain. If your curls tend to balloon around the face, twin side braids pull that area back and give the rest of your hair room to breathe.
How to Wear It
Part the hair down the middle, then take one section from each side, about 1 to 2 inches wide near the temple. Braid each side back just past the ears and secure with small elastics. Leave the rest loose and shake the curls out with your fingers. That tiny bit of breaking up makes the style feel less staged.
If your hair is dense, leave a few short pieces loose around the cheekbones. Those little curls soften the style and keep the braids from looking too severe. You do not need perfect symmetry here. In fact, a slightly uneven braid length looks better.
- Best for high-volume curls
- Great if you want to keep hair off the face
- Works with leather ties, ribbon, or plain elastics
- Looks better when the curls are defined, not brushed out
Small warning: Don’t braid too far back on the side. You want the braids to frame the face, not disappear into the length.
4. Braided Mohawk With Curly Sides
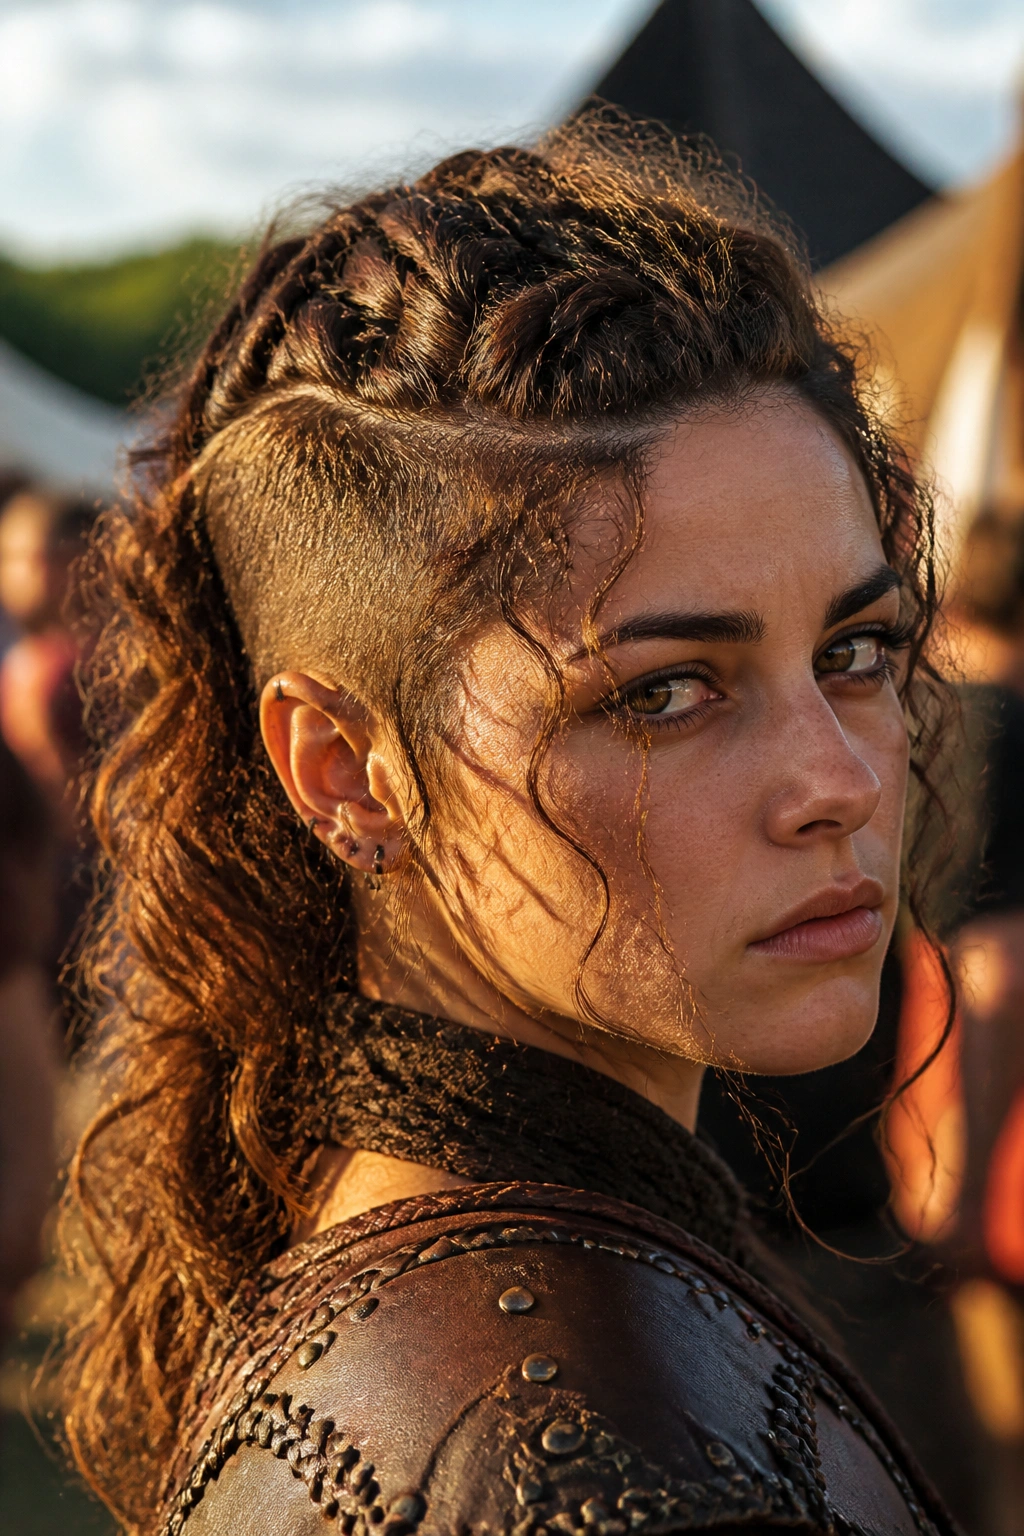
If you want drama without a full updo, this is the one. A braided mohawk gives you height through the center and lets the curls on the sides create a softer edge, which means the style feels powerful without looking overworked. It’s one of those looks that can go from a festival to a dinner table without much adjusting.
The center braid usually starts at the front hairline and runs to the back of the head. Keep the braid 2 to 3 inches wide if you have a lot of hair; smaller sections can look flimsy once the curls puff around them. The sides can be pinned back flat or twisted loosely behind the ears. I prefer a few hidden pins rather than too much product. Pins hold shape. Product only helps if the hair is very slippery.
What Makes It Different
Curly hair gives the mohawk shape more body than straight hair ever could. You don’t need fake fullness. It’s already there.
A flexible-hold spray is enough to keep the braid line neat. Mist it from about 10 inches away so you don’t soak the curls. If you spray too close, the top gets crunchy and the sides lose spring. That’s a bad trade.
- Use 3 to 5 bobby pins on each side
- Keep the braid centered, not too low
- Leave the ends curly instead of forcing them straight
- Works best with hair that has a little grip, not freshly conditioned hair
My honest take: This style looks best slightly imperfect. If it’s too polished, it loses its bite.
5. Rope-Braid Ponytail With Leather Wraps
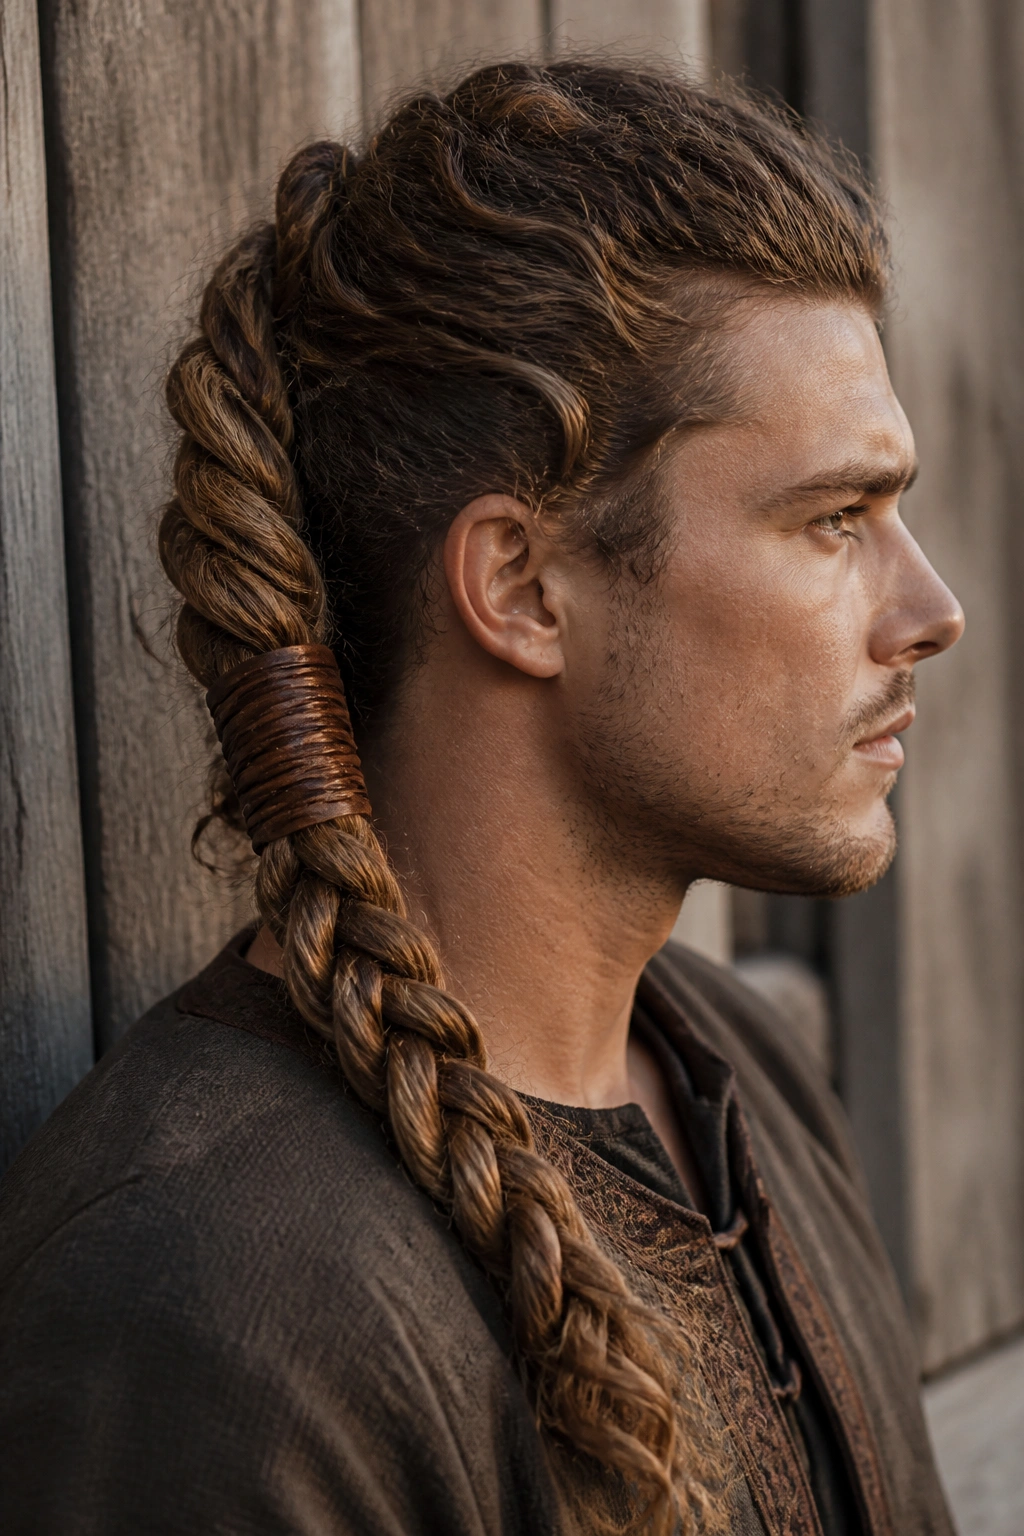
A rope-braid ponytail has a more rugged feel than a standard three-strand braid. Two twisted sections create a thick rope effect, and on curly hair that texture blends in naturally. Add a leather wrap around the base or a few inches down the length, and the whole thing starts looking like it belongs on a shield wall instead of a yoga mat.
This style is especially good when your curls are long enough to show off length but you still want everything controlled. Gather the hair low or mid-height, split the ponytail into two equal sections, then twist each section clockwise before wrapping them around each other counterclockwise. That direction matters. Twist both strands the same way and the braid can loosen fast.
The result feels sturdy and a little heavy in a good way. It swings when you move. It also hides frizz better than a sleek ponytail, because the twist pattern disguises the less tidy bits.
If you want the wrap to stay put, tie it through itself once or twice instead of just laying it on top. Leather cord, faux leather lacing, or a narrow strip of fabric all work. Keep the wrap close to the base if you want a tighter, cleaner look. Move it lower if you want the style to read looser and more handmade.
6. Low Braided Bun With Hidden Pins
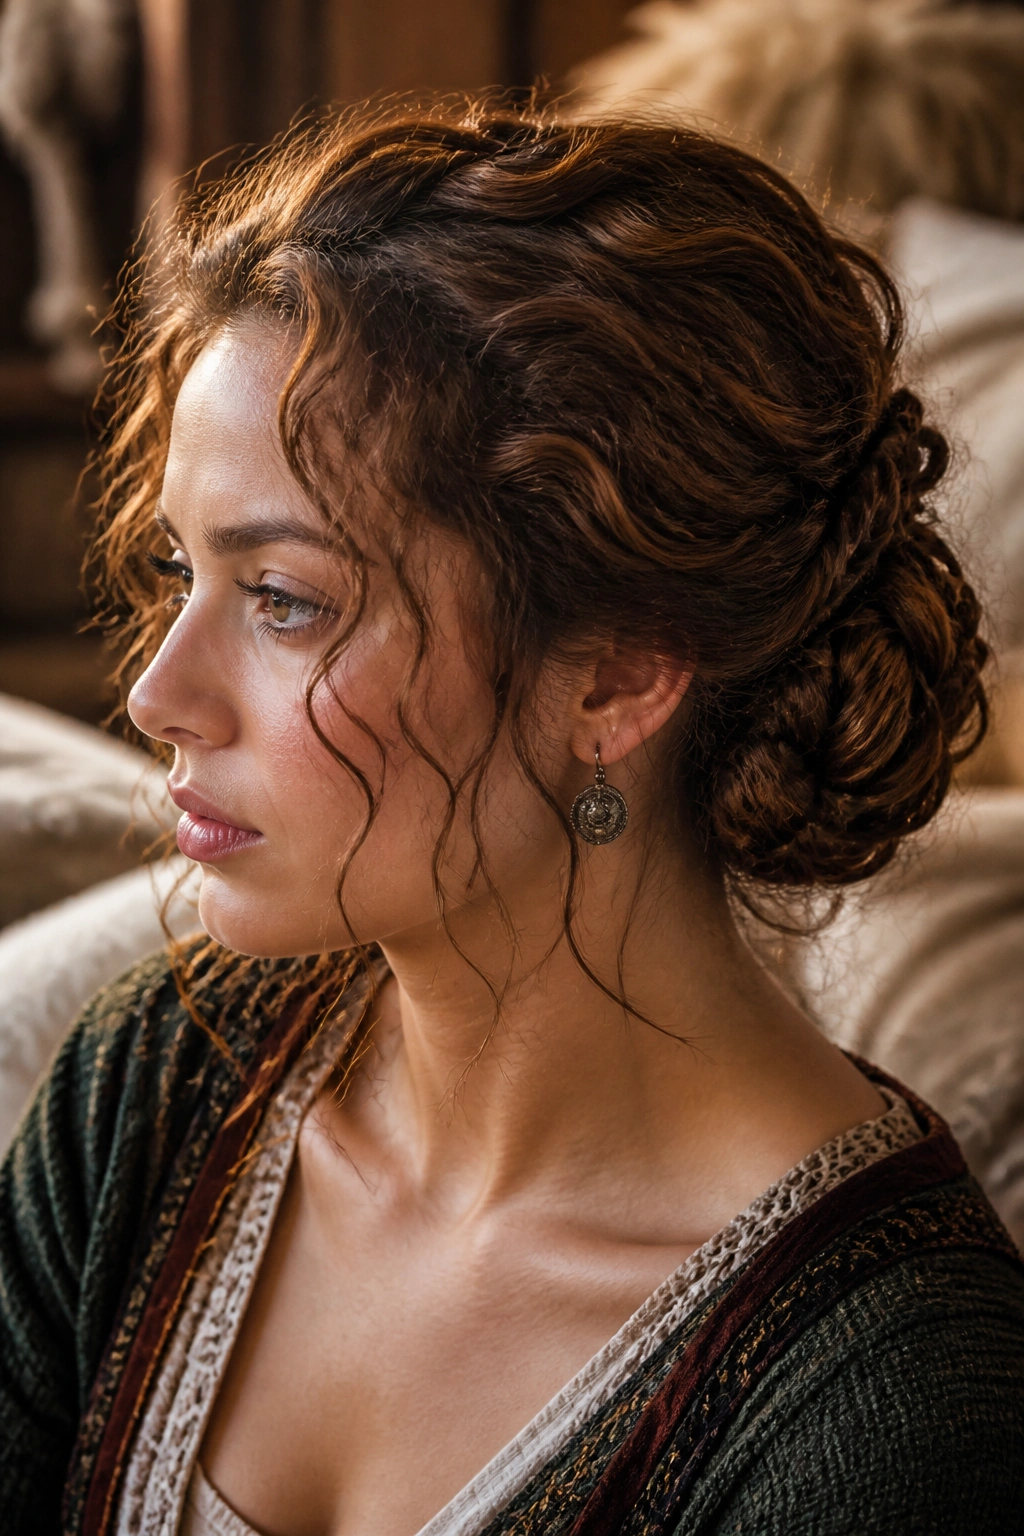
Unlike a slick bun, a low braided bun keeps the texture visible, and that’s what makes it work here. The braid creates a strong base, the bun gives you control, and the curls add thickness where straight hair usually looks thin. It’s a smarter choice than a flat chignon if you want a Nordic feel without losing your hair’s natural shape.
Start with a low ponytail at the nape, braid the length, then coil the braid into a bun and pin it close to the head. Use U-pins or long bobby pins, not a giant claw clip. Clips can slide when curls start to swell, and they often pull in the wrong spot. The bun should sit low and a little off-center if you want a less formal finish.
This style is a good pick for thick curls that need containment. It also works well if you want to show earrings, necklines, or cloak-style collars. The braid line gives the bun enough detail that it does not disappear from view.
I like this one for evenings because it stays put. If the bun is pinned into a braid base, it holds much better than a plain twist. That said, don’t pull it too tight at the scalp. A little lift at the crown makes the whole style feel more alive.
7. Crown-Fall Braid for Long Curly Hair
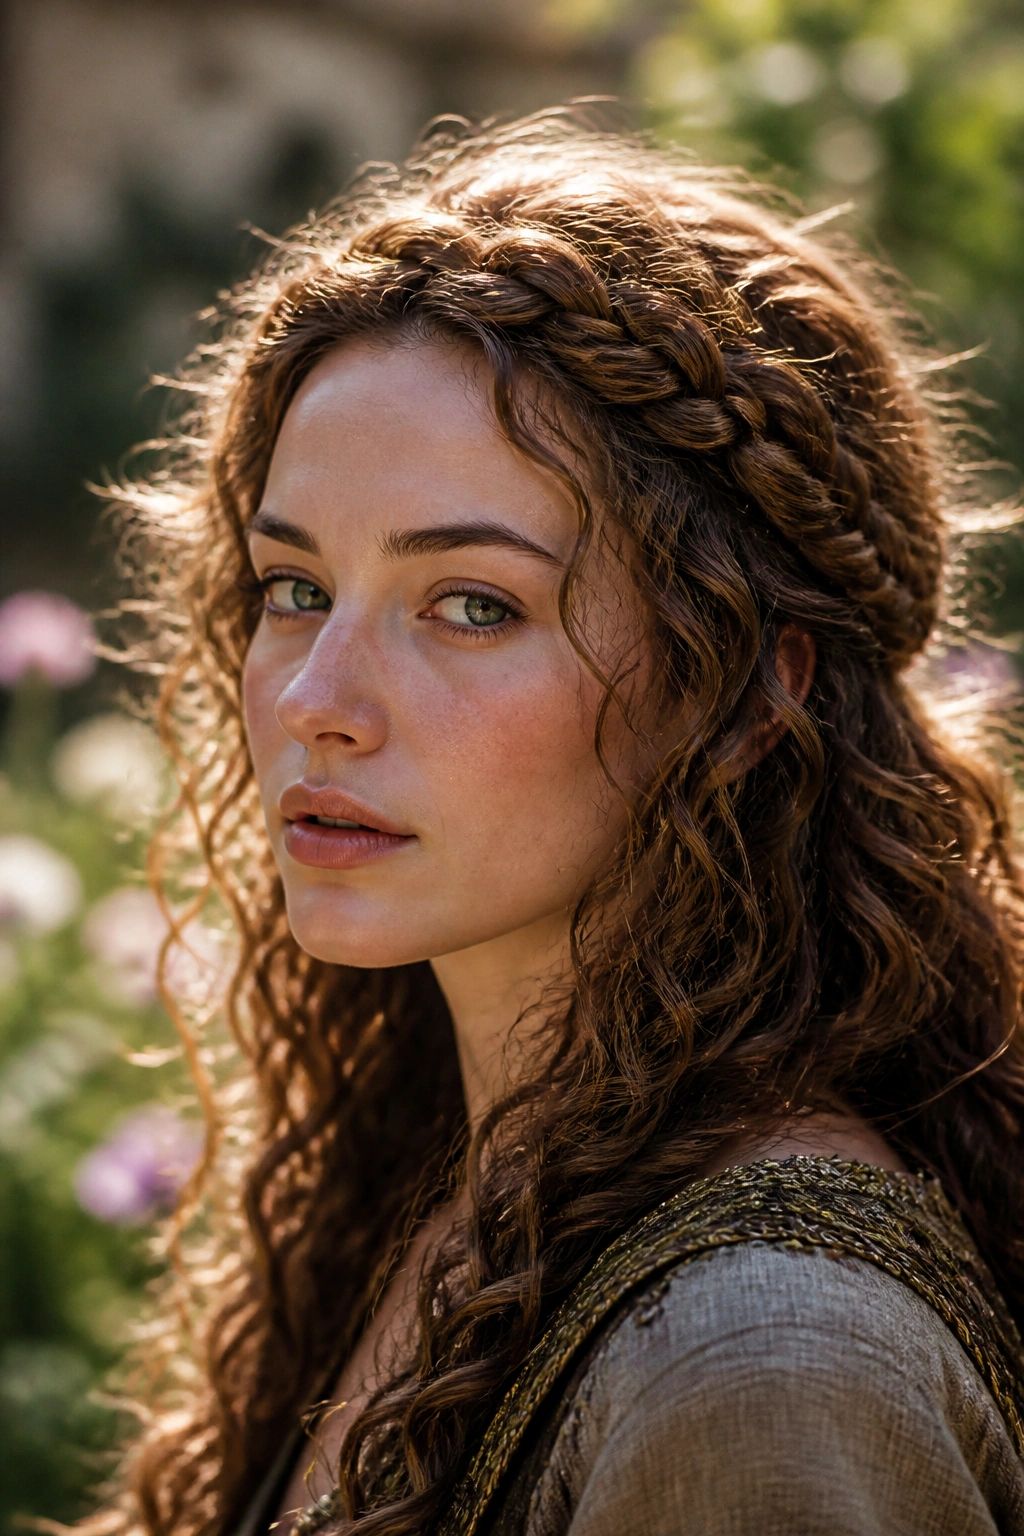
A crown-fall braid gives you the visual payoff of a halo braid without forcing every strand into the braid itself. That matters on long curly hair, because the loose length is half the point. The braid circles the top or front section, then stops and lets the curls tumble down like a second layer.
Where to Begin
Take a section starting near one ear and braid across the hairline toward the other side, keeping the braid about 1 to 1.5 inches wide. Secure it behind the opposite ear or at the back of the head. The rest stays loose. You can tuck the end under the curls or disguise it with a small bead or metal cuff.
What to Watch For
- Keep the braid close to the hairline so it reads like a crown
- Leave the back untouched if your curls have strong definition
- Use a light mist of water or curl refresher before braiding if the hair has gone flat
- Pin the end under a curl cluster so the finish looks clean
This style works especially well when you want shape around the face but still want the length visible. It’s a nice compromise. And yes, it photographs well because the braid gives the eye a clear path while the curls keep the image from looking stiff.
8. Fishtail Braid Over One Shoulder
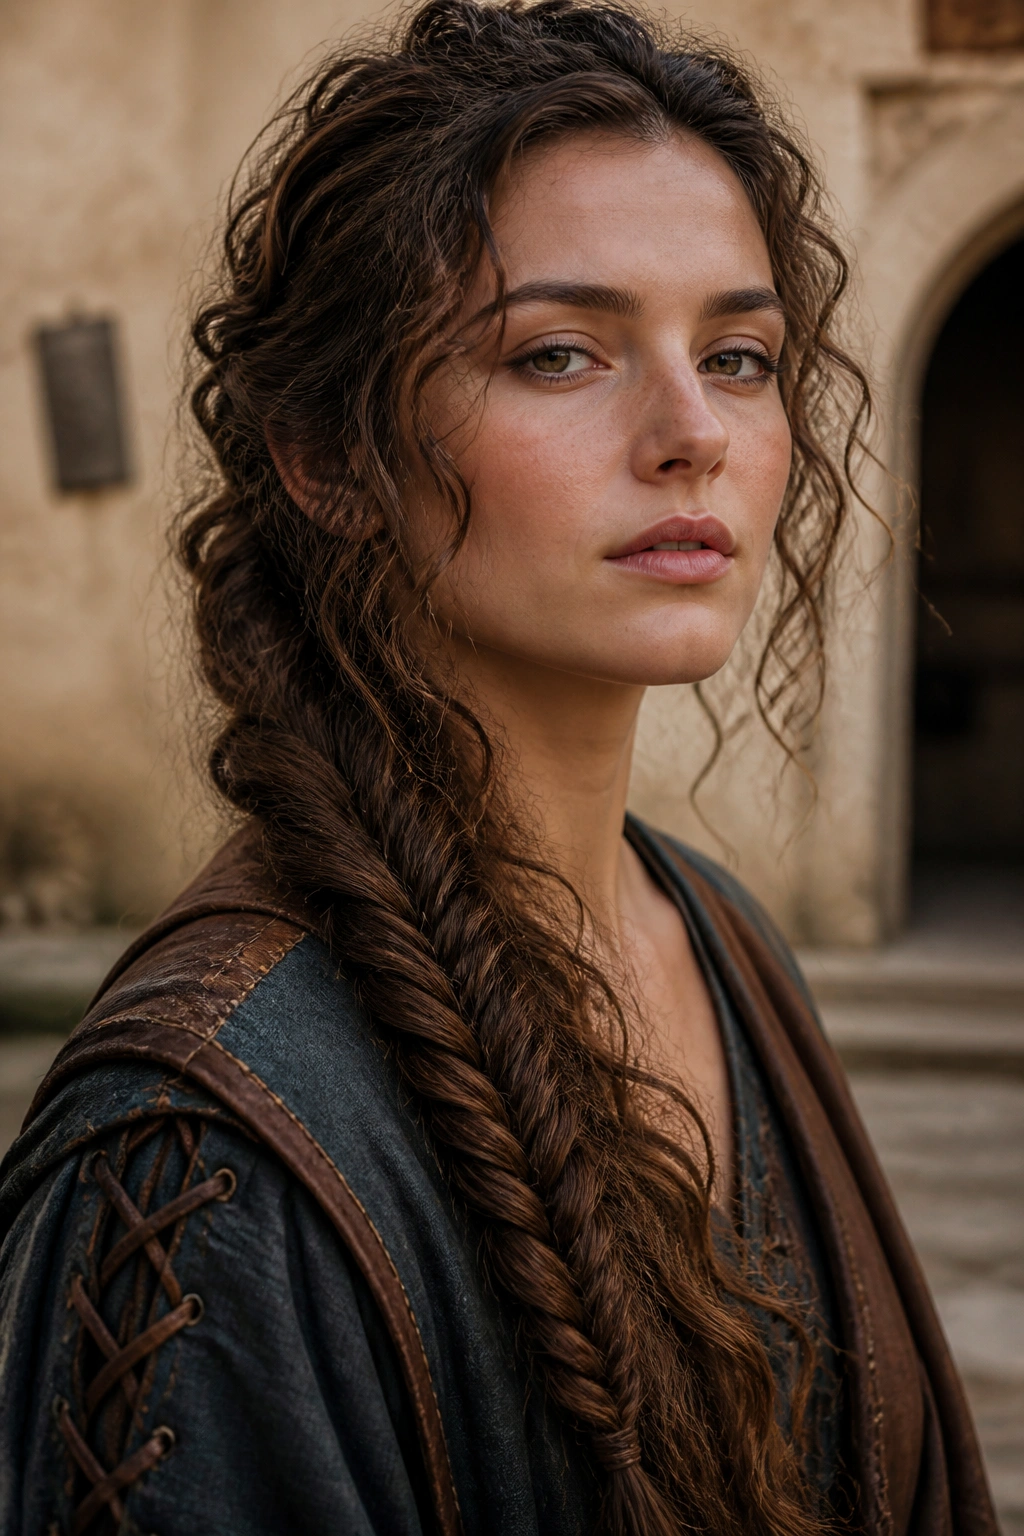
A fishtail braid looks more complex than a standard braid, even when it doesn’t take much longer to do. On curly hair, that extra texture is a gift. The pattern gets a little blurred in the best way, so the braid looks dense and rich instead of skinny and overdone.
Pull all the hair to one side and split it into two sections. From the outside edge of one section, take a small sliver—about half an inch—and cross it over to the other side. Repeat all the way down. Small pieces make the braid look cleaner. Bigger pieces make it loose and chunky. Either can work, but keep the piece size consistent or the braid will start to wobble.
I like this braid on hair that’s fully dry, because damp curls stretch and shrink as they set, which can make the braid feel oddly tight later. If your hair frizzes quickly, smooth a drop of lightweight oil over your palms before braiding. Do not rub oil through the length. That’s too much. Just enough to tame the flyaways at the surface.
Worn over one shoulder, this style feels a little more deliberate than the others. It also keeps the braid visible from the front, which matters if you want the texture to be part of the look instead of hidden down the back.
9. Crown Braid With Face-Framing Tendrils
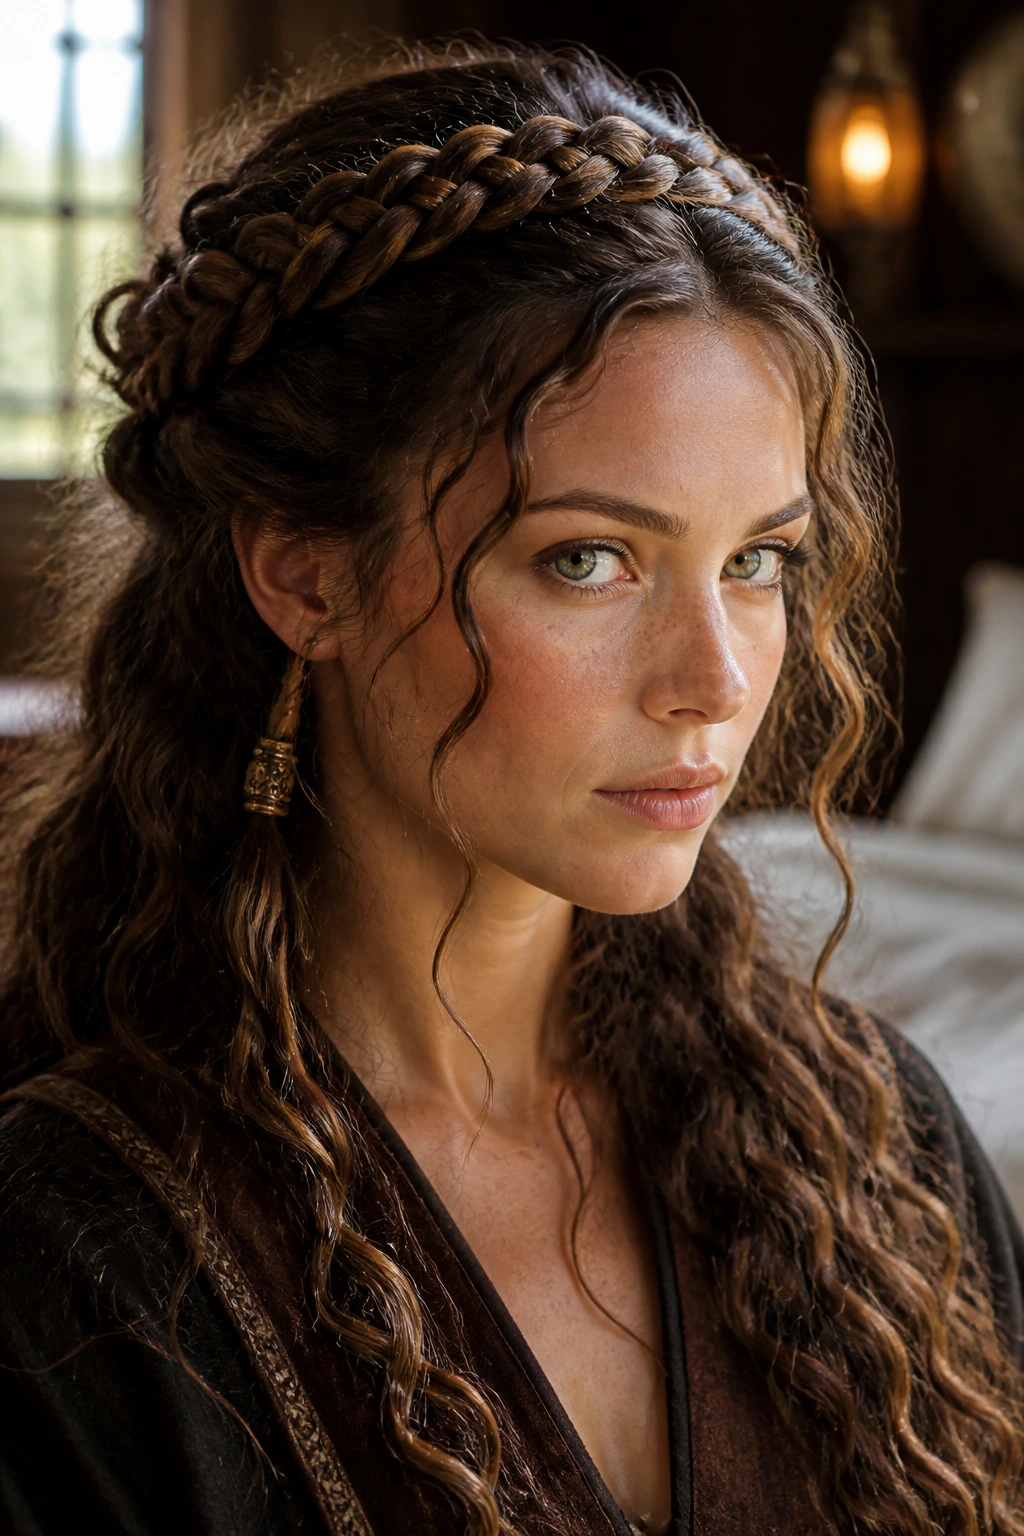
Why do people keep coming back to crown braids? Because they hold the face open while still giving the head shape. On long curly hair, the face-framing tendrils soften the whole thing and keep it from looking too severe, which is a common mistake with themed styles. A crown braid without a few loose curls can feel a little stern.
The braid usually runs around the head just behind the hairline, like a narrow band. You can use a single braid or two braids meeting at the back. The trick is to leave out a few curls near the temples and maybe one coil near each cheekbone. Those pieces should be small enough to feel intentional, not accidental. If you leave too much out, the crown gets lost.
How to Get the Most From It
Use a tail comb to part neat sections at the temples. That gives the crown a cleaner edge. Then pull the curls gently outward after the braid is finished so the crown gets a little lift. No hard tugging. Just a slight expansion.
This is the style I’d choose for a more romantic version of the Viking look. It still has structure, but the loose tendrils keep it from going costume-heavy. Tiny bronze rings or a couple of beads near the braid end can add detail without clutter.
10. Double Dutch Braids Into a Curly Ponytail
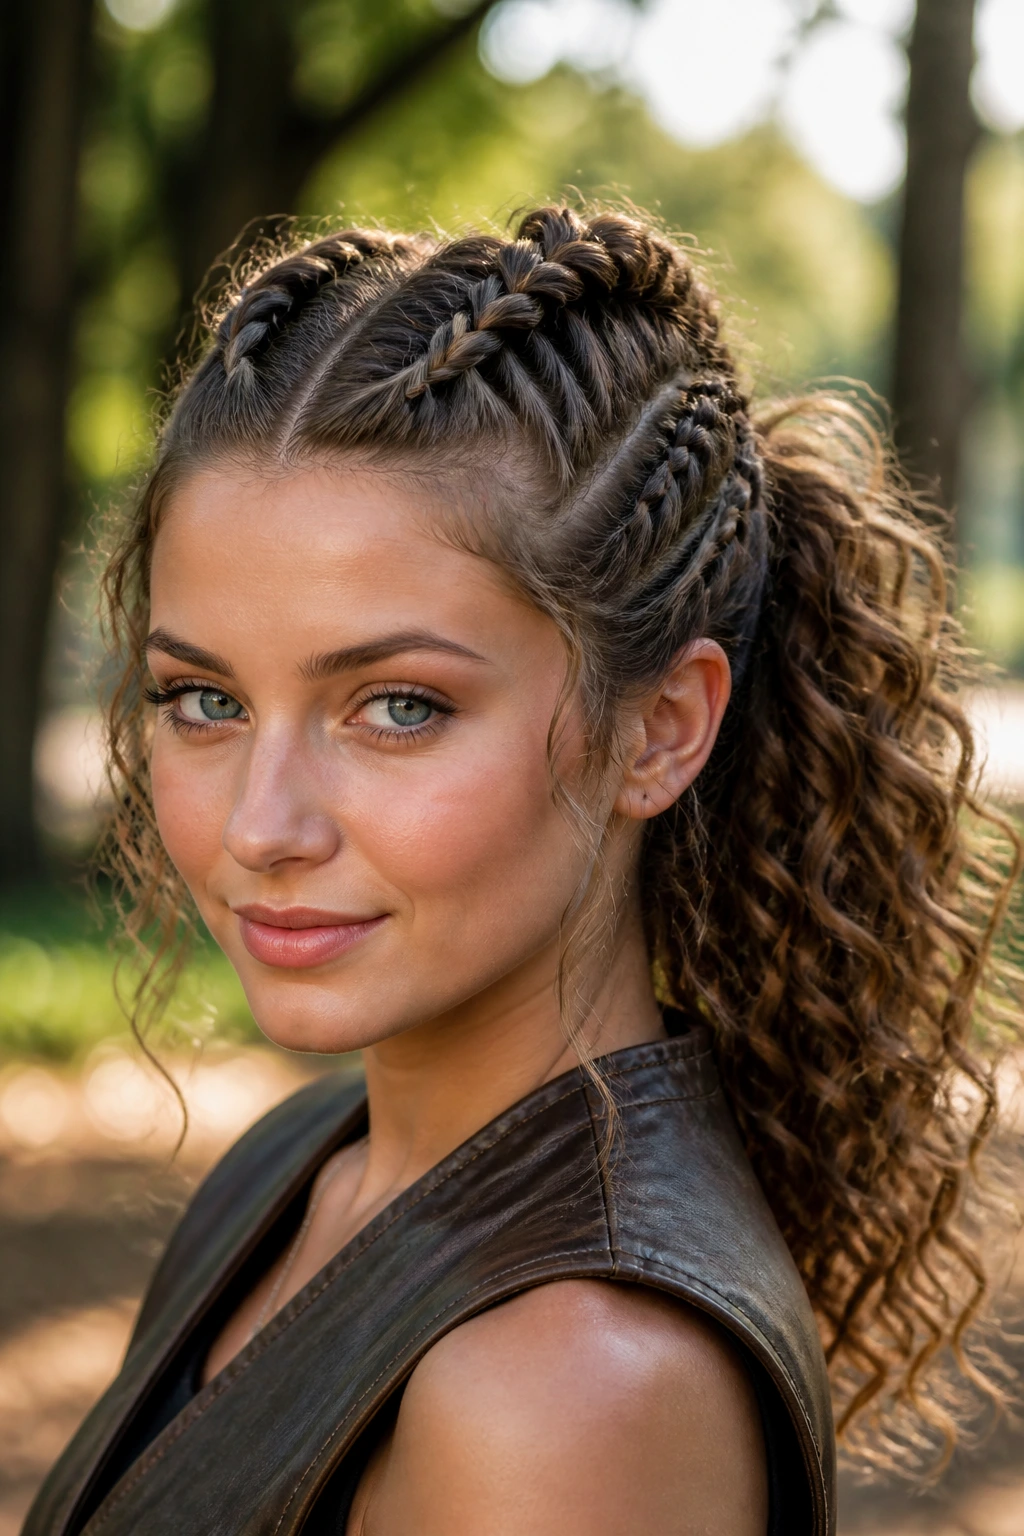
If your curls puff at the roots and collapse by the end of the day, this solves both problems. Double Dutch braids pull the front and sides tight enough to stay neat, then release into a ponytail that keeps the length and volume alive. The inverted braid gives more lift than a regular braid. That little lift changes everything.
Part the hair down the center and braid both sides under, not over, starting at the front hairline. Keep the sections about 1 to 1.5 inches wide for a balanced look. Stop each braid at the occipital bone—the bump at the back of your head—then join them into one ponytail. If you braid too far down, the transition gets bulky. Too short, and the ponytail base looks unfinished.
- Best for dense curls that need front control
- Good with a medium-height ponytail
- Use one elastic at the join, then wrap a small curl around it if you want to hide the band
- Leave the ponytail curly, not brushed out
The style has a practical feel, which I like. It stays secure, and it keeps the curls moving instead of locking them into a stiff shape.
11. Side-Swept Braid With Undone Texture
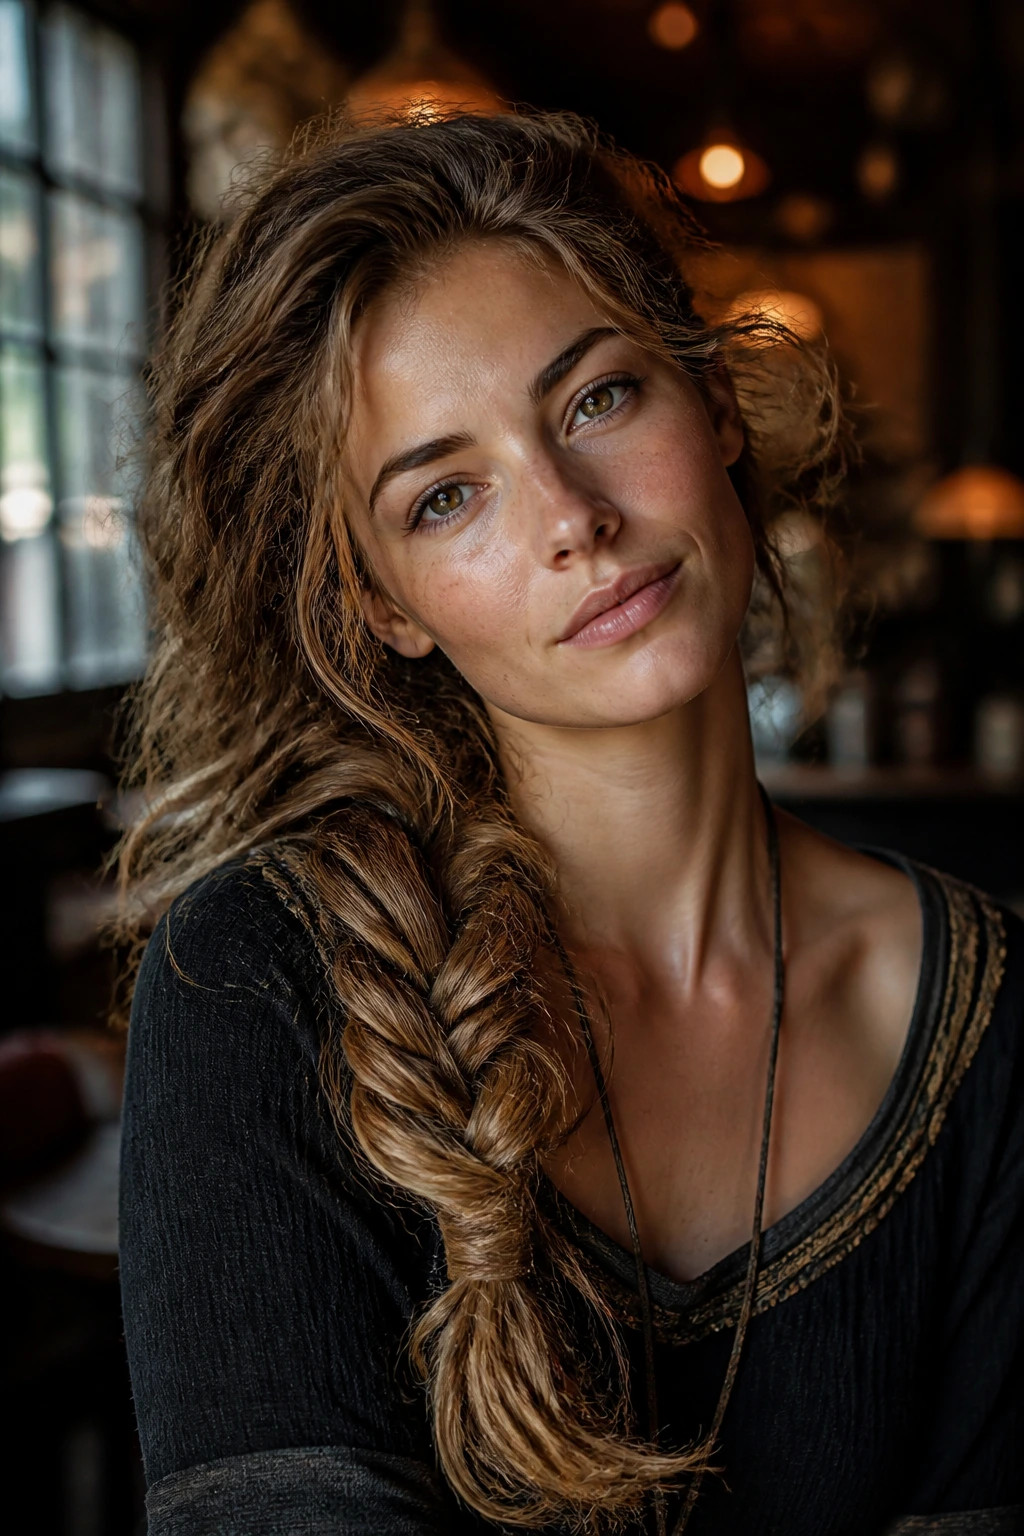
There’s a reason side-swept braids keep showing up in Viking-inspired looks: they let the hair feel heavy and loose while still showing some order. On long curly hair, the braid sits against the shoulder and the rest of the length spills out around it. That contrast is what makes the style work. Tight up top, soft below. Simple, and good.
I usually like this better on second-day curls. Freshly washed curls can be too slippery, and the braid may slide apart by lunchtime. A bit of dry texture gives the hands something to grip. Part the hair slightly off-center, braid one thick section from the front or temple down one side, and let the braid loosen naturally as it travels over the shoulder. Don’t chase perfection. A tiny bit of puff at the edges helps.
The ends can stay curly, or you can braid almost all the way down and finish with a short loose tail. Both versions look fine. What matters is the curve of the braid across the chest and shoulder line, because that shape gives the style its presence.
This one also plays nicely with bigger earrings or a leather cord at the end. It feels less formal than a crown braid, but still pulled together.
12. Top Knot With Curly Length Left Out
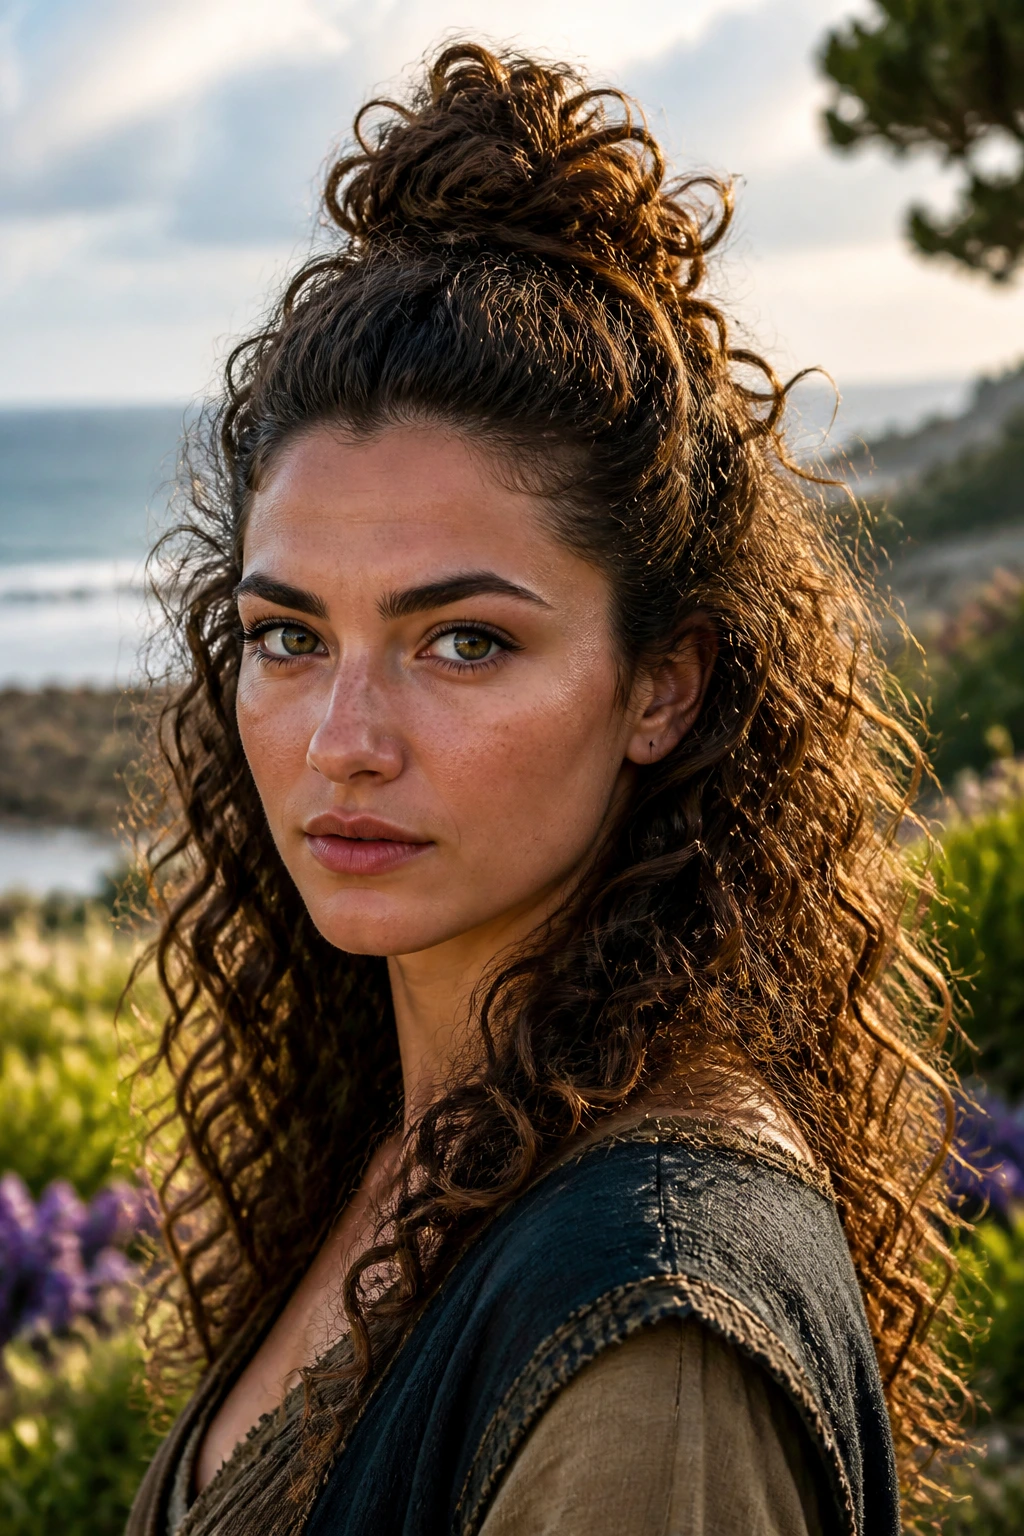
A top knot sounds simple, and that’s part of the charm. Unlike a full bun, this version keeps the bottom length free, which means you get height and movement at the same time. On long curly hair, that balance is gold. You avoid the head-heavy look that full updos can create, especially when the hair is thick.
Pull the top third of the hair into a high section, twist it once or twice, then coil it into a knot at the crown. Secure it with 1 elastic and 2 to 4 pins depending on thickness. Leave the rest of the curls down. If your curls are very springy, stretch the knot slightly after pinning so it doesn’t sit too hard on the head. You want shape, not a pebble.
This works best when the bottom curls are defined and separated. If they’ve puffed into one big cloud, a little water and curl cream on the ends can bring the shape back without starting over. I’d also keep the knot a touch messy. A perfect top knot can look too modern and too neat for the mood you want.
Best use? Busy days, windy days, or any time you want the crown lifted off your face while the rest of the hair stays free.
13. Ladder Braid Down the Back
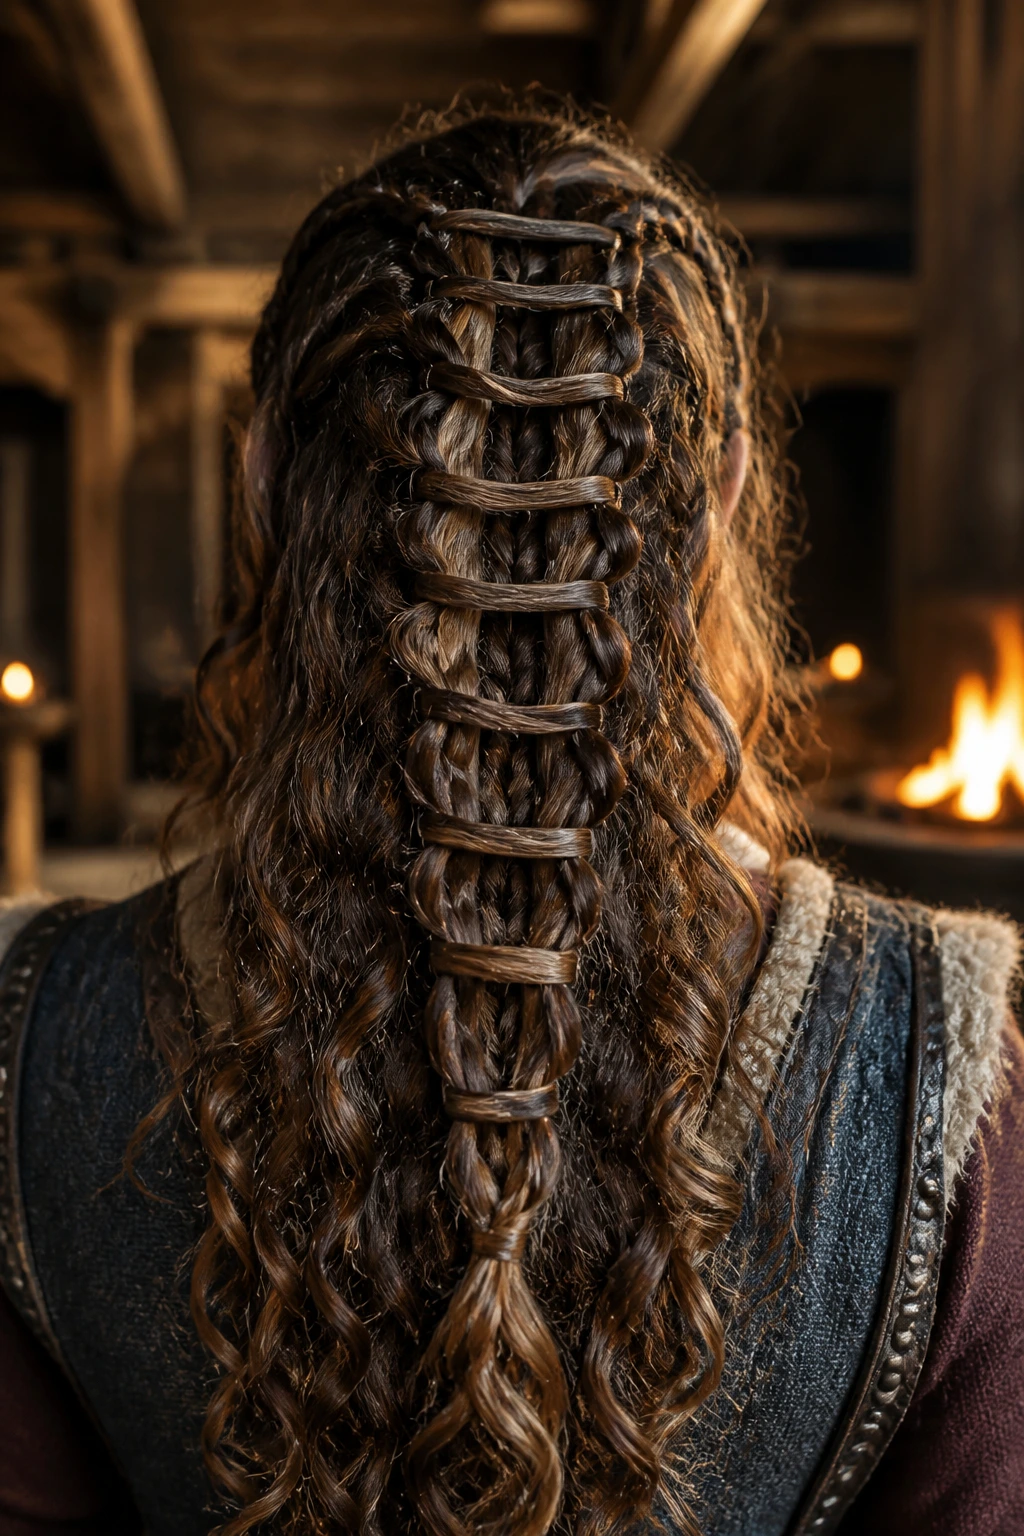
A ladder braid looks more detailed than it really is. It uses small wrapped sections to create a stepped effect down the back, and on curly hair that texture gets even richer because the loose curls peek through the gaps. It’s one of those styles that looks like you spent longer than you did, which is never a bad thing.
Start with a narrow top braid or twist and then add small side sections at intervals, about every 2 to 3 inches, to create the “rungs” of the ladder. The exact method can vary, but the point stays the same: build a visible path down the center back. Let the loose hair between each rung stay fluffy. That space is what makes the braid readable.
What Makes It Work
The braid should be snug enough to hold the ladder shape, but not so tight that the curls around it get flattened. A soft hold spray can keep the little cross sections from unraveling. Use the spray lightly, then press the sections with your palms for a second. That helps the braid settle.
This one shines on thick hair because the structure stays visible even when the curls are busy. Thin hair can do it too, but the braid needs a little extra fullness at the base. If you have that, the style feels almost architectural without looking hard.
14. Three-Strand Braid With Beads and Cuffs
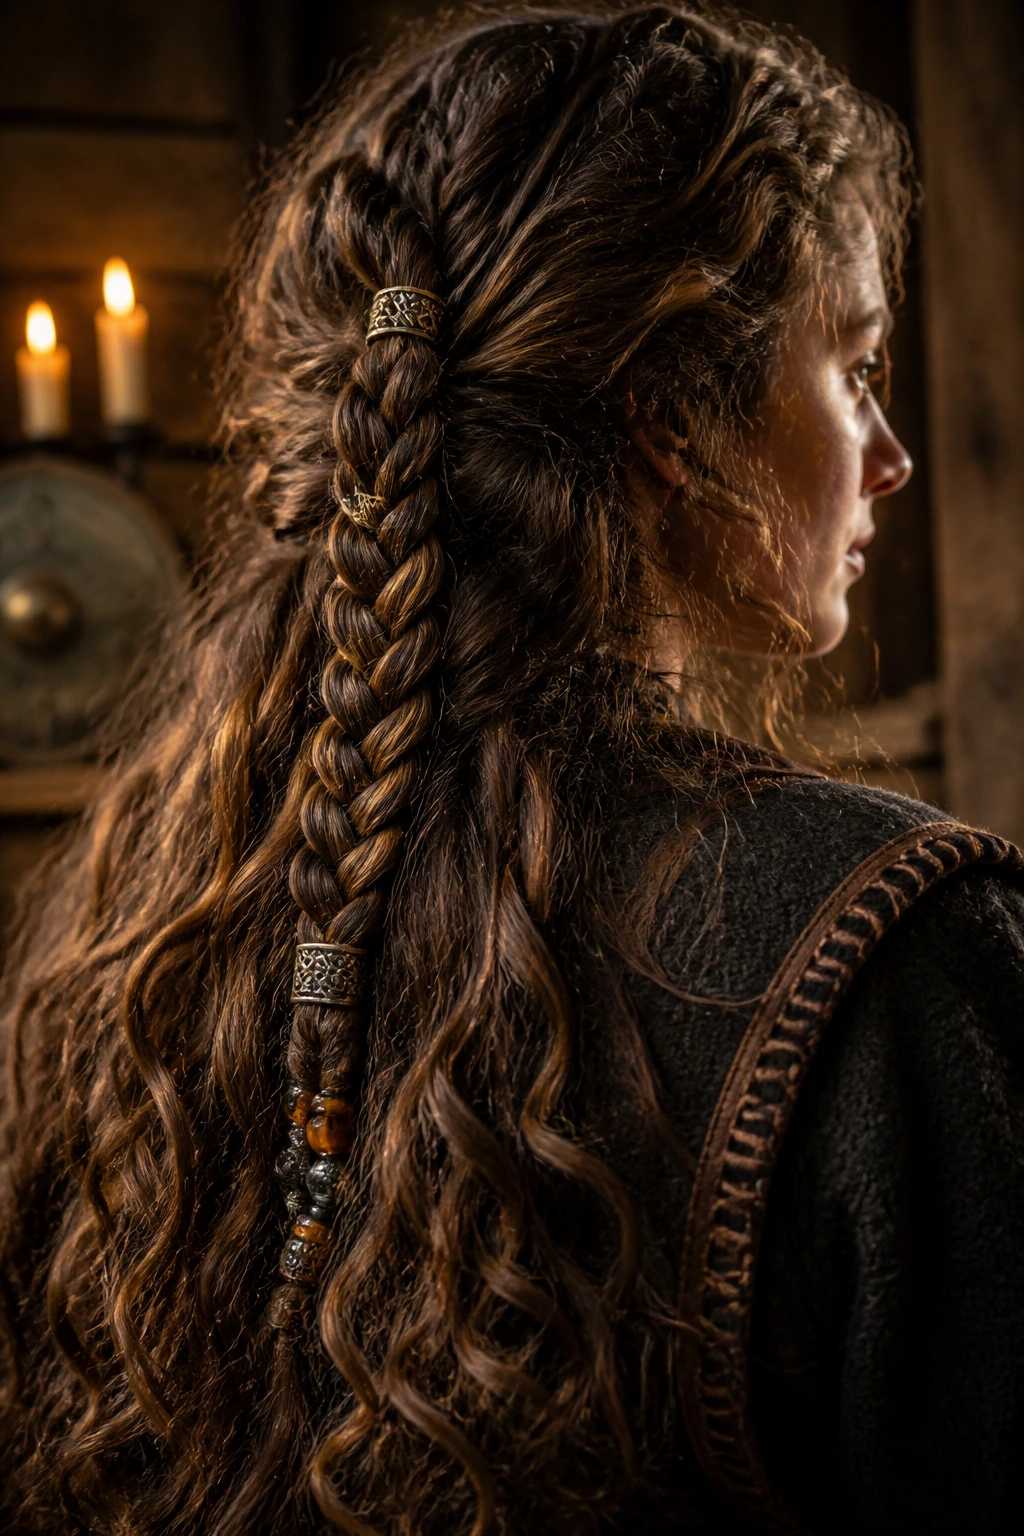
Beads and cuffs change a plain braid fast. A simple three-strand braid can look too ordinary if you stop there, but add a few metal cuffs or wooden beads, and suddenly it has a sharper, more deliberate feel. That’s one of the easiest ways to push a braid into Viking territory without reworking the whole style.
Start with a braid that’s medium to thick, not tiny. On long curly hair, I’d aim for a braid at least 1.5 inches wide after it’s fluffed out. Place beads near the lower third of the braid so they don’t tug at the scalp. Three to five accents is enough. More than that can look crowded, and the braid starts to lose its shape under the hardware.
This style is a good choice if you want something you can wear with a plain tunic, a dark jacket, or a dress with a high collar. The accessories do the talking. Keep the rest of the hair less fussy so the braid stays the focus.
One small detail matters here: use cuffs with a smooth inner edge. Rough edges snag curls. That gets annoying fast.
15. Messy Half-Up Knot for Long Curly Hair
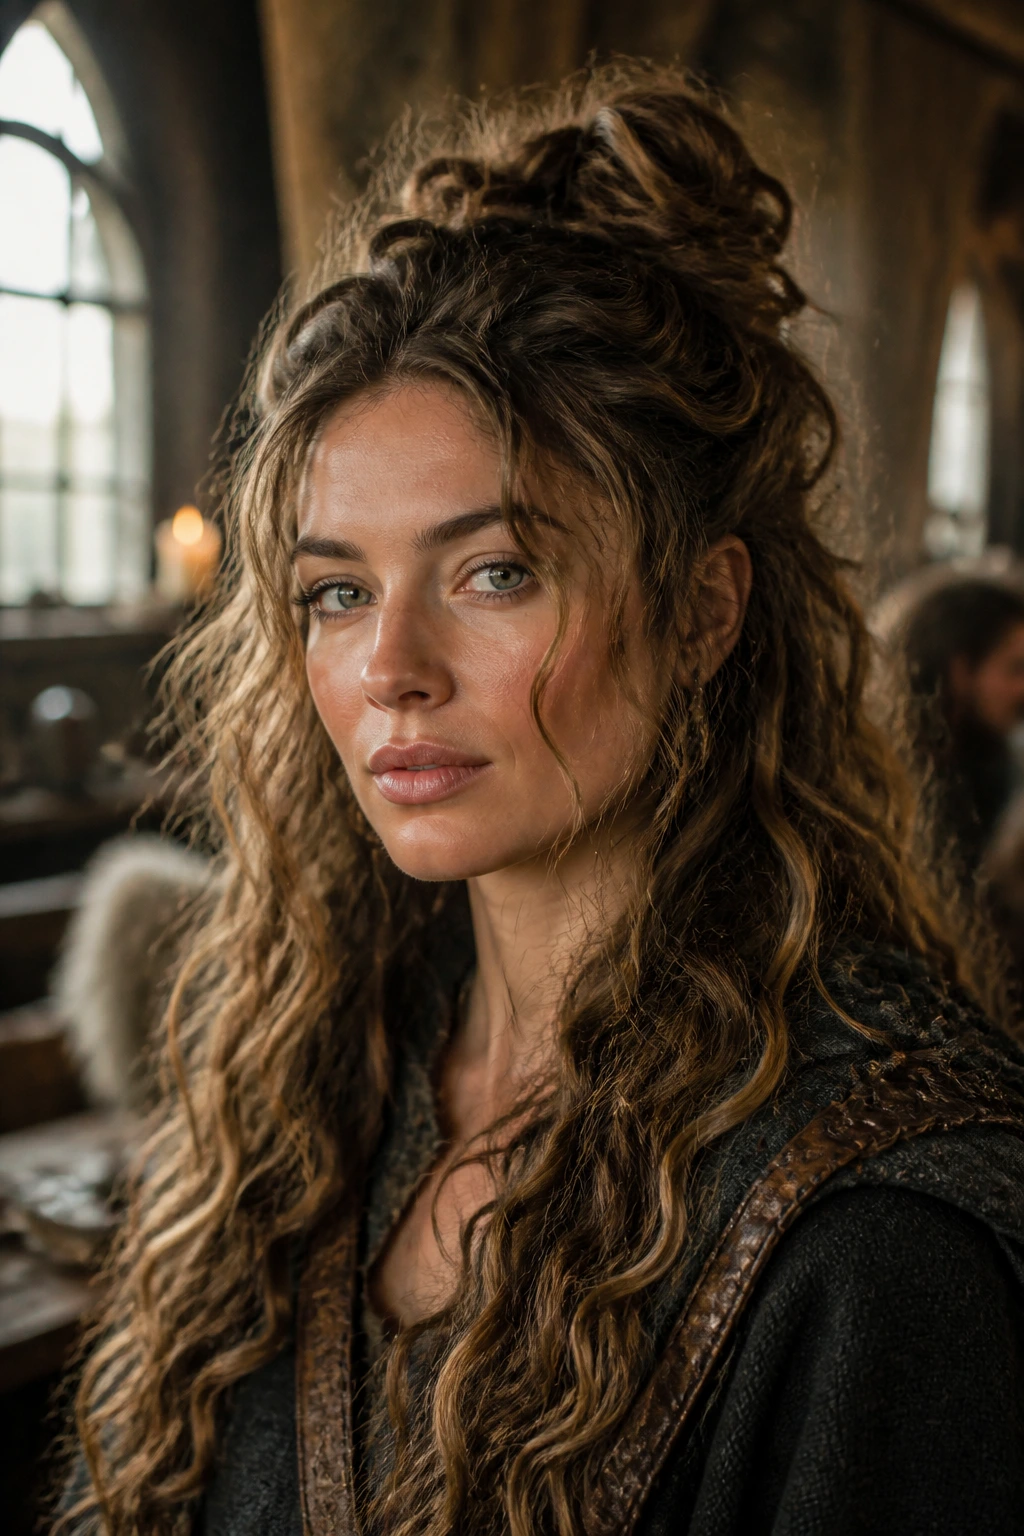
Can a knot look Viking without trying too hard? Yes, and this is the version that proves it. A messy half-up knot keeps the top controlled while letting the rest of the curls stay big and open, which is exactly the balance long curly hair needs. It has a rough, lived-in feel that suits the mood far better than a polished bun.
Pull back the top section from temple to temple—just the crown and a little behind it—and tie it into a loose knot. You can twist the section once before looping it, or make a simple knot and pin the ends underneath. Leave the lower curls untouched. If the top feels too flat, lift a few pieces at the root with your fingertips and pin them lightly from underneath.
How to Keep It from Sagging
- Use a small elastic first, then pin the knot
- Keep the top section at about the size of one hand spread
- Tease the crown very lightly if the hair is soft
- Let a few curls fall free around the ears
This one is best when you want volume but don’t want a full style commitment. It takes under ten minutes once you know your hand placement, and it still reads intentional. That matters.
16. Braided Headband and Free Curls
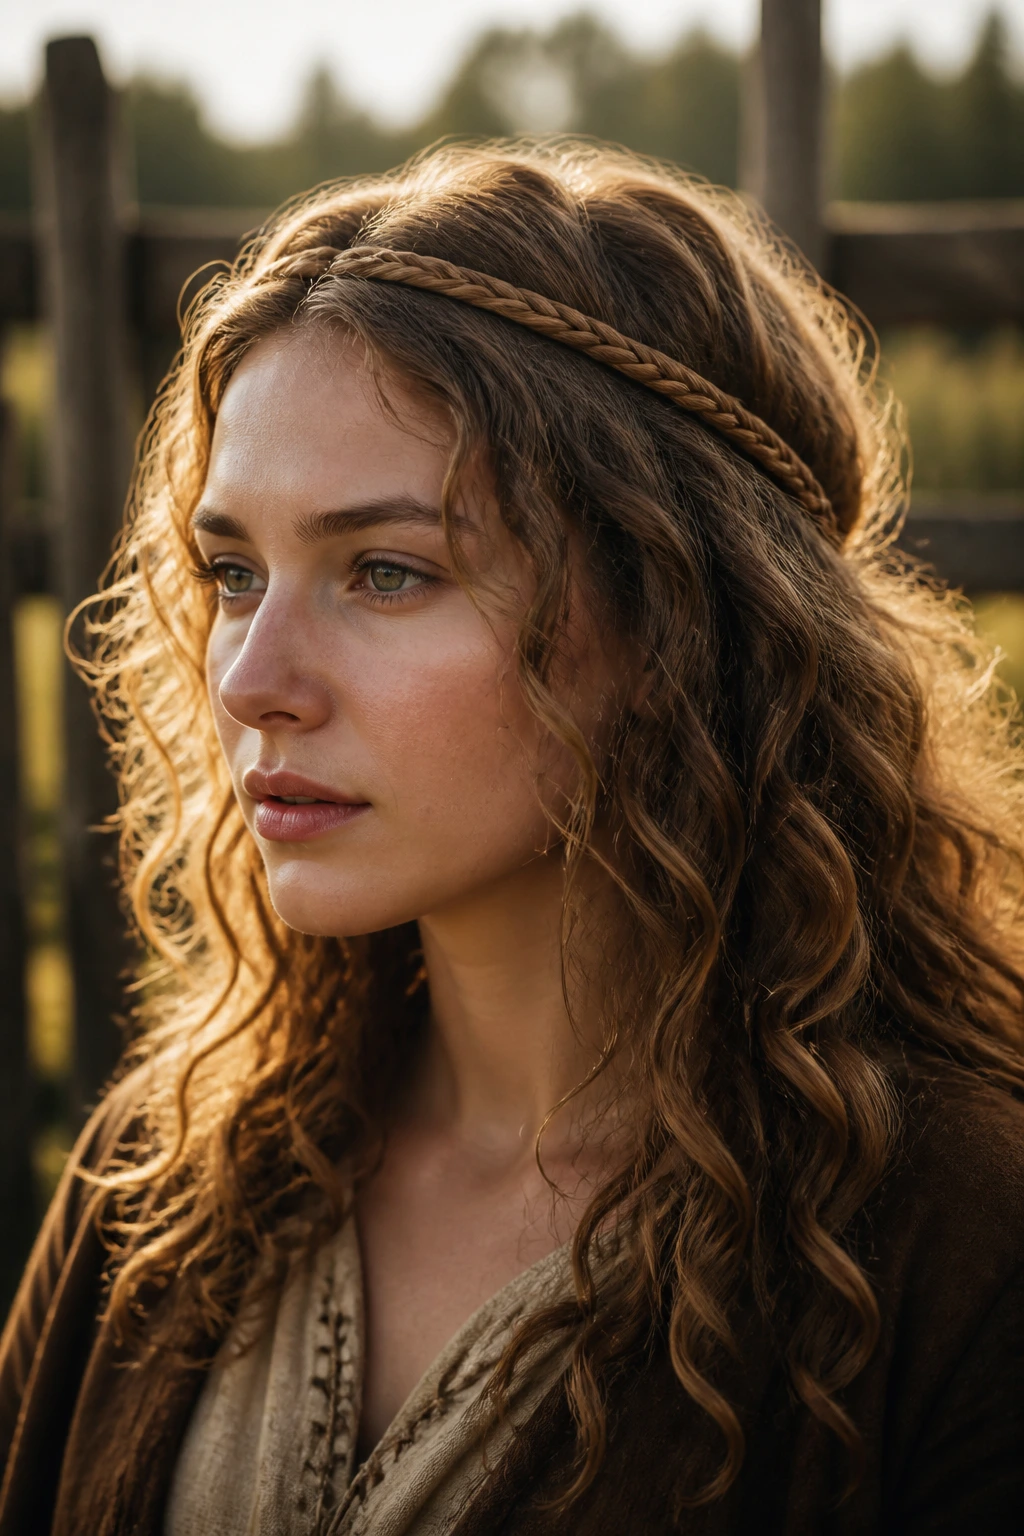
Picture a thin braid crossing the head like a band while the rest of the curls stay loose and alive. That’s the whole appeal here. The braid gives you a clear front frame, and the free curls keep the style from feeling trapped or overbuilt. On long curly hair, the contrast is clean and easy to wear.
Take a section just behind one ear, about 1 inch wide, and braid it across the top of the head toward the other side. Pin the braid near the opposite temple or tuck it under a little curtain of curls. The rest stays down. That simplicity is part of what makes this style useful. You get the look without changing the entire head.
This is also one of the better choices if you like showing off curl pattern. The braid acts like a border. It says, “Look here,” while the curls handle the rest. If your hair is very thick, keep the braid narrow so it doesn’t sit too high and compete with the volume underneath.
I’d wear this one when I want the easiest version of the look that still feels themed. It’s quick. It holds. And it doesn’t chew up the curl pattern the way tighter braids can.
17. Asymmetrical Pull-Through Braid
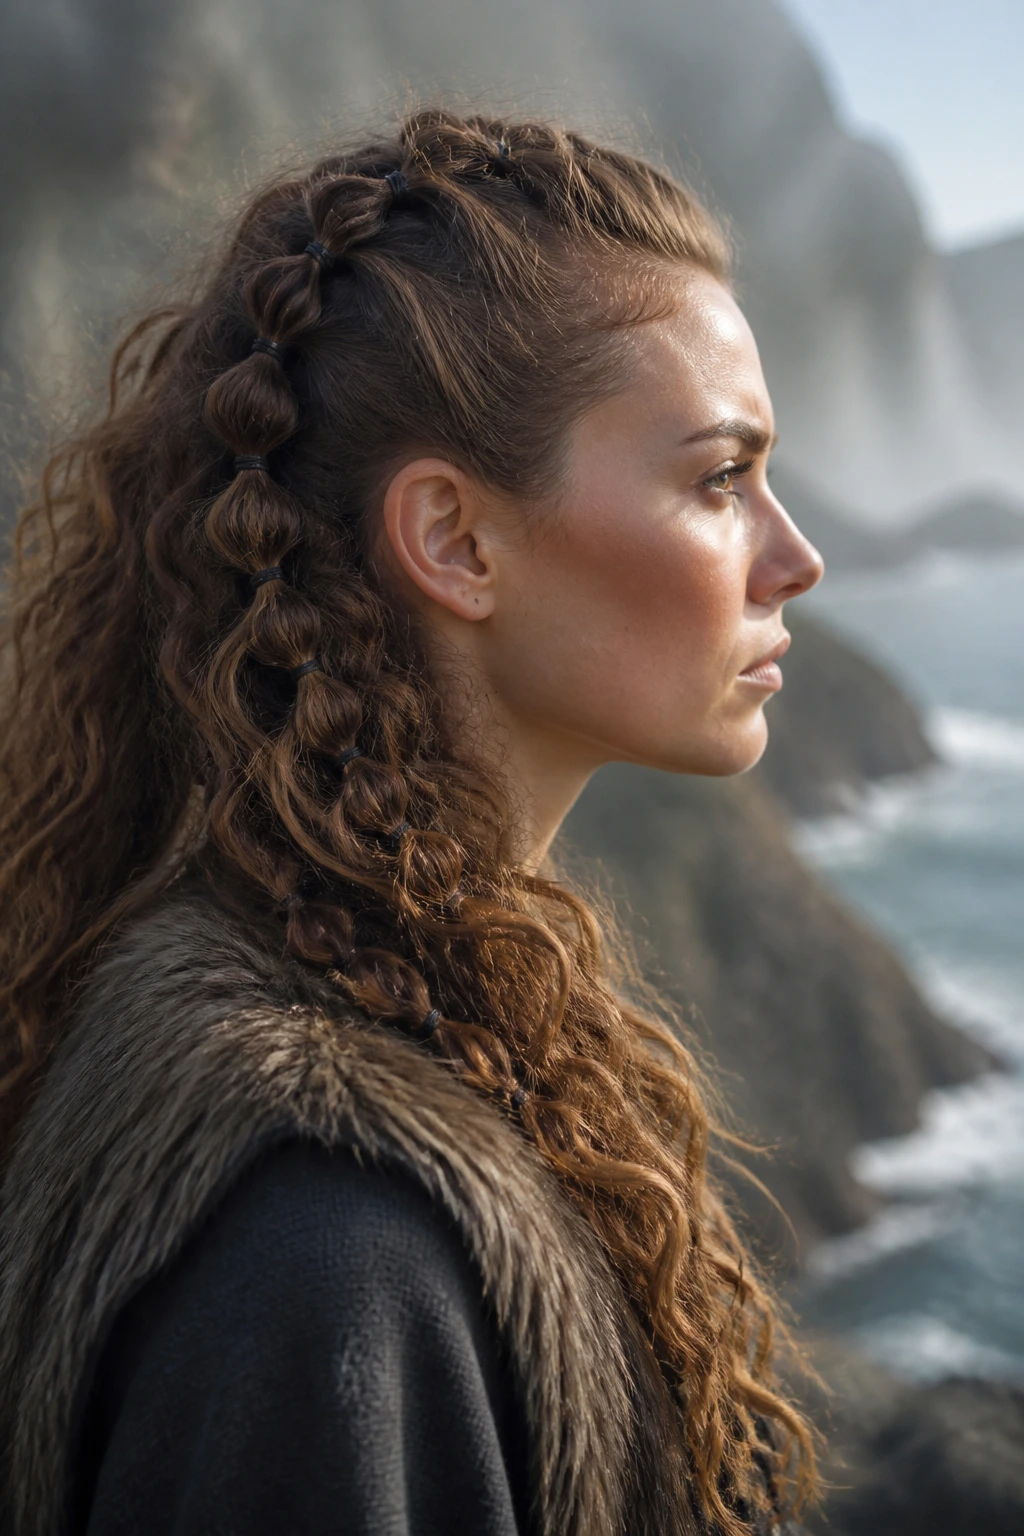
A pull-through braid looks complicated from a distance, which is part of the fun. Up close, it’s mostly a chain of ponytails flipped through each other, so it works beautifully on curly hair that needs volume and doesn’t want to be flattened into a standard braid. The asymmetry gives it a rough edge, which fits the Viking mood better than a perfect centerline ever could.
Build it on one side of the head or slightly off-center. Make a series of small ponytails, each about 1 to 2 inches apart, then split and loop the next section through them. The curls create body between each section, so the braid looks thick and dimensional. That’s where curly hair gets to show off. It does the heavy lifting for you.
Use small elastics that match your hair color, or the braid can look dotted in a distracting way. If your curls are very long, stop the braid halfway and leave the ends loose. That transition looks better than forcing the pattern all the way down to the tips. The braid should feel like it’s carrying the hair, not boxing it in.
It’s a solid choice for anyone who wants something sturdy but not strict. There’s a bit of movement in it, even after a full day.
18. Four-Strand Braid for Thick Curls
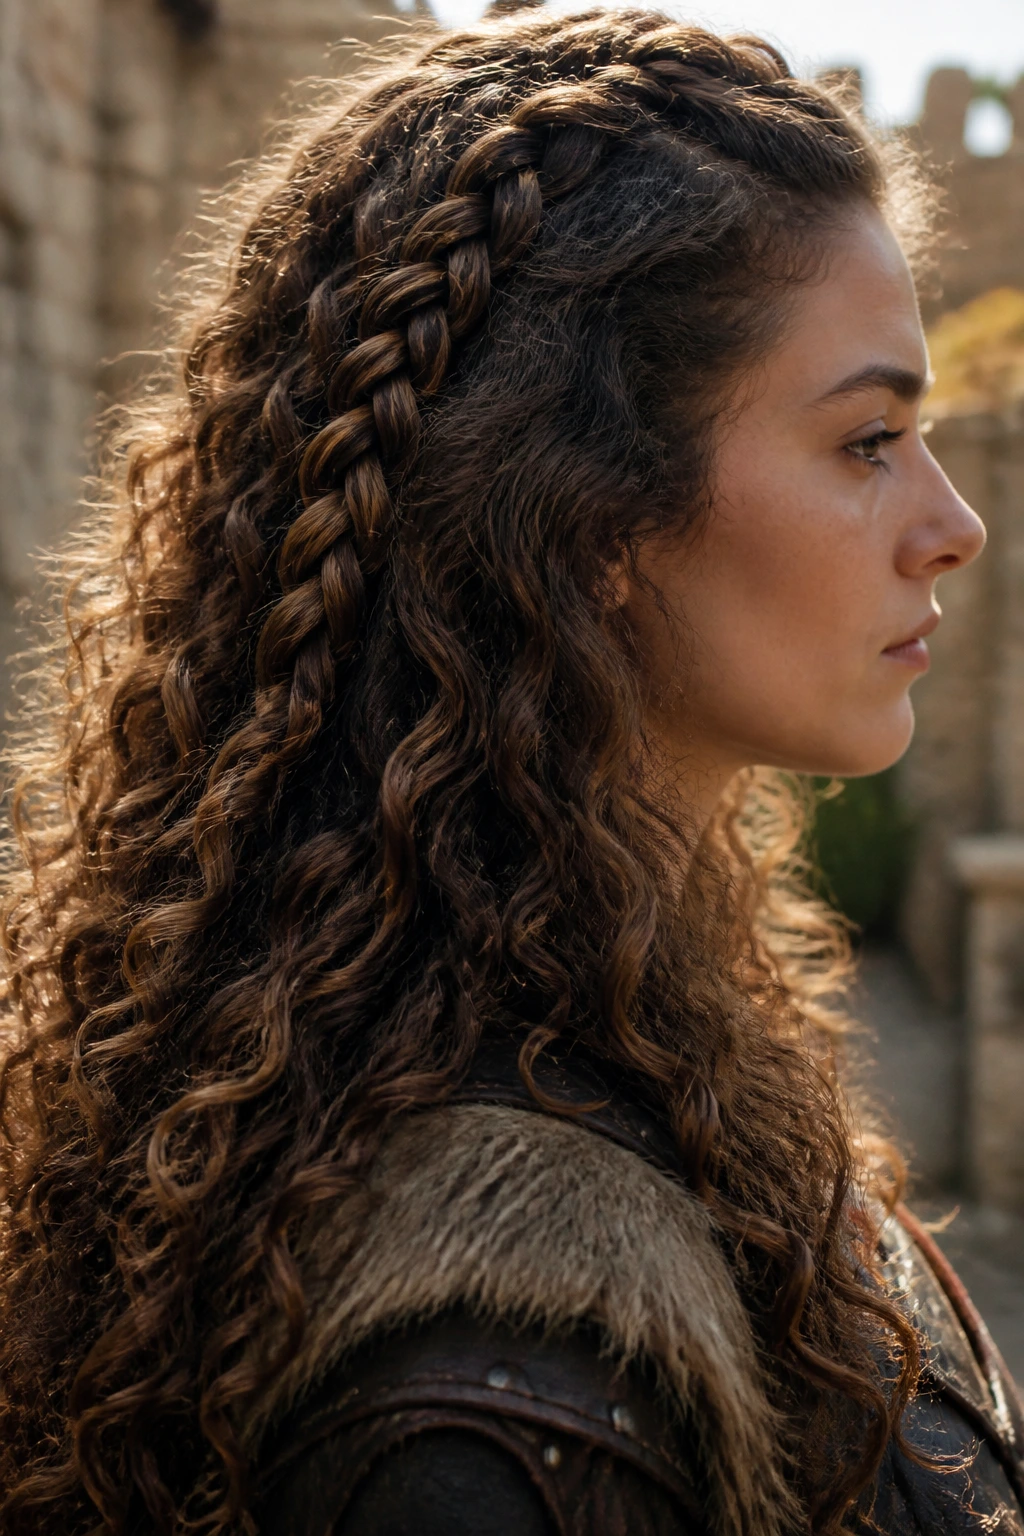
A four-strand braid gives thick curls a better grip point than a standard braid. It lays flatter, looks more woven, and handles dense hair without turning into a chunky knot at the nape. If your curls are coarse or very full, this braid often looks cleaner than a basic three-strand version because the extra strand helps distribute the bulk.
Start by dividing the hair into four equal sections. The pattern takes a minute to learn, but once it clicks, it feels steady. Keep your hands close to the braid so the sections don’t separate too far from each other. A little curl cream on the palms helps the sections slide without frizzing apart. Use a very small amount. Too much and the braid loses hold.
This braid is good when you want a more woven, rope-like finish. It has a firmer look than a soft side braid, which makes it useful for stronger outfits and heavier accessories. I’d also recommend it if your curls tend to fray at the ends. The four-strand pattern holds those ends together better.
It’s not the fastest style on the list, but it pays off. Especially on dense hair.
19. Low Ponytail With Wrapped Sections
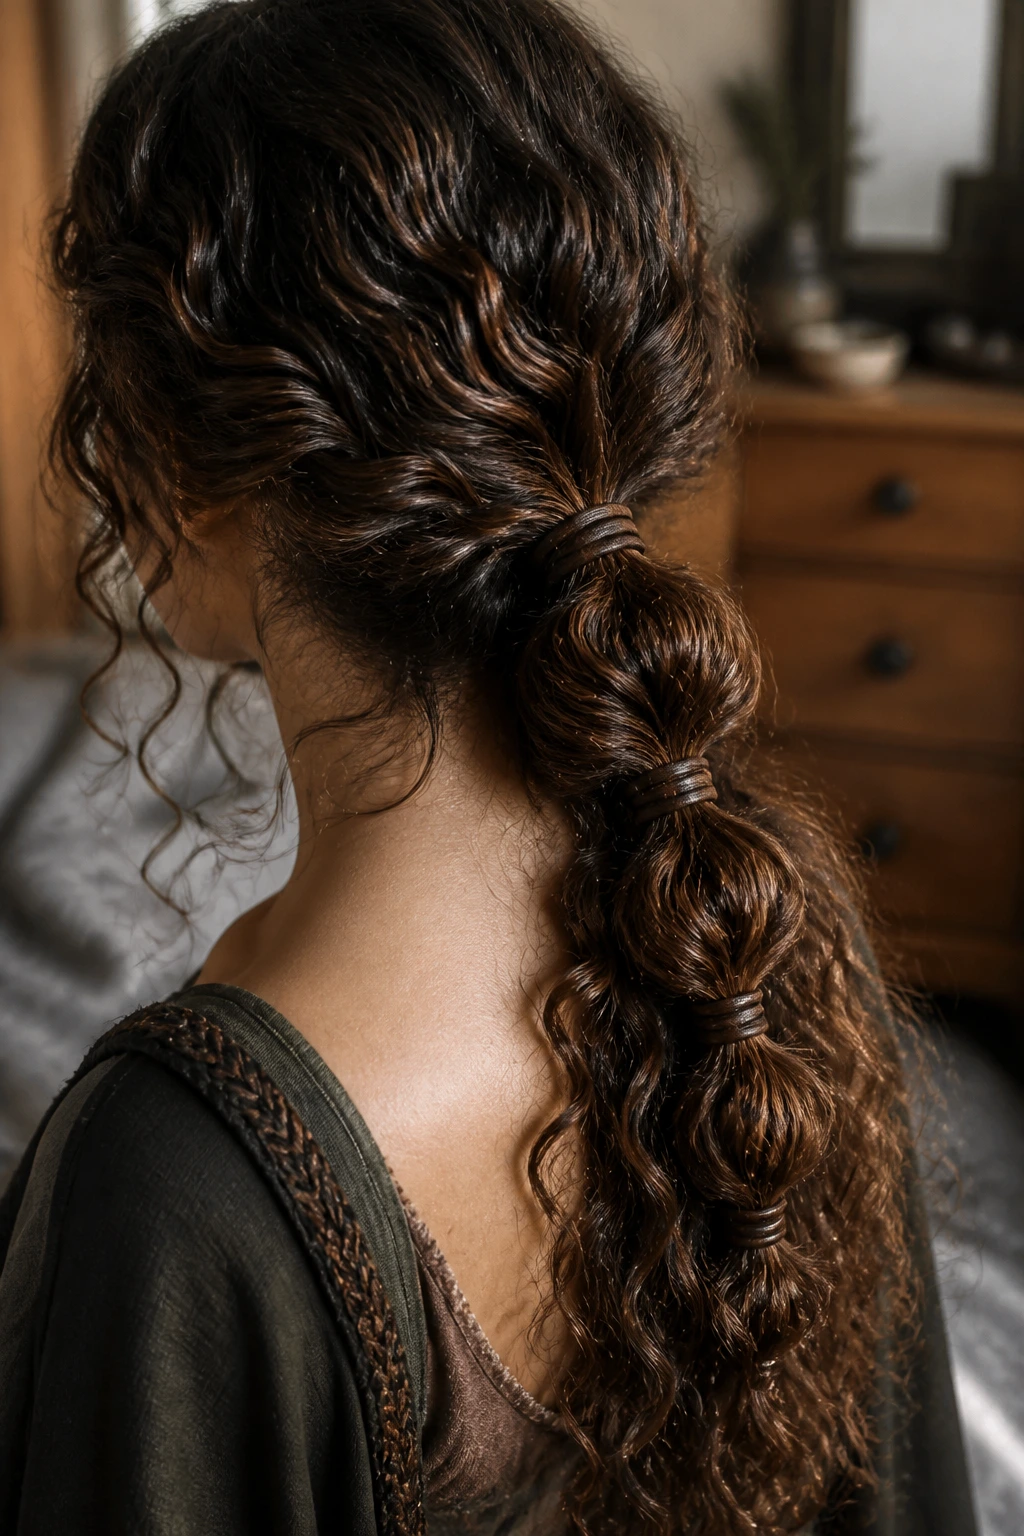
A low ponytail can look plain fast. Wrap the length in sections, though, and it starts to feel much more deliberate. This style uses small bands, twists, or hair wraps to break the ponytail into visible segments, which gives the curls a stacked, almost armored look. That layered rhythm is what makes it fit the theme.
Tie the ponytail low at the nape, then take a narrow strand from the ponytail and wrap it around the base to hide the elastic. From there, add another wrap every 2 to 3 inches down the length, securing each one with a tiny clear elastic underneath if needed. The curls should puff slightly between the wraps. That spacing is what keeps it from looking like a stiff cord.
Why I Like It
It’s practical. The hair stays controlled, but you still get movement in the tail.
It also works with decorative cords, leather strips, or thin ribbons if you want more texture. Keep the wraps simple. Over-decorating it can tip the style into costume territory fast. One or two accents are enough. The ponytail itself should stay the main shape.
This is a good daytime style when you want something dependable, quick, and a little tougher looking than a plain ponytail.
20. Warrior Half-Up With Twists and Rings
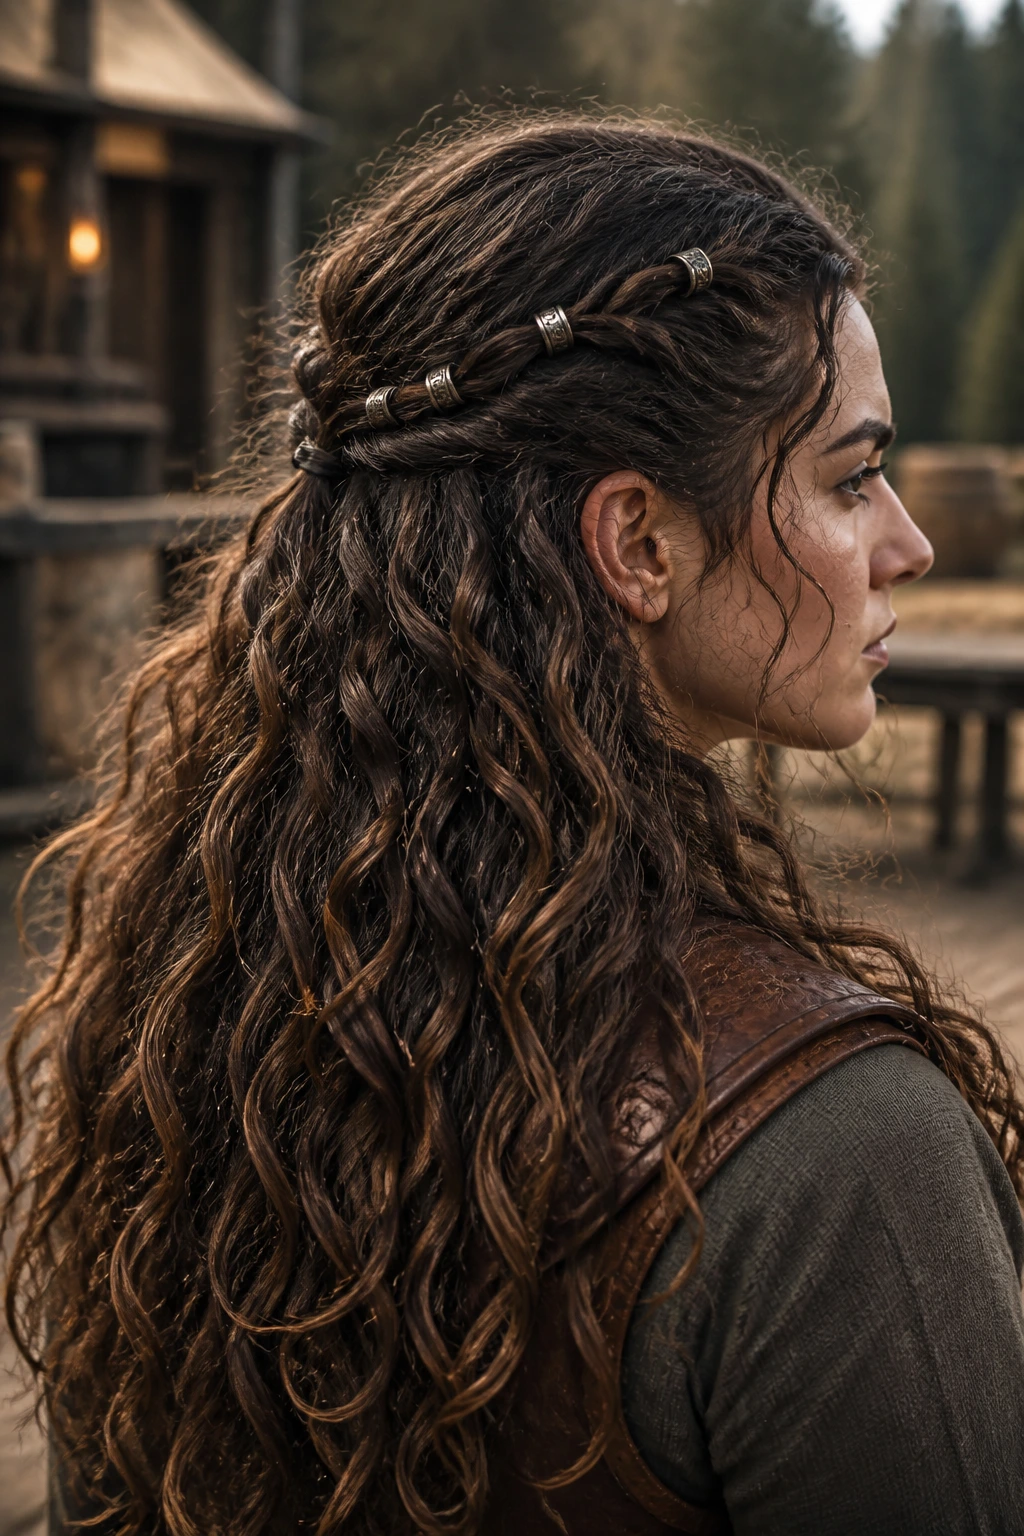
This is the most theatrical option in the set. Two twisted sections at the temples, a half-up hold at the back, and a few rings or beads threaded through the twists create a style that feels ready for a feast, a performance, or a full costume moment. It still works on long curly hair because the curls stay visible underneath, which keeps the whole thing from feeling stiff.
Take one section from each temple, twist them back toward the crown, and connect them at the back with a small elastic. You can braid each twist first if you want more control. Then add 2 to 4 metal rings or bead accents near the twist line. Keep them spaced out. Too many and the style gets noisy. You want the eye to catch them, not get buried in them.
The best part is the contrast. The top has clear structure, while the length stays loose and alive. That tension gives the hairstyle its presence. If you’re using clips or rings, make sure they have smooth edges so they don’t snag curl clumps when you take the style out.
It’s not the quietest look here. Good. It shouldn’t be.
Final Thoughts
The best Viking-inspired styles on long curly hair do not fight the texture. They work with it, and that’s the whole point. Braids give shape, twists add grip, and loose curls keep the look from going stiff or costume-flat.
If you want the safest starting points, try the half-braided crown, the fishtail over one shoulder, or the messy half-up knot. If you want something with more edge, go straight to the braided mohawk or the warrior half-up with rings. Both rely on the curls to do part of the styling, which is why they look strong without looking forced.
One last thing: keep your hands out of the hair once the style is set. Curly texture changes fast when it gets picked at all day. Pin it, set it, leave it alone. That usually makes the whole look hold together far better than chasing perfection ever does.
