



Twisted updos have a sneaky advantage: they look polished from across a ballroom, but they still move like hair, not helmet hair.
That matters more than people admit. A good twist does not depend on perfect curl pattern or waist-length hair; it depends on direction, tension, and pin placement. Get those three things right and a style can hold through a wedding ceremony, a long dinner, and the weirdly hot dance floor that always shows up after dessert.
And yes, the details are fussy. A few millimeters of placement can change the whole shape. Pin too high and the style starts to creep. Pin too low and the twist collapses at the nape. Pin where the hair naturally wants to bend, though, and the whole thing suddenly looks easy.
The prettiest special-occasion hair usually starts with a little texture, a little control, and a plan for the neckline. That is where the good stuff begins.
1. Low Twisted Chignon

If you want one twisted updo that can handle a veil, statement earrings, or a dress with a low back, start here. A low twisted chignon sits at the nape, so the shape feels calm even when the rest of the outfit is doing a lot.
Why it holds so well
The trick is tension, not volume. Create two side sections, twist each one back, then cross them over a small hidden bun or padded base before pinning. The nape is the strongest point for an updo, which is why this style tends to last through dinner and dancing without needing constant fixing.
- Works well on shoulder-length hair and longer.
- Add a tiny bun donut if your hair is fine.
- Keep the part slightly off-center if you want a softer line.
- Use 4 to 6 U-pins for a cleaner hold than regular bobby pins.
My favorite version leaves one or two whisper-thin pieces near the temples. Anything more starts to look fussy.
2. Side-Swept Twisted Bun
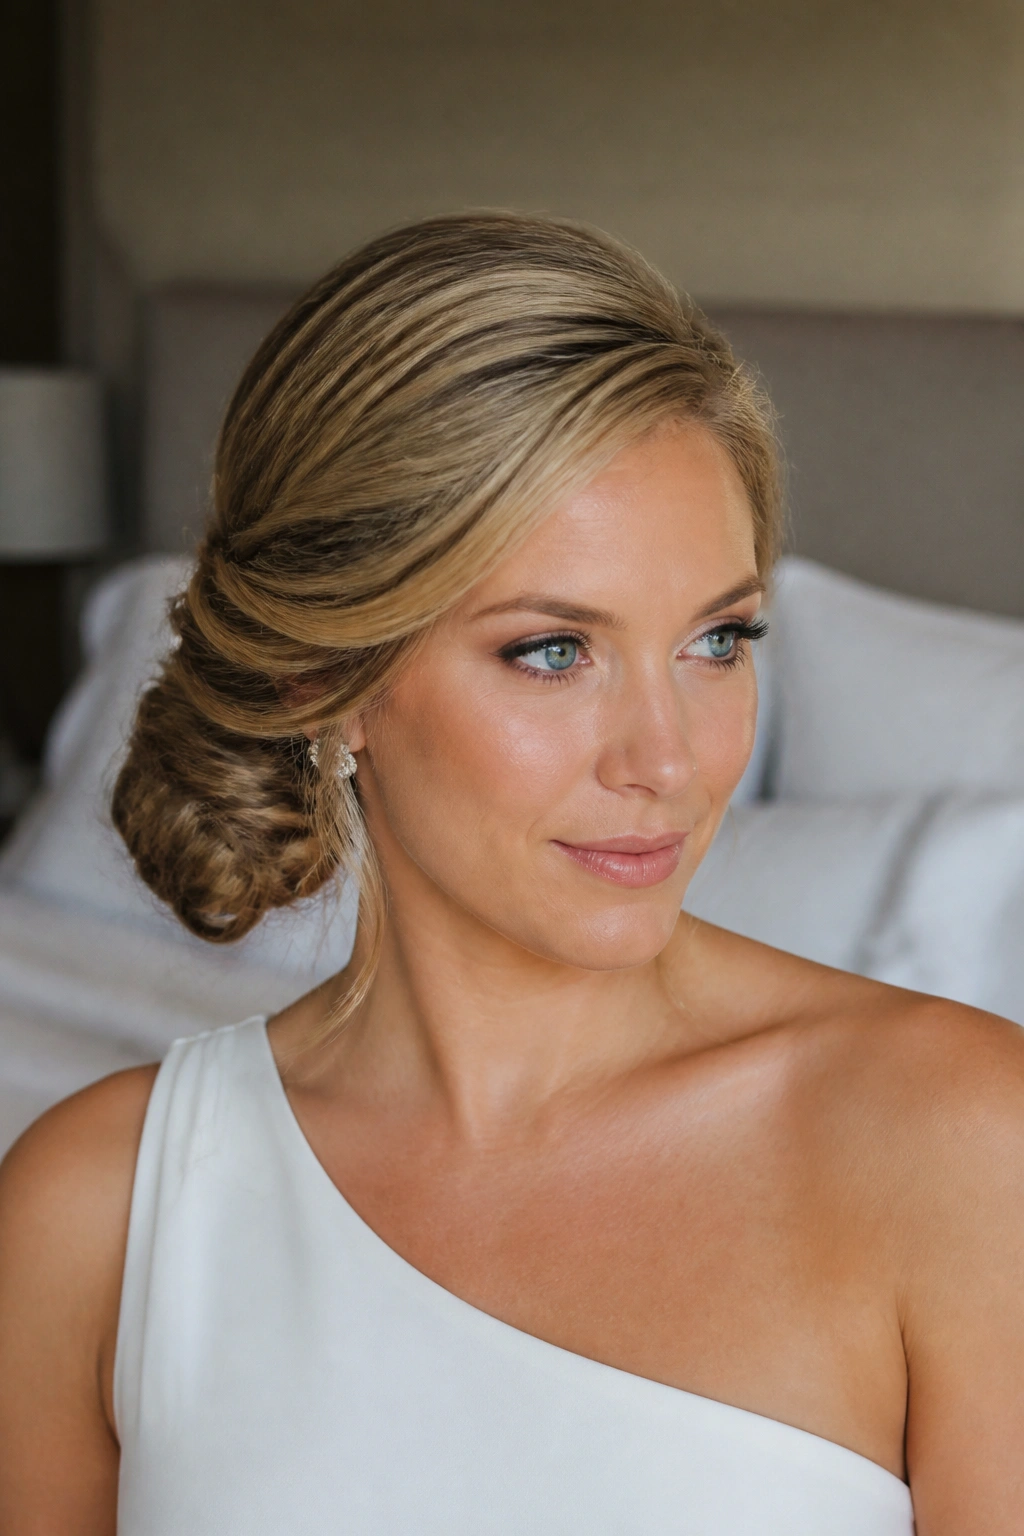
Want a style that makes a one-shoulder dress make sense instantly? A side-swept twisted bun does that job without trying too hard. The bun sits low and slightly off-center, while the front section is pulled back in a smooth sweep that opens one side of the face.
That asymmetry matters. It gives the eye somewhere to go, which is why this look works so well with neckline-heavy outfits and big earrings. The twist can be sleek, but it should not be stiff. A touch of movement near the part keeps it from feeling like a recital bun.
I like this one for guests who want something elegant without looking overly formal. It also saves you if your hair is in that awkward middle zone: too short for a full French twist, too long to leave hanging around your shoulders. The bun can be compact or softly folded, and either way the line stays clean.
3. Crown Twist Updo

A garden ceremony, warm air, and hair that refuses to sit still — that is where the crown twist earns its keep. This style starts with twists along the hairline or temple area, then gathers into a low knot or tucked bun at the back. The front stays neat, but the shape still has lift.
What makes it different
The crown section acts like a frame. Instead of pulling every strand straight back, you let the twist travel across the top of the head before it disappears into the back. That gives the style a softer outline and makes it friendlier for face-framing layers.
- Best on medium to long hair.
- Use a light mist of texture spray before twisting.
- Secure the crown with 6 to 8 pins, crossing them in an X when the hair feels slippery.
- A small comb tucked into the back can help if the hair is very silky.
It is a good pick for weddings, but also for events where the weather might not cooperate. The shape reads as dressed up even when the rest of the hair has a little movement.
4. French Twist with Soft Volume
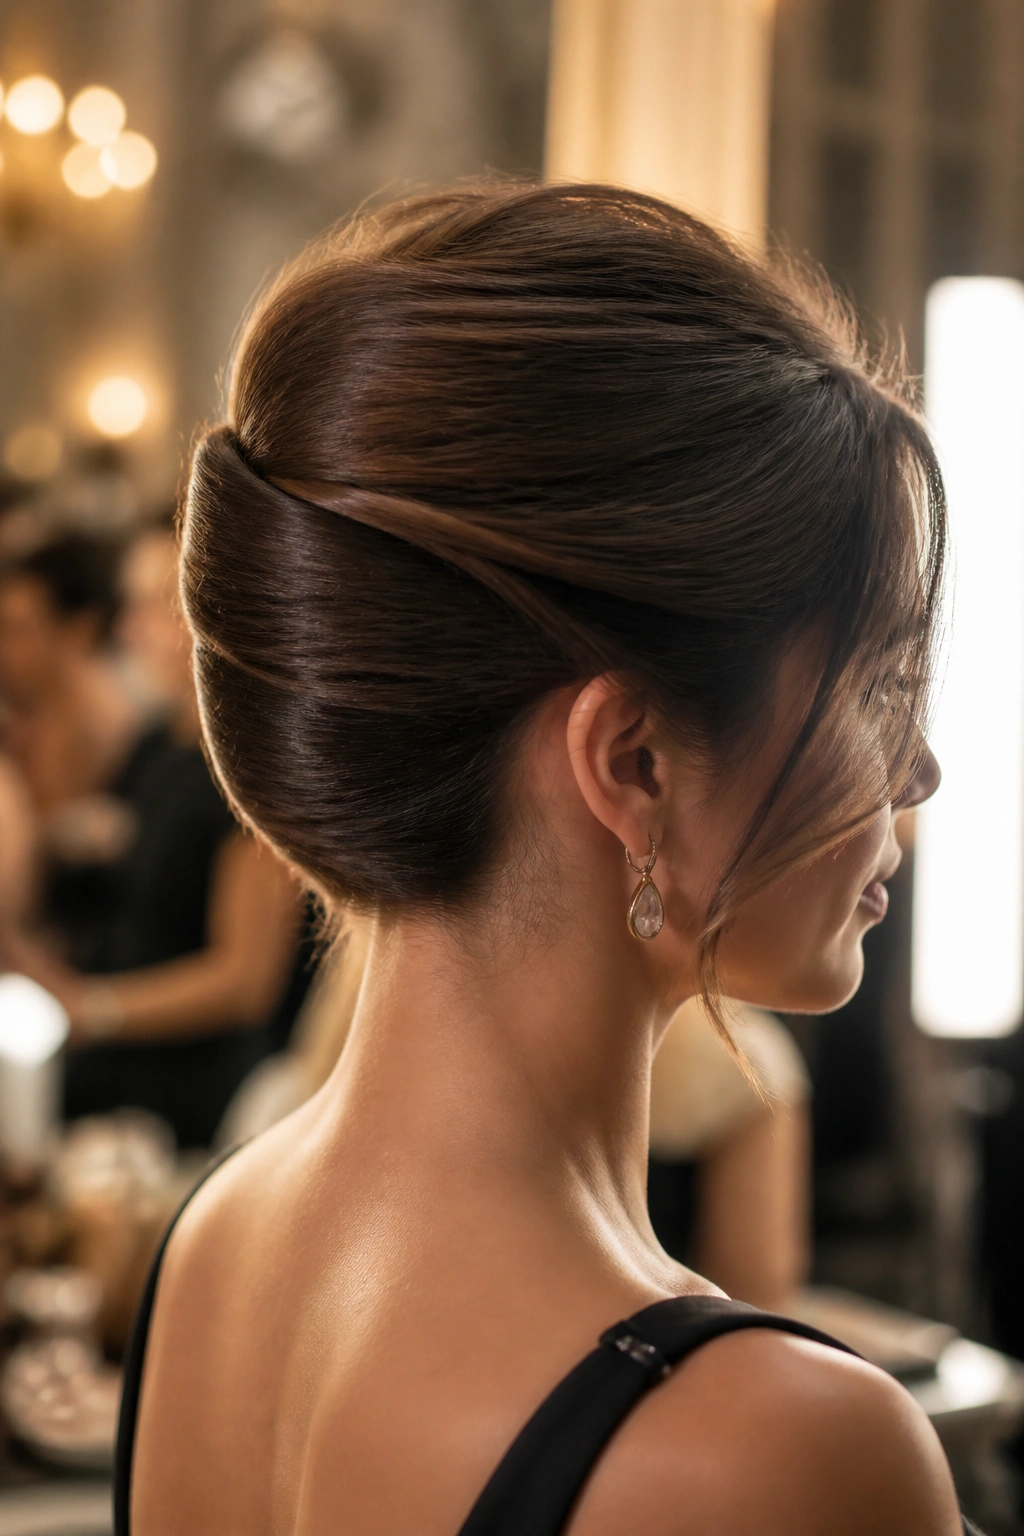
A French twist does not have to look severe. That old, shellacked version is what scared a lot of people away from it in the first place, and I do not blame them. Give the shape a little air at the crown and a softer finish at the sides, and suddenly it feels modern again.
Where the softness comes from
Tease only the crown — about 1 to 2 inches deep — then smooth the top layer over it. The twist itself should sit narrow and vertical, but not tight enough to flatten the head. You want the sides to curve in gently rather than being pulled like a drum.
The best French twists look polished from the front and tidy from the side, which is why they suit black-tie dinners and formal weddings so well. They also work with structured dresses because the hairline stays clean.
A little shine spray at the very end helps, but only a little. Too much and the style starts to look greasy under indoor lights. Nobody needs that.
5. Messy Twisted Knot

You see movement before you see structure. That is the whole point of a messy twisted knot. It sits low, usually around the nape, with the ends tucked in loosely enough that the shape feels relaxed but still deliberate.
The key is to twist the sections before you pin them, not after. That gives the knot a bit of rope-like texture, which looks better than a plain bun if you are wearing silk, satin, or anything that already has a lot of shine. A quick pass with texture spray from mid-length to ends helps the twist grip instead of slipping.
This one is good for cocktail parties, rehearsal dinners, and events where you want to look styled but not overdone. Keep the crown flat enough to avoid puffiness, then leave just enough irregularity in the knot to stop it from feeling formal in a stiff way.
One small thing. Use pins that match your hair color, or the “messy” part turns into “unfinished” fast.
6. Half-Up Twisted Style
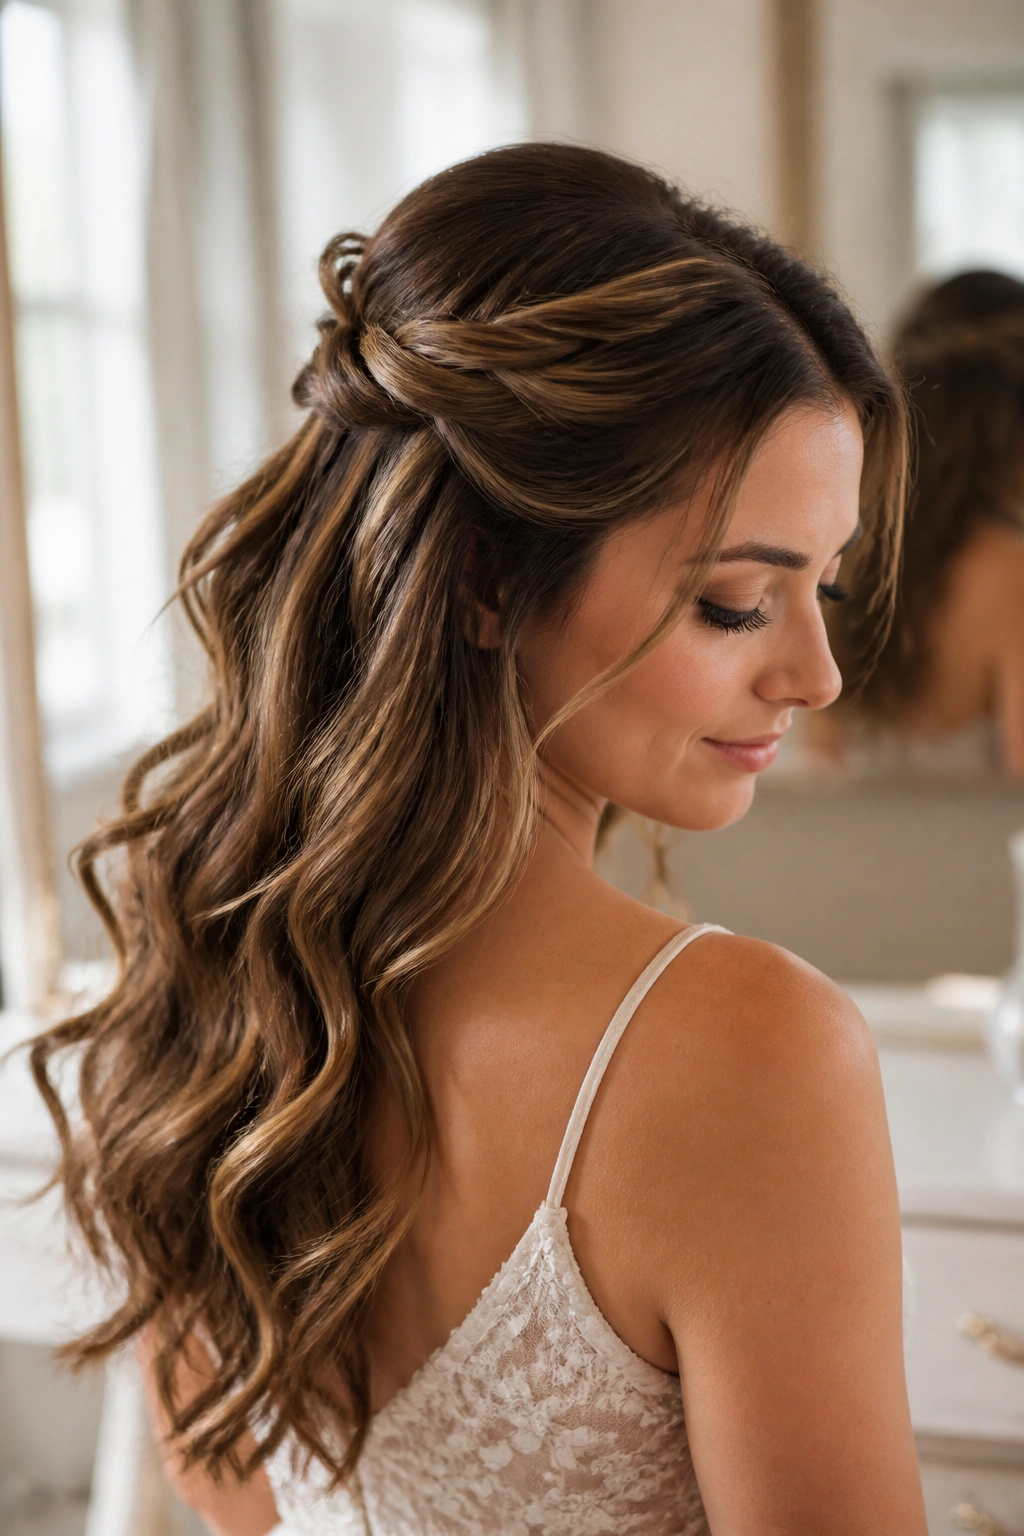
Some dresses need hair to stay long. A half-up twisted style is the answer when you want movement down your back but still need the front to behave. Two front sections are twisted back and pinned at the crown or just below it, while the rest of the hair stays loose in waves, curls, or a smooth blowout.
This works especially well if your hair has layers. The twist keeps shorter pieces off the face, and the loose section gives you that soft, romantic line that looks right at weddings and formal dinners. It also plays nicely with hair accessories because the top section gives the pins or comb somewhere to sit.
If your hair is very fine, curl the loose ends first so they do not go limp halfway through the night. If it is thick, keep the twist narrow so it does not steal all the attention from the length.
7. Braided Twist Bun
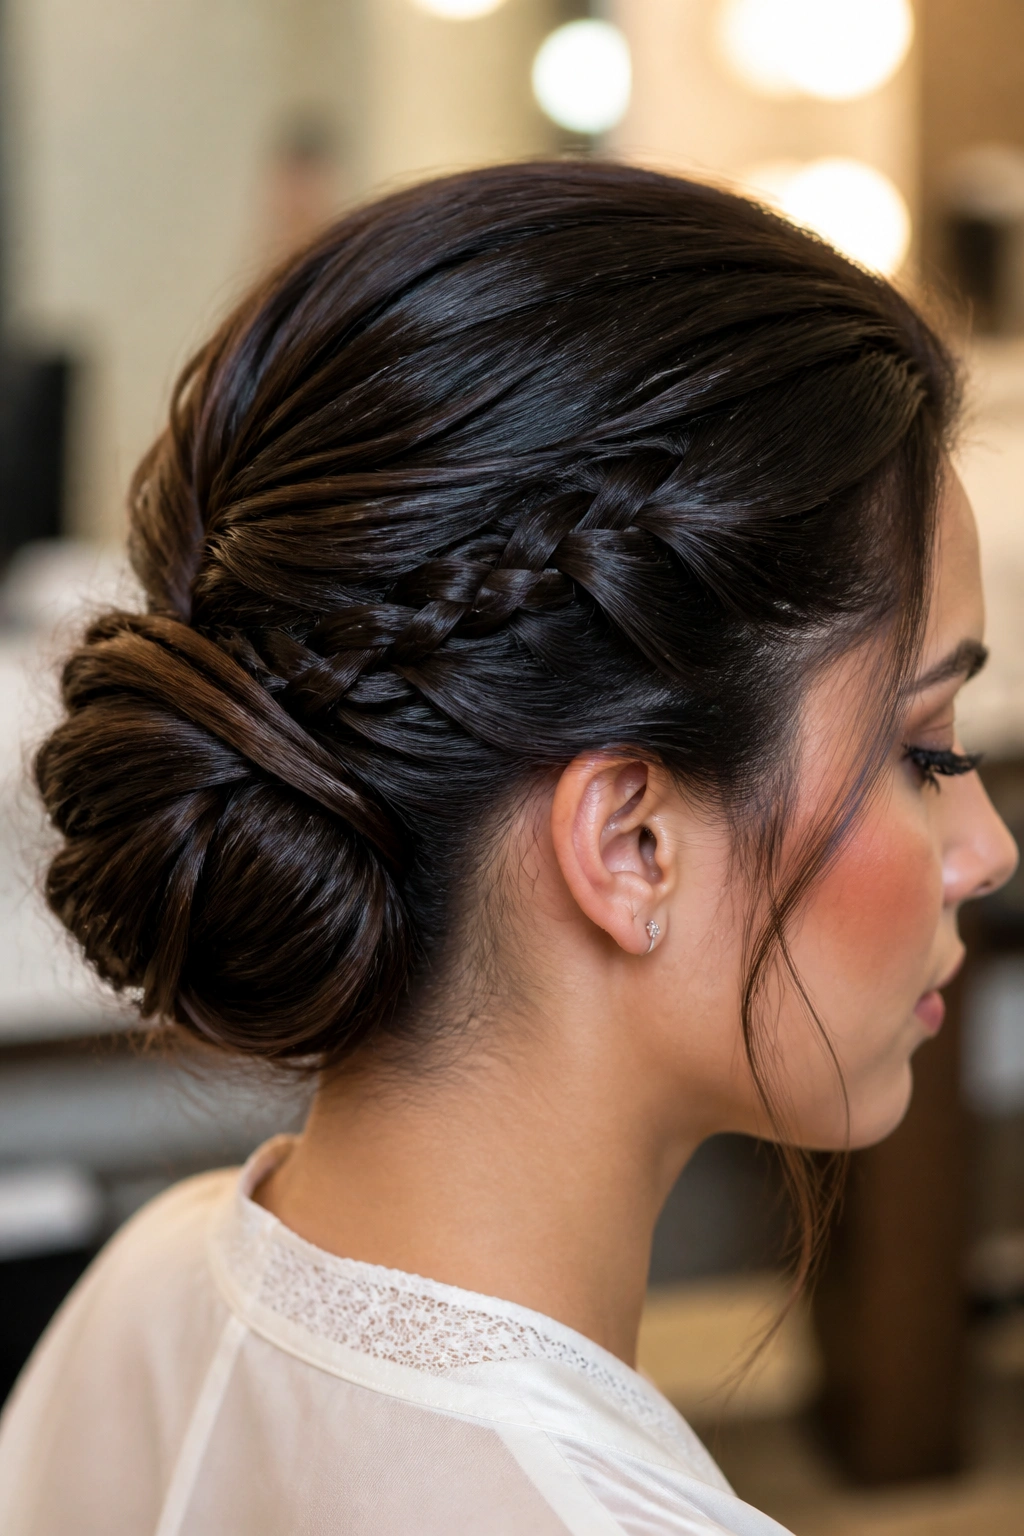
A braid inside a twist gives you more hold than either style alone. That is why this version is such a smart move for long events. You can feed a narrow braid into the twist or braid one side before wrapping it into a bun, and the result feels detailed without looking crowded.
When a braid helps the twist
The braid controls layers. It keeps shorter pieces from escaping and gives the bun a tighter core, which is useful if your hair is slippery or freshly washed. On medium hair, a single braid on one side is often enough. On thick hair, two smaller braids can create a cleaner line than one bulky one.
- Best for layered hair that does not stay in place easily.
- Use a 1-inch curling iron first if the ends need bend.
- Keep the braid narrow so the twist still feels like the main shape.
- Pin the braid where it disappears into the bun, not right at the top.
This is one of those styles that looks more complicated than it is. Good news for anyone doing their own hair at home.
8. Twisted Low Pony Wrap
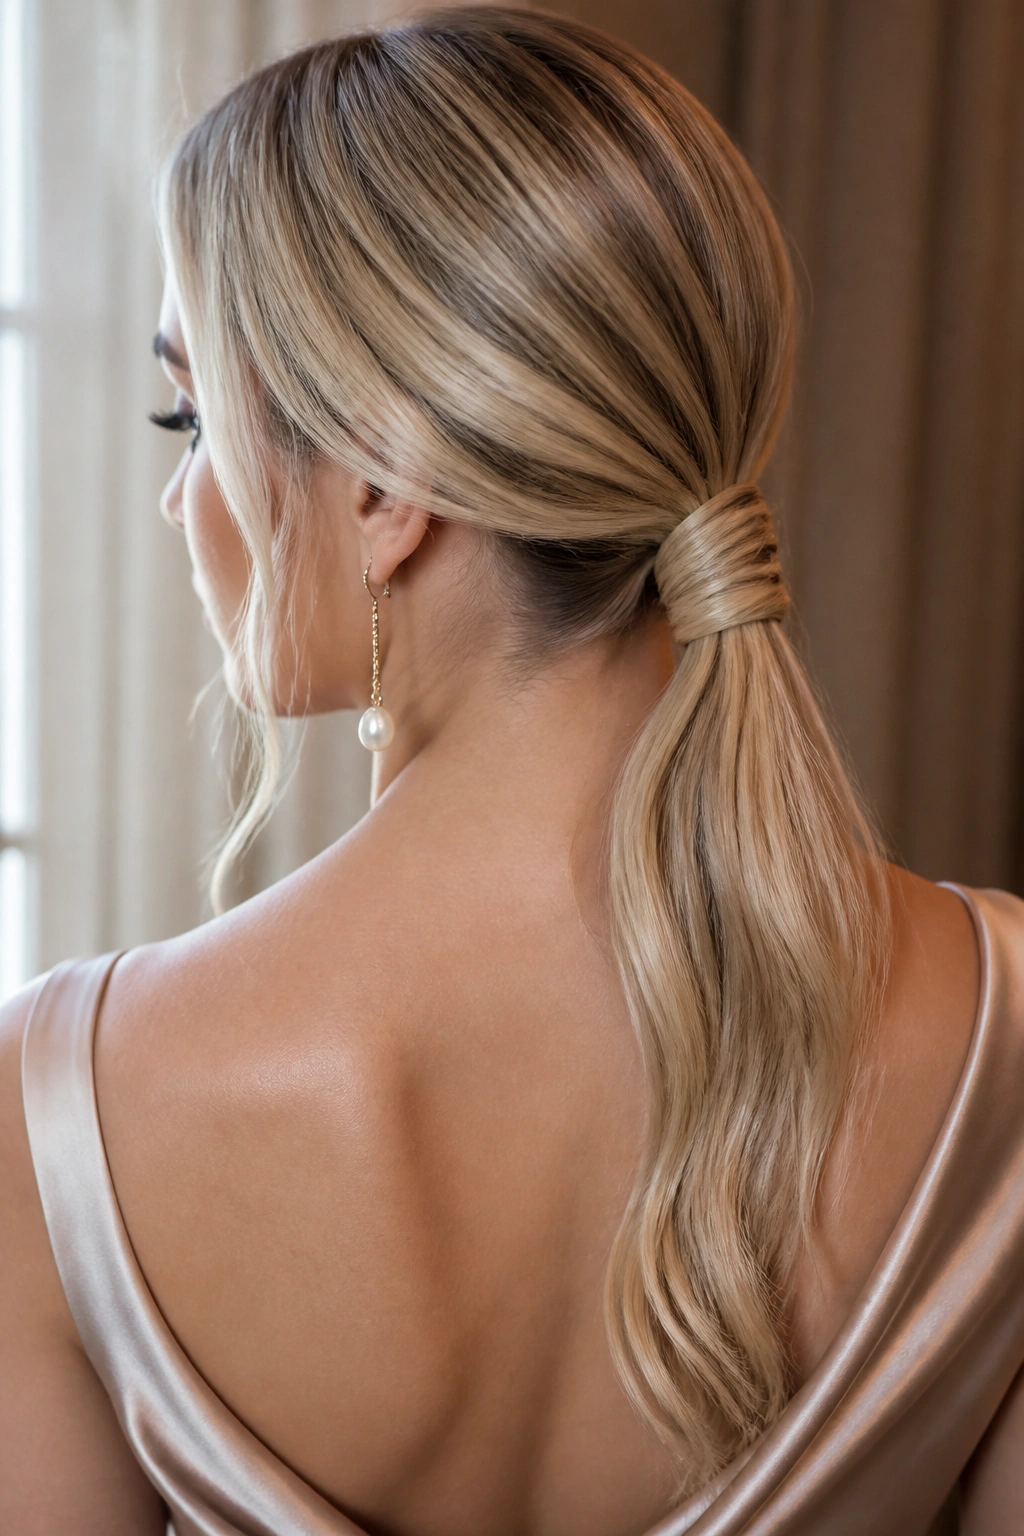
Why should a ponytail feel formal? Because once you wrap it in a twist, it stops reading like an afterthought and starts reading like a choice. The base stays low and sleek, then a twisted section hides the elastic and turns the whole thing into event hair.
The shape is especially good with satin dresses, sharp necklines, or outfits that already have strong lines. Keep the pony at the nape and smooth the crown with a tail comb. If the hair ends are polished with a flat iron, the look feels crisp. If they are softly waved, it gets a little more movement.
I like this for people who do not want a full bun. It leaves some length visible, which helps when the dress back is simple and the hair needs to carry a bit more of the visual weight.
It is also faster than it looks. That matters when the ceremony starts late and your room is full of half-open makeup bags.
9. Sculpted Top Twist

Picture a strapless gown, a tall neckline, and a hairstyle that adds height without becoming a full beehive. That is the sweet spot for a sculpted top twist. The hair is drawn upward at the crown, then folded or twisted back into a shape that sits higher than a standard bun.
How the height changes the look
A little lift at the top stretches the neck and gives the face more space. Not a huge amount — about 1 to 2 inches is enough for most people. Anything taller starts to get theatrical unless the outfit is made for it.
The twist itself should feel controlled. You are not building a loose knot; you are creating a shape with edges that stay readable from the front and side. That makes this style a good fit for structured formalwear, especially when the dress already has sharp shoulders or a clean bodice.
- Works well with shorter statement earrings.
- Use teasing at the crown only, not all over.
- Anchor the top section first, then fold the ends under.
- A shine cream on the outer layer keeps flyaways down without freezing the hair.
This is one of the few high styles that still feels elegant instead of loud.
10. Twisted Halo Updo
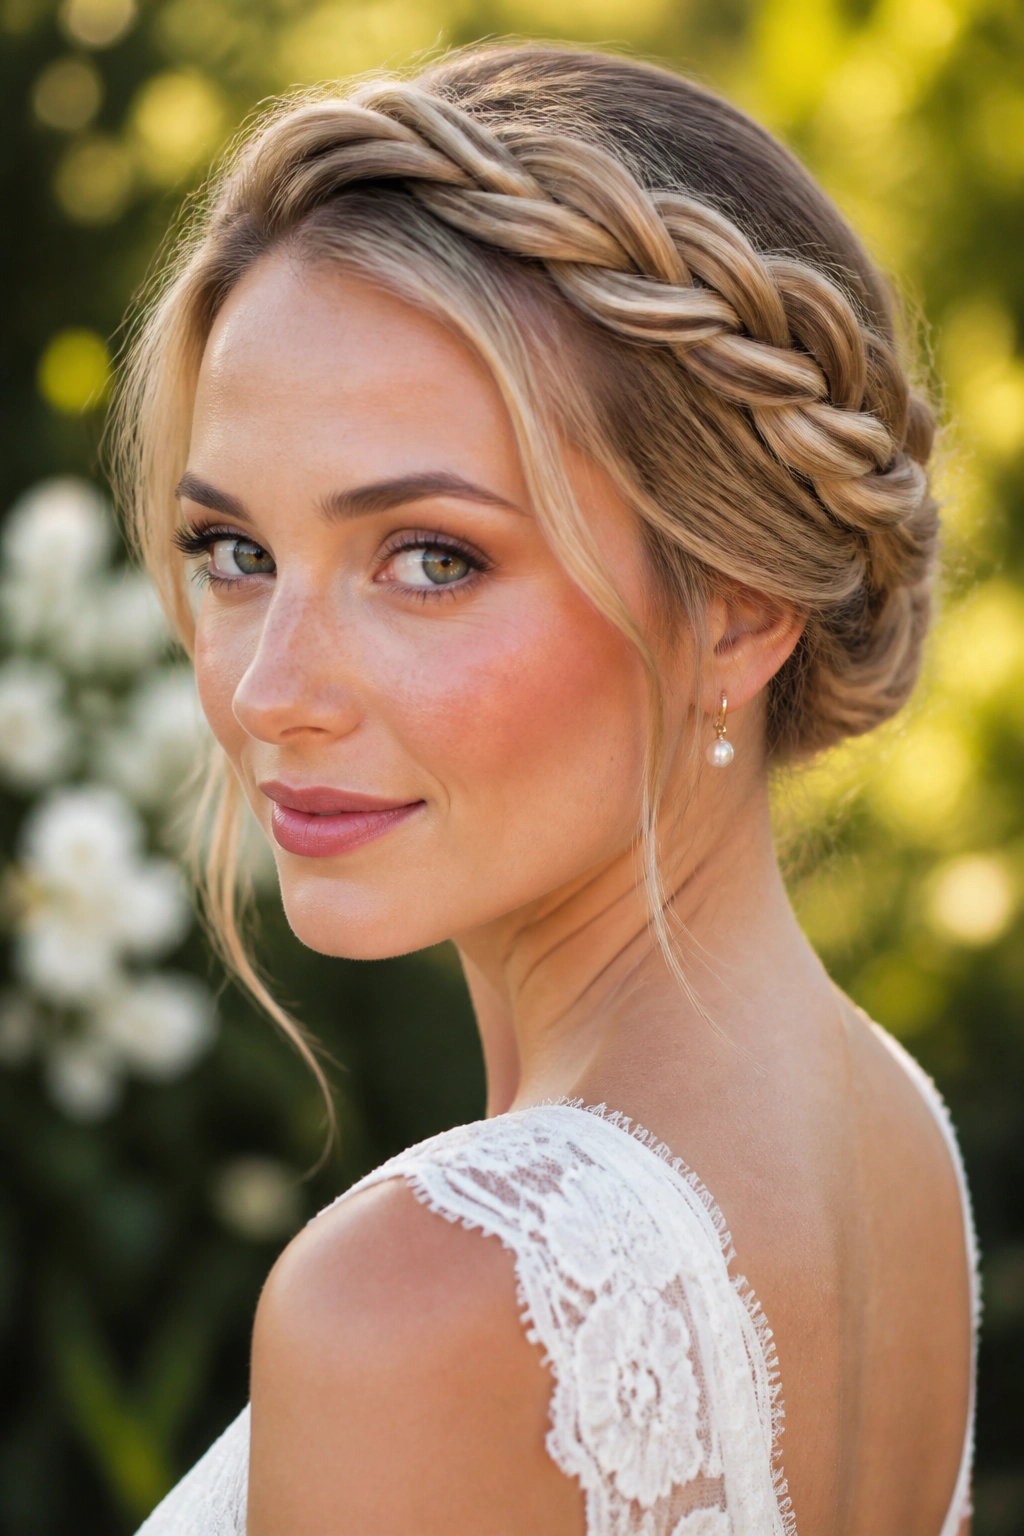
Not every special-occasion style needs a bun. A twisted halo updo wraps around the head and tucks into itself near the nape or behind the ears, which gives you a softer outline with a lot of surface detail.
The look works best when the twist follows the natural curve of the hairline. Start near one temple, travel across the crown, then continue around the other side before pinning the ends out of sight. Keep the front pieces smooth but not flat. A little give around the temples keeps the style from looking severe.
This one is lovely for outdoor weddings, but it is also good for events where you want your hair off your neck without losing softness. It pairs nicely with dresses that have open backs or narrow straps, because the halo shape frames the head without crowding the neckline.
The trick is balance. If one side gets too thick, the whole halo starts to tip visually.
11. Rolled Gibson Tuck

The Gibson tuck has a quiet kind of charm. It feels vintage, but not costume-like, and the rolled shape at the back of the head gives it a neat finish that works for tea-length dresses, cocktail events, and formal daytime celebrations.
The process is simple enough to do at home. Create a loose pocket above the nape, roll the ends upward into that space, and pin the roll in place so it stays tucked. The rolled surface should look smooth from the outside, with just enough texture to keep it from feeling flat.
Small details that make it work
- Best on medium-length hair or longer bobs.
- Use 2 to 3 U-pins per side for security.
- A side part softens the vintage feel.
- Satin or pearl accessories fit this shape well.
It is a quieter style than some of the other twisted updos here, and that is exactly why it works. Some dresses do the talking. Hair does not have to shout back.
12. Asymmetrical Twist Bun
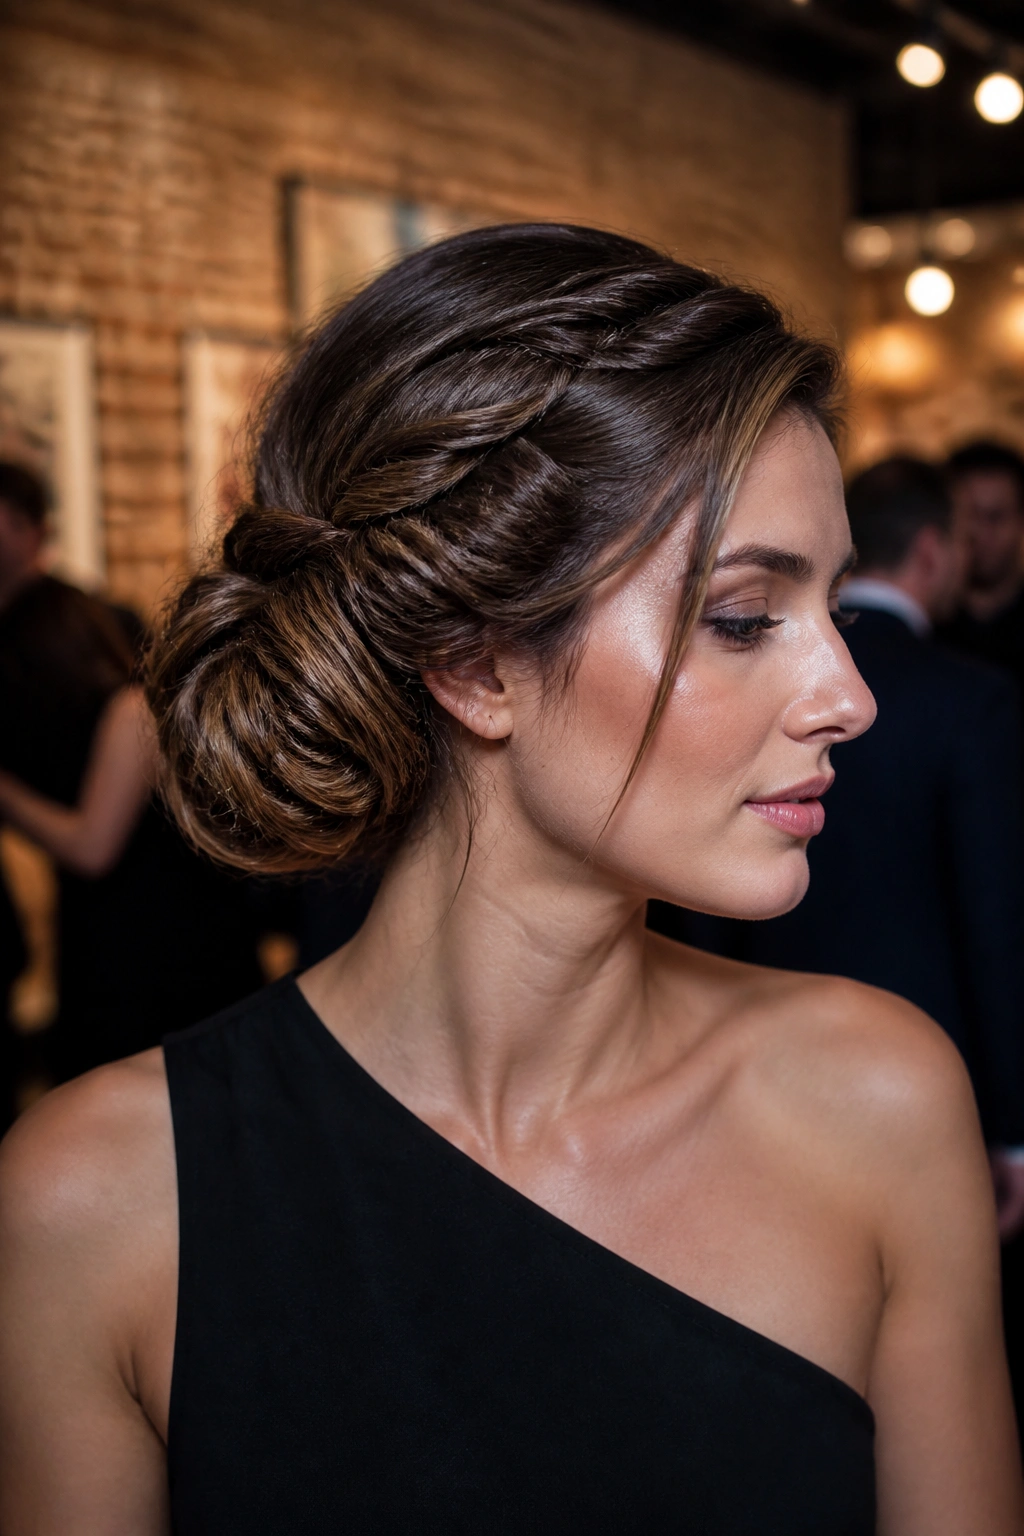
Not every polished style needs perfect balance. An asymmetrical twist bun gives the eye a stronger line on one side and a lighter finish on the other, which can make a plain dress feel more deliberate.
The bun sits off-center, usually a few inches from the middle of the nape. One side can be sleek and tucked close to the head, while the other side carries more twist and texture. That contrast is the whole point. It keeps the style from feeling too neat, which is useful if the outfit already leans formal.
This is a smart pick for modern bridesmaids, art-gallery events, or any look where you want the hair to feel sculpted rather than sweet. It also helps if your face shape is narrower and you want the hairstyle to add width on one side instead of height on top.
Keep the loose side controlled. Asymmetry works when it looks planned.
13. Textured Twist with Face-Framing Pieces
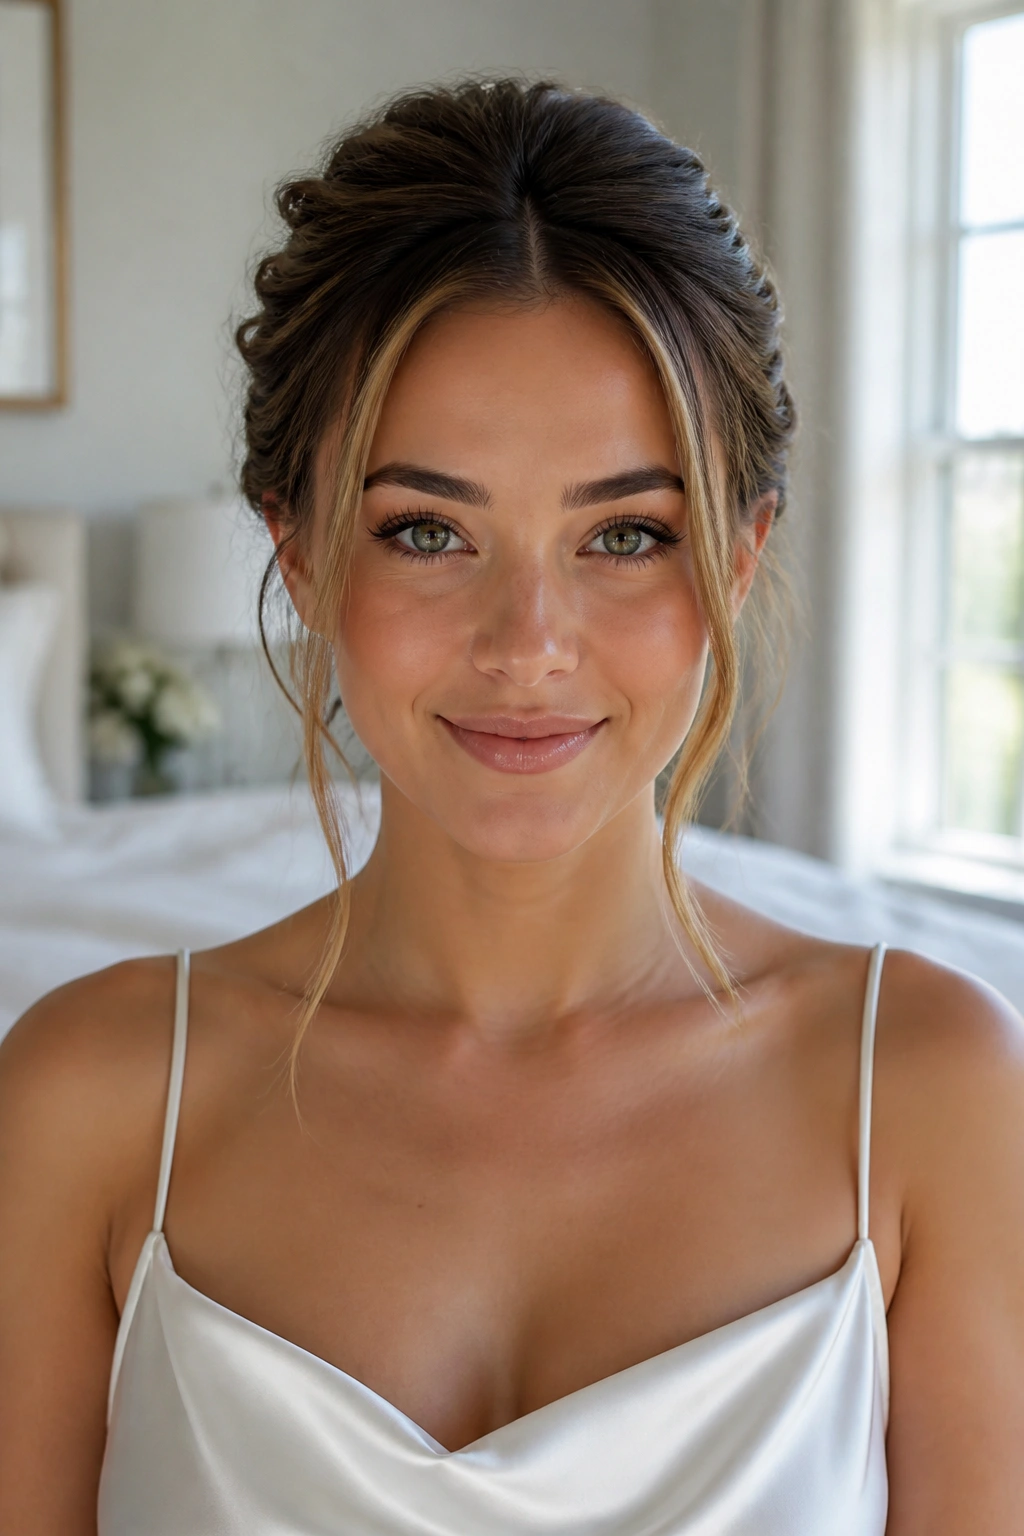
A textured twist with face-framing pieces gives you softness without losing structure. That balance is harder to find than people think. Too many loose pieces and the style starts to unravel. Too few and it can look boxy around the jaw.
How much face-framing is enough?
Two narrow pieces are usually plenty. Think pencil-width, not thumb-width. Curl them away from the face with a 1-inch barrel or a small flat iron bend, then leave the ends a little imperfect. That keeps the frame soft without turning the front into a separate hairstyle.
The twist at the back can be low or mid-height, but the texture should stay visible. A bit of roughness in the surface makes the style feel modern and helps it hold under a light mist of hairspray. Fine hair benefits from texture powder at the roots. Thick hair usually needs less help and more pinning.
This look is a favorite for photos because it keeps the face open while still giving the hair some shape near the back.
14. Sleek Center-Part Twist

A center part changes the whole mood. It makes a twisted updo feel sharper, cleaner, and a little more intentional, especially with minimalist dresses or geometric earrings. Instead of sending all the hair to one side, the part divides the shape evenly before the twists gather into a low knot or tucked roll.
The front needs to be smooth. Use a tiny amount of serum or cream, then comb the part with a tail comb so the line stays straight. From there, twist each side back at the same angle. When the two sides meet, the result feels balanced in a way that suits formal events with a more modern edge.
This style is especially good if you like hair that stays close to the head. It does not ask for much height or fluff, which means it is a better match for dresses with strong shoulders or a square neckline.
Clean lines. That is the whole story here.
15. Twisted Bun with Statement Pins
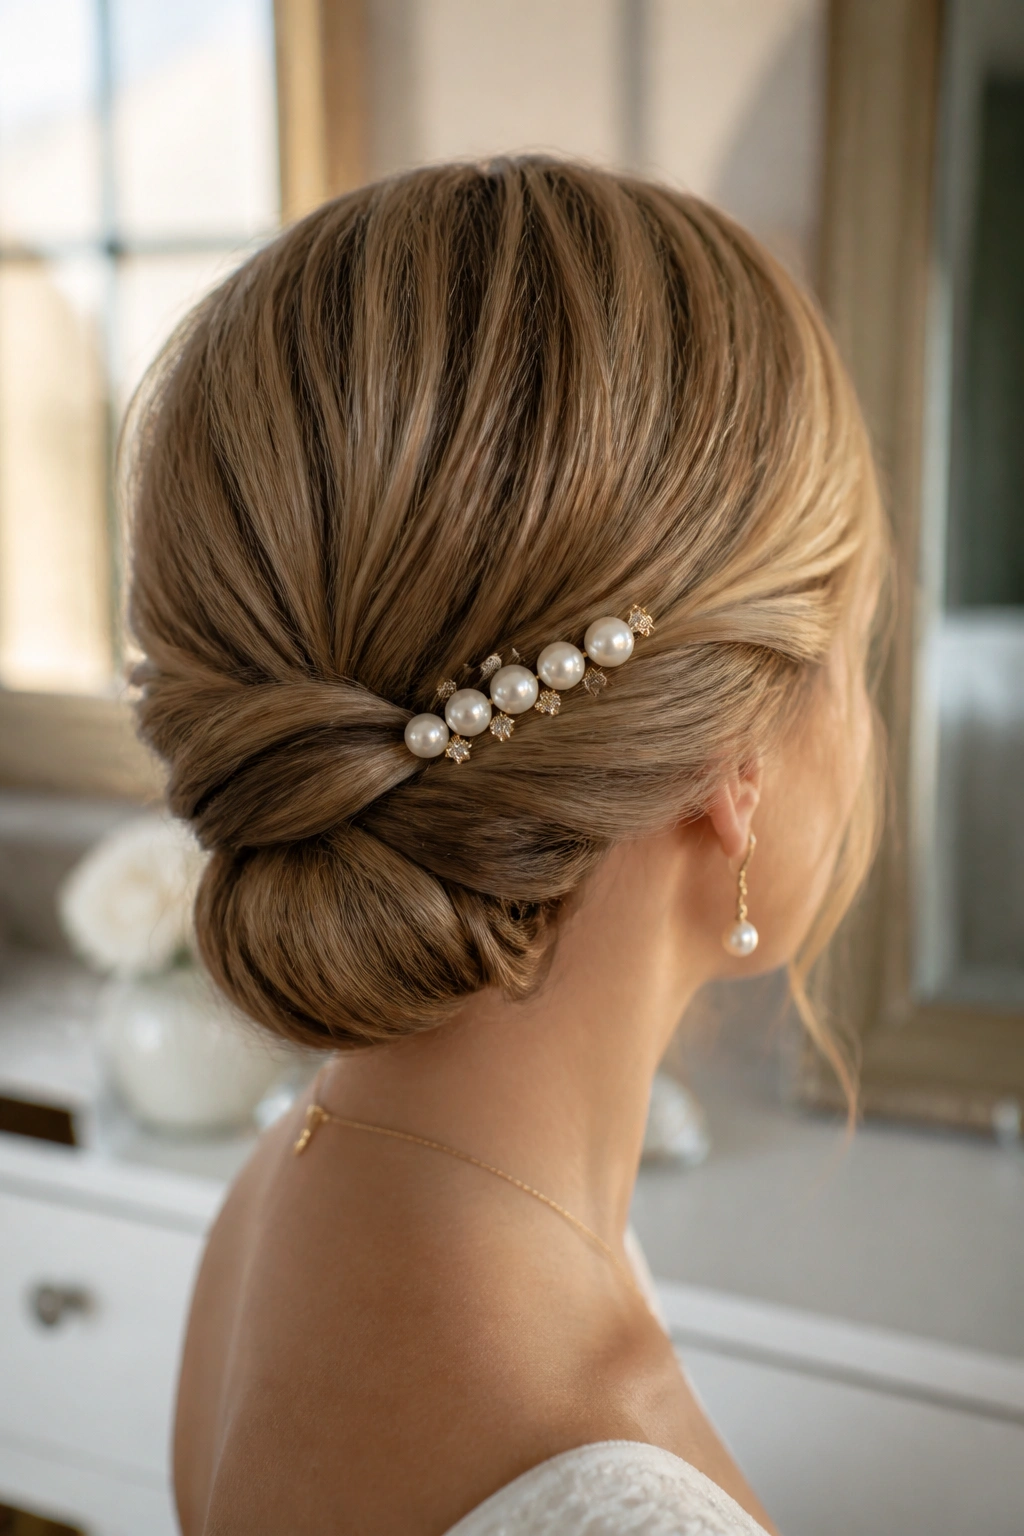
A row of pearl pins or crystal clips can turn a plain twist into something much more event-ready. The bun does not need to be huge. It just needs a surface that gives the accessories enough room to sit in a line or cluster without fighting the hair.
I like placing statement pins after the twist is already secured. That way you can see the final shape before you decide where the decoration should go. One side, just above the bun seam, usually looks cleaner than scattering pins everywhere. If the dress has silver hardware, echo that in the pins. If the dress is warm-toned or ivory, gold or pearl usually feels calmer.
- Place pins 1 inch apart if you want a neat line.
- Add accessories after the last mist of hairspray.
- Keep the rest of the style simple so the pins stay in focus.
- Do not overload a small bun with too many pieces.
This is one of those cases where less really does look better.
16. Curly Twist Updo

Curly hair does not have to be flattened to be formal. A curly twist updo keeps the curl pattern visible while still giving you the structure needed for a wedding or black-tie event. The trick is to work with the curl clumps instead of brushing them out into softness that disappears.
What to preserve
Leave the curls intact as much as you can. Separate them gently with your fingers, then twist each section into the updo without stretching the curl away. If the hair is dry, a little leave-in cream or curl cream helps keep the strands from frizzing once they are pinned. If the hair needs a reset, diffuse it first and let it cool before styling.
- Best when curls are already defined.
- Use pins that grab without crushing the curl.
- Keep the front line soft; too much pulling can make the style look tight.
- A few face-framing curls are enough. More than that starts to crowd the twist.
This style has a lovely honesty to it. It does not pretend the curls are gone. It works because they are still there.
17. High Twisted Knot

At the crown, the style feels lighter. A high twisted knot lifts the hair away from the neck and puts the focus on the jawline, earrings, and shoulders. It can look sharp and modern when it is smooth, or a little softer when the twist is textured.
The placement matters most. Gather the hair high enough that the knot sits above the natural head shape, then twist the length into a compact coil and pin it flat against the base. The result is dramatic without being bulky, which is a useful line to walk when the dress already has strong details.
This is a good pick for long earrings, strapless gowns, and makeup that you want people to notice. It also keeps the neck completely open, which can be a relief during crowded events.
Heavy layers need extra pins here. Otherwise the knot starts shedding pieces halfway through the evening, and that is never a fun surprise.
18. Looped Twist Chignon

Short fragment. Big payoff. The looped twist chignon is one of those styles that looks more intricate than it is because the twist folds back into wide curves instead of a tight coil.
The loop is the signature. Rather than winding all the hair into a small knot, you fold sections back on themselves so the side profile shows soft curves and a clean seam. That makes the style lovely with open-back dresses or necklines that need a neat line at the nape.
What to watch for
- Use 3 to 4 U-pins to anchor each loop.
- Keep the loop wide enough to show shape from the side.
- Smooth the outer layer before pinning so the folds stay visible.
- A small decorative comb fits neatly above the seam.
This is a nice choice when you want something elegant that still feels a little airy. It has more shape than a standard bun, but less fuss than a braided crown.
19. Soft Wrapped Twist for a Polished Finish
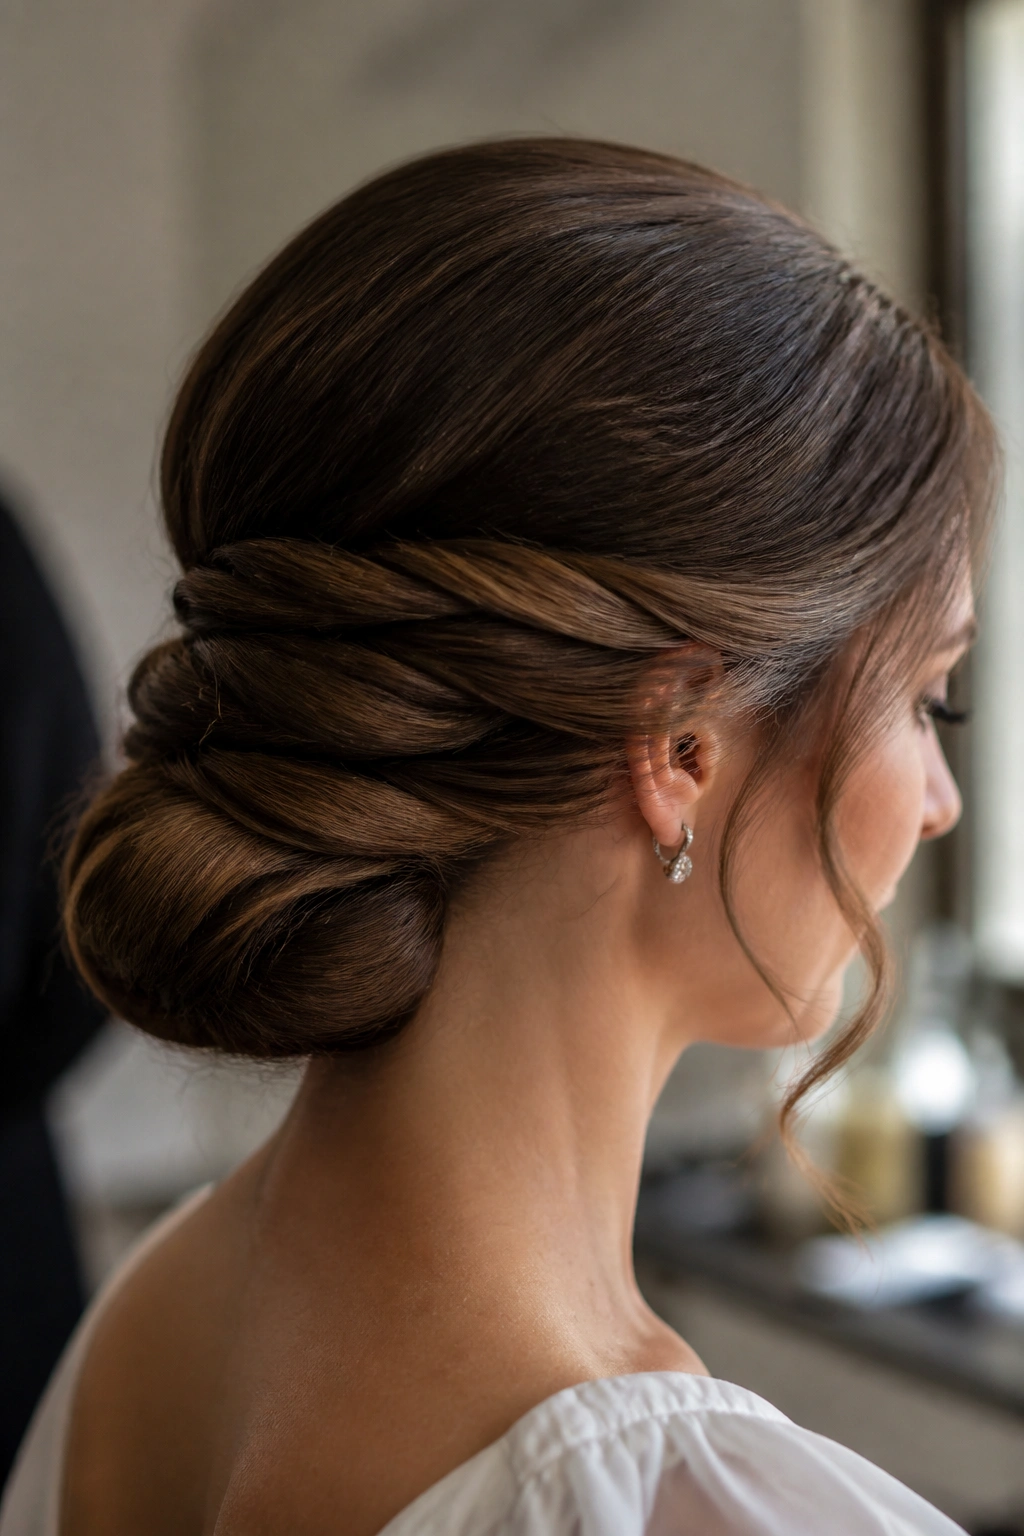
The soft wrapped twist is what I reach for when the dress is doing the loud work and the hair should quietly behave. It wraps two or more twisted sections around a low base, but it keeps the finish gentle instead of hard-edged.
The smoothness comes from brushing the surface before pinning, then wrapping the sections in a way that hides the seams. A light mist of flexible hairspray helps the surface stay neat without turning stiff. This is a very useful style for wedding guests, gala dinners, or formal events where you need the hair to look finished from every angle.
What makes it feel polished is the control at the edges. The twist line should be visible, but the ends should vanish into the base. If the hair is extra fine, a tiny filler bun gives the wrap something to hold onto. If it is thick, divide the hair into smaller sections so the wrap does not become too bulky.
This one ages well over the course of the evening. That matters more than people think.
20. The Clean Wrapped Twist for Long Event Nights

Long dinners and late dancing ask for a style that stays calm. The clean wrapped twist does that without a lot of drama. It uses a secure low base, smooth surface, and tight pinning through the densest parts of the hair so the style can handle hours of movement.
Start by dividing the hair into two or three sections, depending on thickness. Twist each section in the same direction, then wrap them around the base and tuck the ends under. The shape should feel snug, not painful. If the scalp feels pulled before you leave the house, it will not improve after the fourth toast.
Carry two extra pins in your bag. Seriously. One hidden pin can save the whole style if a side starts to loosen near the temple or behind the ear.
If you are choosing between two twisted updos, pick the one that follows your hair’s natural bend and supports your neckline. That tiny choice usually matters more than whether the style looks slightly softer or slightly sleeker in the mirror.
