



A hairstyle that survives a packed workday has to do more than look decent in the bathroom mirror. It has to handle a commute, a screen-heavy morning, a lunch break that runs late, and that one moment when you catch your reflection in a dark monitor and think, oh no, the crown has gone flat.
The best everyday hairstyles for work days are the ones that look intentional without eating your morning. They also need to behave. Hair that shifts, frizzes, slips, or falls into your face by 10:30 is a nuisance, no matter how nice it looked when you left the house. So I always favor styles with a clear shape, a little restraint at the hairline, and enough hold to stay put without feeling stiff.
I keep coming back to the same family of styles: low buns, wrapped ponytails, braids, clipped-back twists, and a few smart half-up options. Straight hair usually needs grip. Curly hair needs space. Fine hair needs lift in the right places, or it can disappear into a shapeless puff by lunch. None of that is dramatic. It is just the truth of hair and desks and real life.
The first style is the one I trust when I do not want to think about my hair again until evening.
1. The Low Sleek Bun

A low sleek bun is the office equivalent of a white shirt: plain at first glance, but hard to beat when you need something that looks clean and controlled. It sits at the nape, keeps the hair off your face, and works with collars, blazers, and headphones without constant adjustment.
Why it works on work days
The shape matters here. A bun placed low on the head feels calmer than a high knot, and it is less likely to collapse if you lean back in a chair or pull a sweater over your head. I like this style on hair that has a little natural texture, because it helps the bun hold without a ton of product.
- Best for medium to long hair
- Usually needs 1 elastic and 3 to 5 bobby pins
- Looks smoother with a center part or a soft side part
- Holds best when the hair is brushed in one direction before twisting
Tiny tip: leave the bun slightly off-center if your hairline tends to puff up at the temples. It softens the whole look.
2. The Wrapped Low Ponytail

Why does a wrapped ponytail look more finished than a regular one? Because the elastic disappears. That small detail changes everything. The style still takes about 3 minutes, but it reads as deliberate instead of rushed.
How to wear it without fuss
Brush the hair into a low ponytail at the nape, then take a thin half-inch section from underneath the ponytail and wind it around the elastic. Pin the end under the ponytail with a small bobby pin. If your hair is silky, mist the base with a little texturizing spray first so the wrap does not slide.
I like this one for days when you want movement at the ends but no hair falling forward while you type. It also works well under scarves and coat collars, which sounds boring until you are actually wearing a wool coat and trying not to get snarled in it.
3. The Claw Clip French Twist
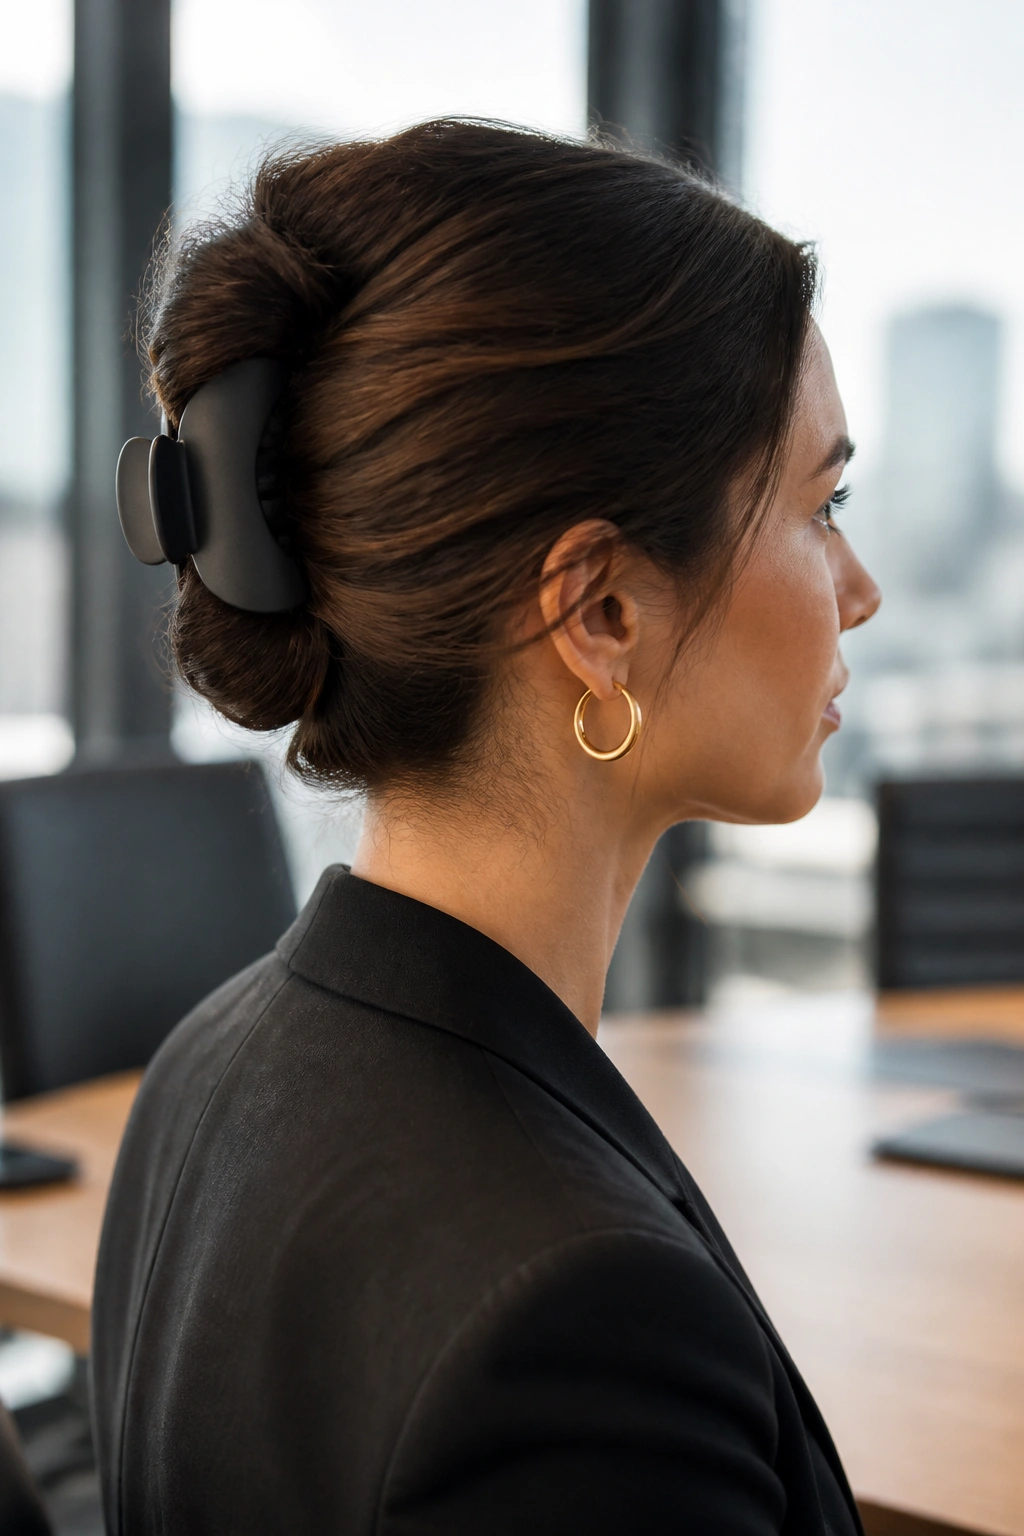
A claw clip French twist is the style I see people reach for when they want their hair up fast and still want it to look like a choice. It is especially useful when hair is second-day, a little soft at the roots, or too slippery for a neat bun.
The trick is to twist the hair upward from the nape, fold the length in on itself, and secure the roll with a medium or large claw clip. Not every clip works. The cheap, flimsy ones crack at the hinge or slide on fine hair. A matte clip with a strong spring usually grips better and looks less clunky.
- Best on shoulder-length hair and longer
- Works well with medium texture or slight wave
- Takes about 2 to 4 minutes once you know the motion
- Use two hidden bobby pins if your layers keep escaping
It is not the style for a marathon workout. For a desk, a meeting, and a coffee run? Solid.
4. The Half-Up Knot

The half-up knot is the hairstyle I recommend when you want the ease of loose hair but need your face clear. It has a little lift at the crown, which helps if your hair goes flat when pulled back too tightly. It also softens sharp outfits. A blazer and a half-up knot feel less severe than a blazer and a slick bun.
Start by taking the top section from temple to temple, then tie it into a small knot at the back of the crown. Don’t make the knot too tight. A tiny bit of slack gives the style shape and keeps it from looking like a knot you made in a rush with wet hands. I like to tug the crown up just slightly after securing it so the top has some air.
The front pieces matter here. A couple of face-framing strands, curved with a flat iron or left natural, can keep the style from feeling too stern. If your hair is fine, a light mist of dry shampoo at the roots before tying helps the knot sit with more structure.
5. The Side-Part Tucked Bob

Short hair gets ignored in a lot of hairstyle lists, which is ridiculous. A bob can look sharp with almost no effort if you use the cut you already have instead of fighting it. The tucked bob is one of my favorites because it looks neat without trying to pretend the hair is longer than it is.
Unlike a pin-heavy updo, this style leans into the shape of the haircut. Make a deep or soft side part, tuck one side behind the ear, and smooth the front with a pea-sized amount of cream or balm. If the bob flips outward at the ends, leave it. That little bend can look better than forcing it flat.
This works especially well for straight bobs and slightly wavy lobs. If your hair is layered, secure the tucked side with one discreet pin under the top layer so the ear tuck does not creep loose by midmorning. Clean, simple, done.
6. Soft Flat-Iron Waves

Soft flat-iron waves are what I reach for when straight hair needs a little shape without turning into full-on curls. The goal is not perfection. It is movement. A few loose bends in the mid-lengths make the hair look finished, even if the rest of your outfit is all business.
The part most people skip
Use a flat iron that is about 1 to 1¼ inches wide. Clamp a section, turn the iron away from your face, and glide it down the strand while easing the wrist in alternating directions. Leave the last inch straighter so the ends do not look too curled or old-fashioned. Then brush through once with a wide-tooth comb or fingers.
- Best for medium to long hair
- Works fastest on clean, dry hair
- Needs heat protectant, always
- A light mist of flexible spray keeps the bends from falling flat
I prefer this style when I want my hair down but not limp. It takes a little more time than a ponytail, but the payoff is good.
7. The Loose Three-Strand Braid

Why does a basic braid still earn a spot on a workday list? Because it holds together. It keeps the hair controlled in humid weather, on windy walks, and during long stretches at a desk when you do not want anything touching your neck.
Start the braid low at the nape and keep the tension even. Too tight, and it looks severe. Too loose, and the braid turns fuzzy in an hour. Once it is secured, pinch the edges outward with your fingertips to widen it slightly. That one move gives the braid a fuller look without needing extensions or teasing.
How to keep it from slipping
- Spray a little texturizing spray on silky hair first
- Use a small clear elastic if you want the braid end to disappear
- Cross the strands firmly at the start; that keeps the top from puffing
- Leave the bottom inch or two unbraided if you want a softer finish
This is a good fallback on mornings when your hair is cooperating only halfway.
8. The Braided Low Bun

A braided low bun is one of those styles that looks more involved than it is. That is a nice thing to have in your back pocket. You braid the tail first, then coil the braid into a bun at the nape and pin it down. Done cleanly, it stays neat for hours.
I like this style on thick hair because the braid controls bulk before the bun is formed. If you have fine hair, it still works, but the bun will look smaller and a little more delicate. There is nothing wrong with that. The real advantage is security. The braid gives the bun something to hold onto, so it does not unravel as easily as a simple twist.
Two details make a difference: first, braid all the way to the end before coiling, and second, pin in a crisscross pattern instead of sticking pins in the same direction. That gives the bun a stronger grip. It is a small thing. It matters.
9. The Bubble Ponytail
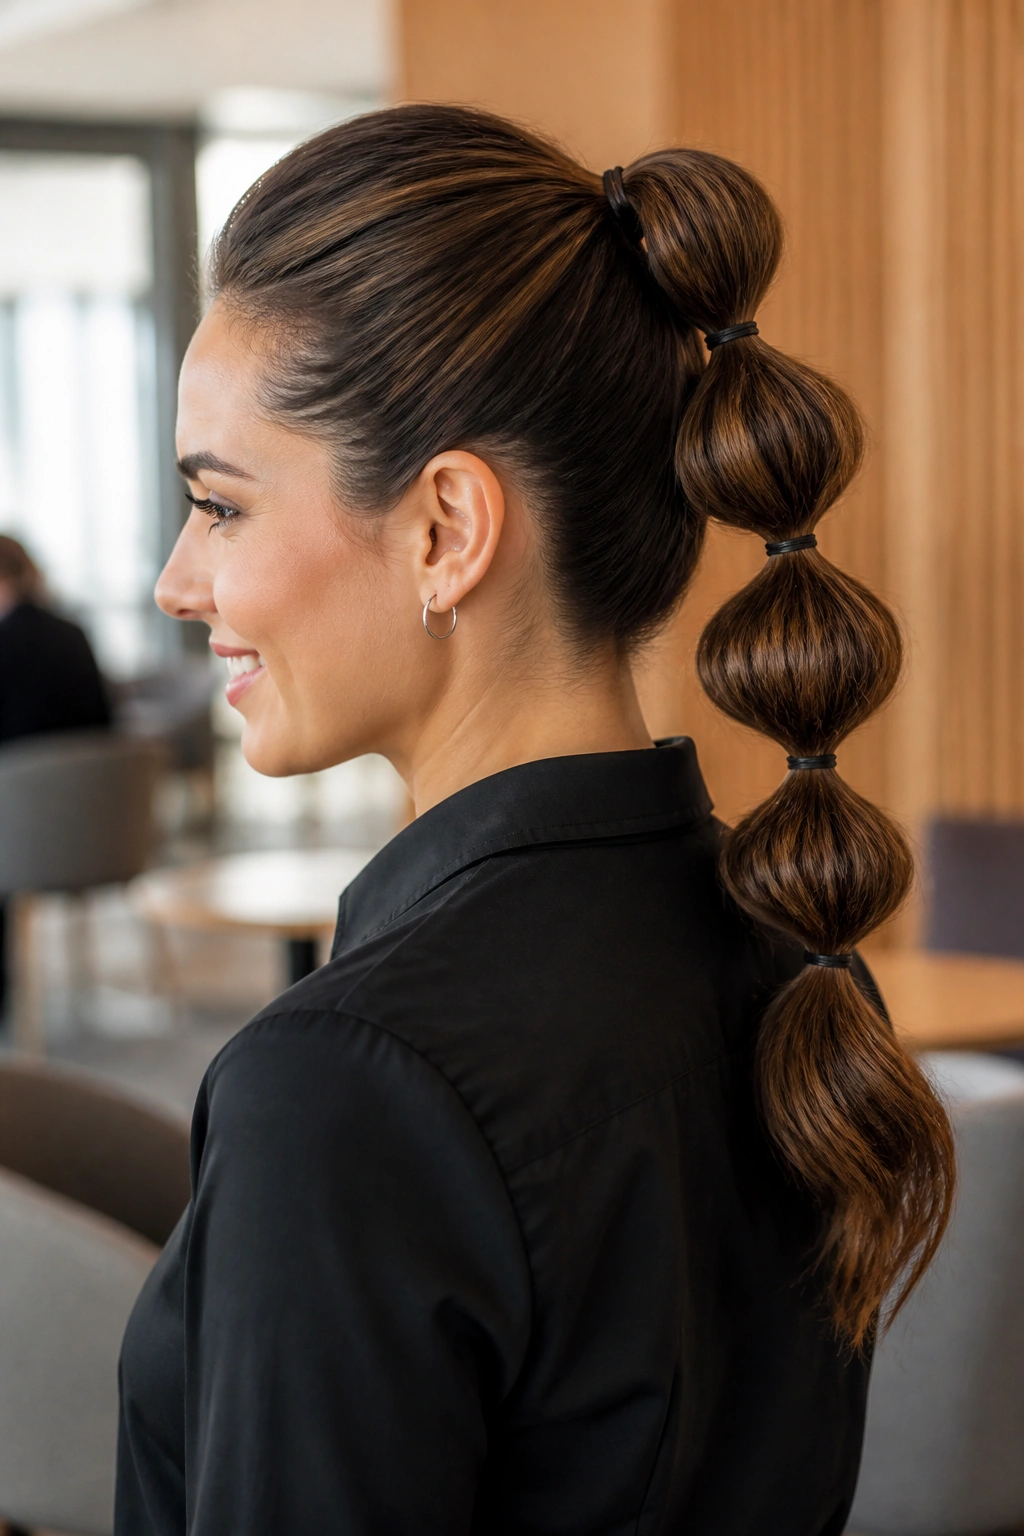
A bubble ponytail gives you structure without requiring braid skills. It is basically a ponytail with evenly spaced little sections puffed out between elastics, which sounds playful, but in a work setting it can read polished if the bubbles are kept neat and moderate in size.
Unlike a plain ponytail, this style breaks up the length and keeps the hair from looking flat through the middle. Use clear elastics or small hair ties every 2 to 3 inches down the tail, then gently tug each section outward to create the bubble. If the hair is very fine, a little hairspray on each section before puffing helps the shape last.
This one suits medium to long hair best. It also works nicely with straight or lightly waved textures, because you get a clean outline. Keep the bubbles even, though. Random spacing makes the style feel unfinished, and that is not the look we are after.
10. The Twisted Half-Up Crown

A twisted half-up crown is what I do when I want hair off my face but still want length showing down my back. Two small sections from the front are twisted back and pinned together at the crown, leaving the rest loose. It looks softer than a full half-up knot, and it is especially good on wavy or curly hair.
Where it looks best
This style shines when the front pieces have some movement. Straight hair can wear it too, but a little bend in the twists helps the style blend into the rest of the hair. I usually take sections from just above the temples, twist them back loosely, and pin them with two crossed bobby pins so they do not rotate during the day.
The hidden virtue here is comfort. Nothing is pulling at the scalp. Nothing is squeezing the whole head. If you have a long day with back-to-back calls, that matters more than people admit.
11. The Smooth Center-Parted Ponytail

If your morning is packed, a smooth center-parted ponytail is the no-drama answer. It is one of the cleanest work hairstyles around because it looks sharp with almost any outfit, and it takes less time than most people spend deciding whether they want to curl their ends.
Brush the hair back with a boar bristle brush or a firm paddle brush, then smooth a tiny amount of gel or styling cream over the part and hairline. Tie the ponytail low for a calm, office-friendly look, or mid-height if you want a little more lift. Keep the crown flat but not glued down. That balance is the whole trick.
I like this style most on straight or slightly wavy hair, but it works on curls too if you smooth the top and leave the tail natural. A ponytail that is too tight can give you a pulled-back, stressed-out look. Leave a touch of softness around the temples.
12. The Shoulder-Length Flicked Ends
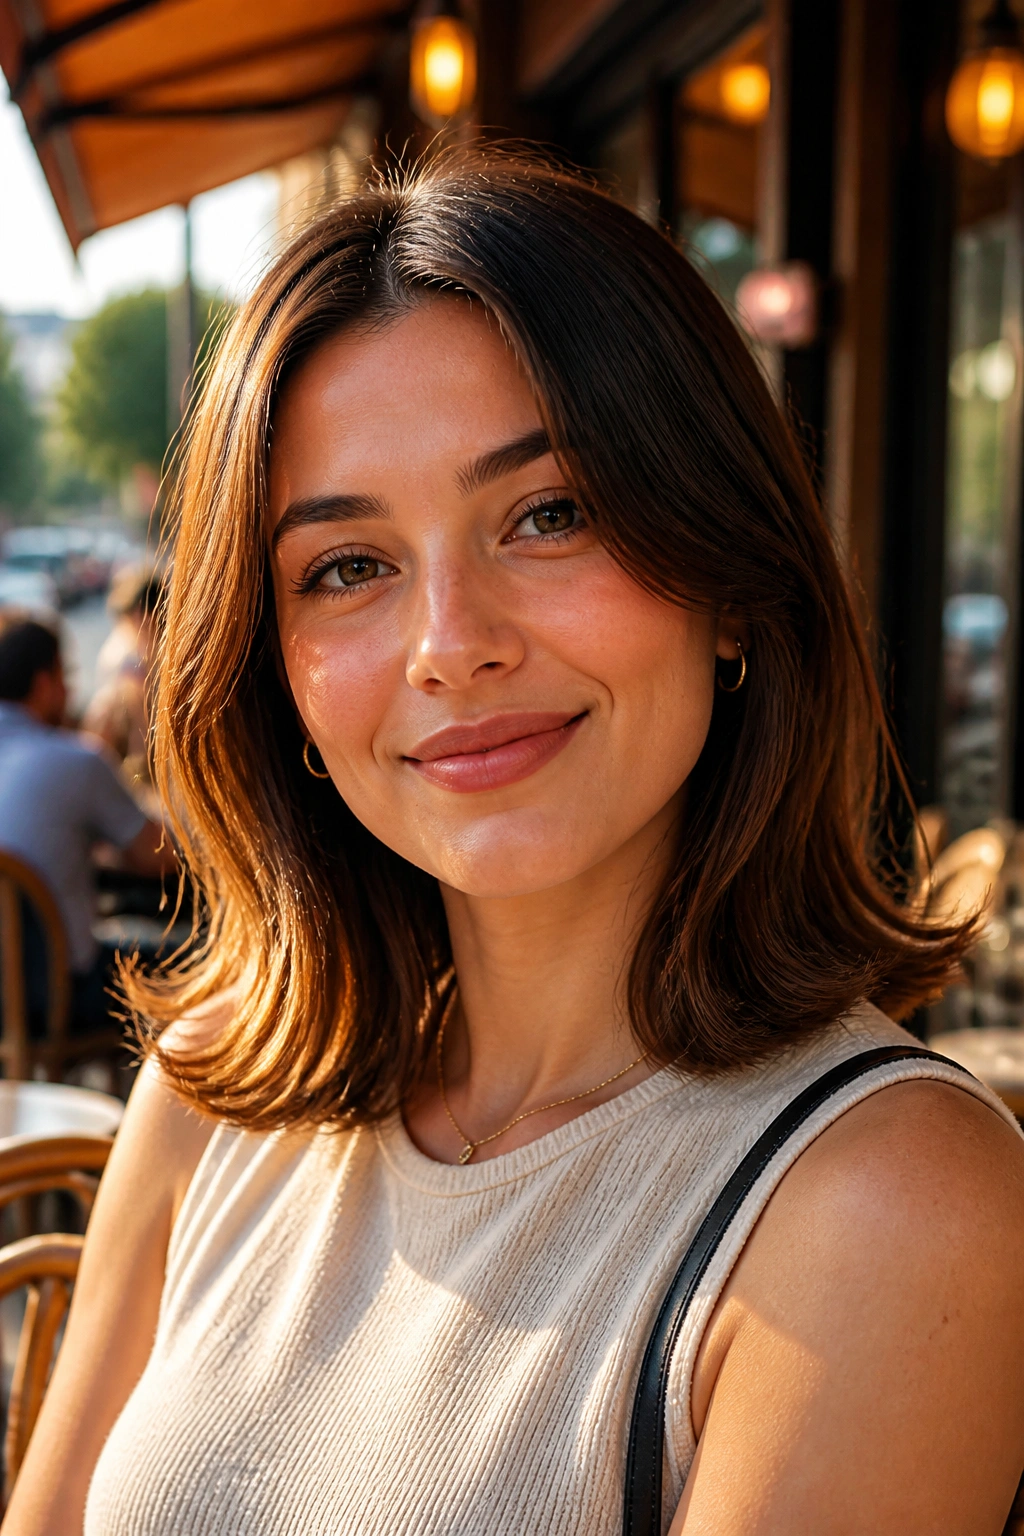
What if your hair is a bob or lob and you do not want to pin it up at all? Flicked ends are the answer. They give shape to shoulder-length hair, keep the cut looking intentional, and take almost no time once you know the motion.
Use a round brush or a flat iron to bend the last inch of the ends outward. You can flick them away from the face for a lighter look or keep the bend subtle for something more subdued. A center part makes the style feel cleaner, while a slightly off-center part can make it look less severe.
How to get the bend
- Work on dry hair only
- Use a 1-inch section at a time
- Heat the ends for 2 to 3 seconds, then release
- Finish with a small amount of shine serum on the last 2 inches
This is not a giant style change. That is the point. It gives a simple cut a little polish without pretending the hair is something it is not.
13. The Rope Braid Ponytail
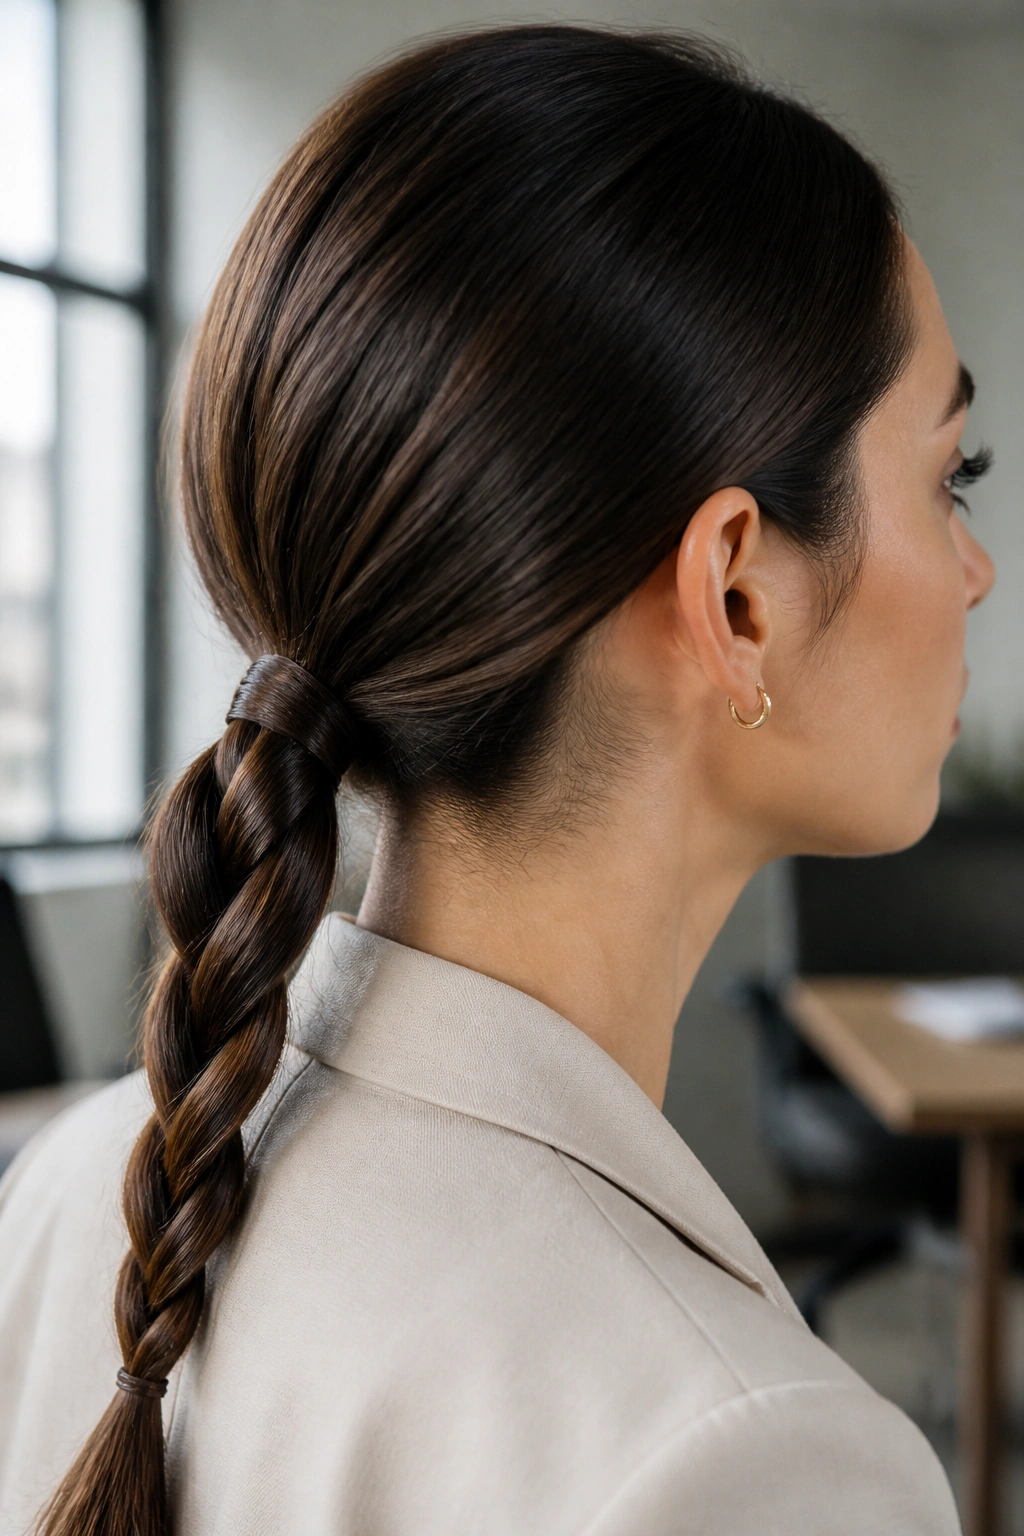
A rope braid ponytail is a nice change when a standard braid feels too familiar. It has a cleaner, more modern line, and it takes less hand coordination once you get the hang of it. You split the ponytail into two sections, twist each section in the same direction, then wrap them around each other in the opposite direction.
That opposite twist is what locks the braid in place. If both motions go the same way, the braid loosens. I know that sounds minor, but it is the difference between a rope braid that holds and one that falls apart while you are walking to your desk.
- Best for medium and long hair
- Good for hair that does not grip regular braids well
- Looks neat with a low ponytail base
- Secure the end with a tiny elastic, not a bulky one
This style has a tidy shape and a little texture. It is the kind of detail that makes a plain outfit look more considered.
14. The Headband Tuck

A headband tuck looks like a cheat code, and honestly, it sort of is. You place a stretchy headband over the hair, then tuck the length up and around the band until the ends disappear underneath. The result is smooth, compact, and oddly elegant when done cleanly.
Unlike a claw clip or pin-heavy style, this one depends on the headband’s grip, so the band needs enough stretch to hold without cutting into the scalp. Thin, silky hair usually benefits from a couple of hidden pins at the sides. Layered hair can be trickier, because shorter pieces may pop out around the nape.
I like this style when hair is in that awkward in-between state: not clean enough to wear down, not dirty enough for a full updo to feel easy. It takes five minutes, maybe less, and it keeps the whole back of the head neat.
15. The Double Mini Braids into Low Pony
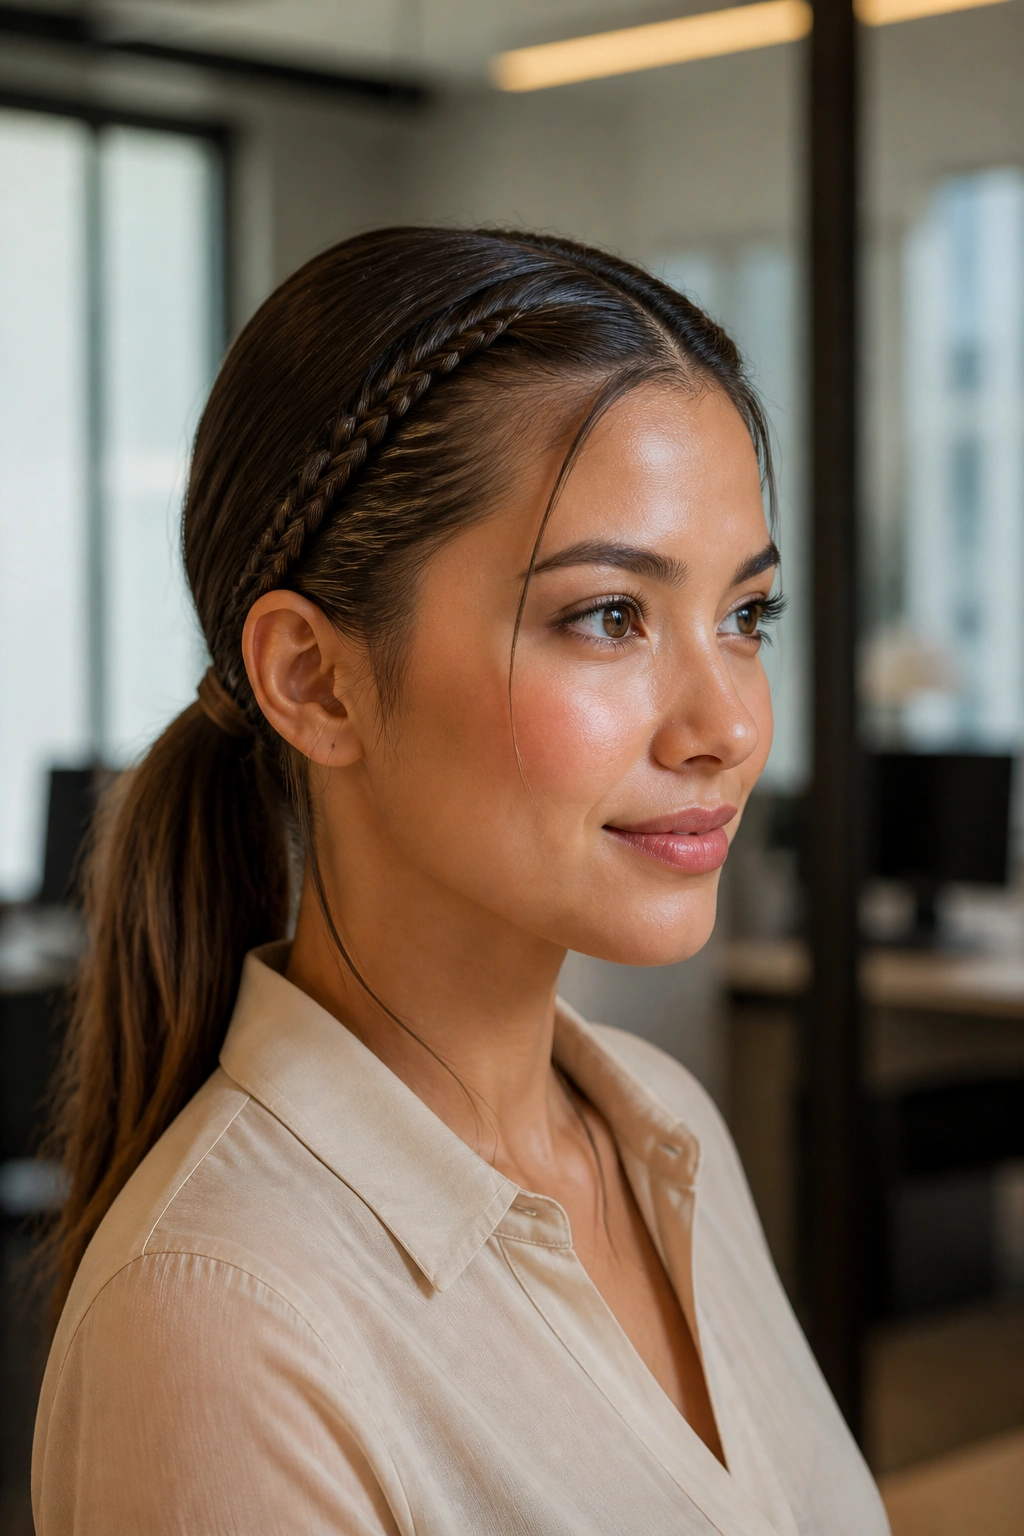
Two small braids at the front can make a plain low ponytail feel more thought-out without turning it into a fussy style. I reach for this one when I want a little texture near the face but still need the rest of the hair controlled.
Braid a thin section from each temple, then pull both braids back and gather them into a low ponytail with the rest of the hair. If you want a softer effect, stop the braids about two inches above the ear and let them blend into the tail. If you want a sharper look, braid all the way down and keep them visible.
Where the style gets tricky
The main problem is slippage. Fine or slippery hair can let the mini braids unravel before lunch, so use tiny clear elastics at the ends and a light mist of spray on the sections before braiding. I would also keep the braids slim; thick front braids can take over the whole look and make it feel more weekend than workday.
It is a small detail style, but that is why it works.
16. The Polished Messy Bun with Clean Edges
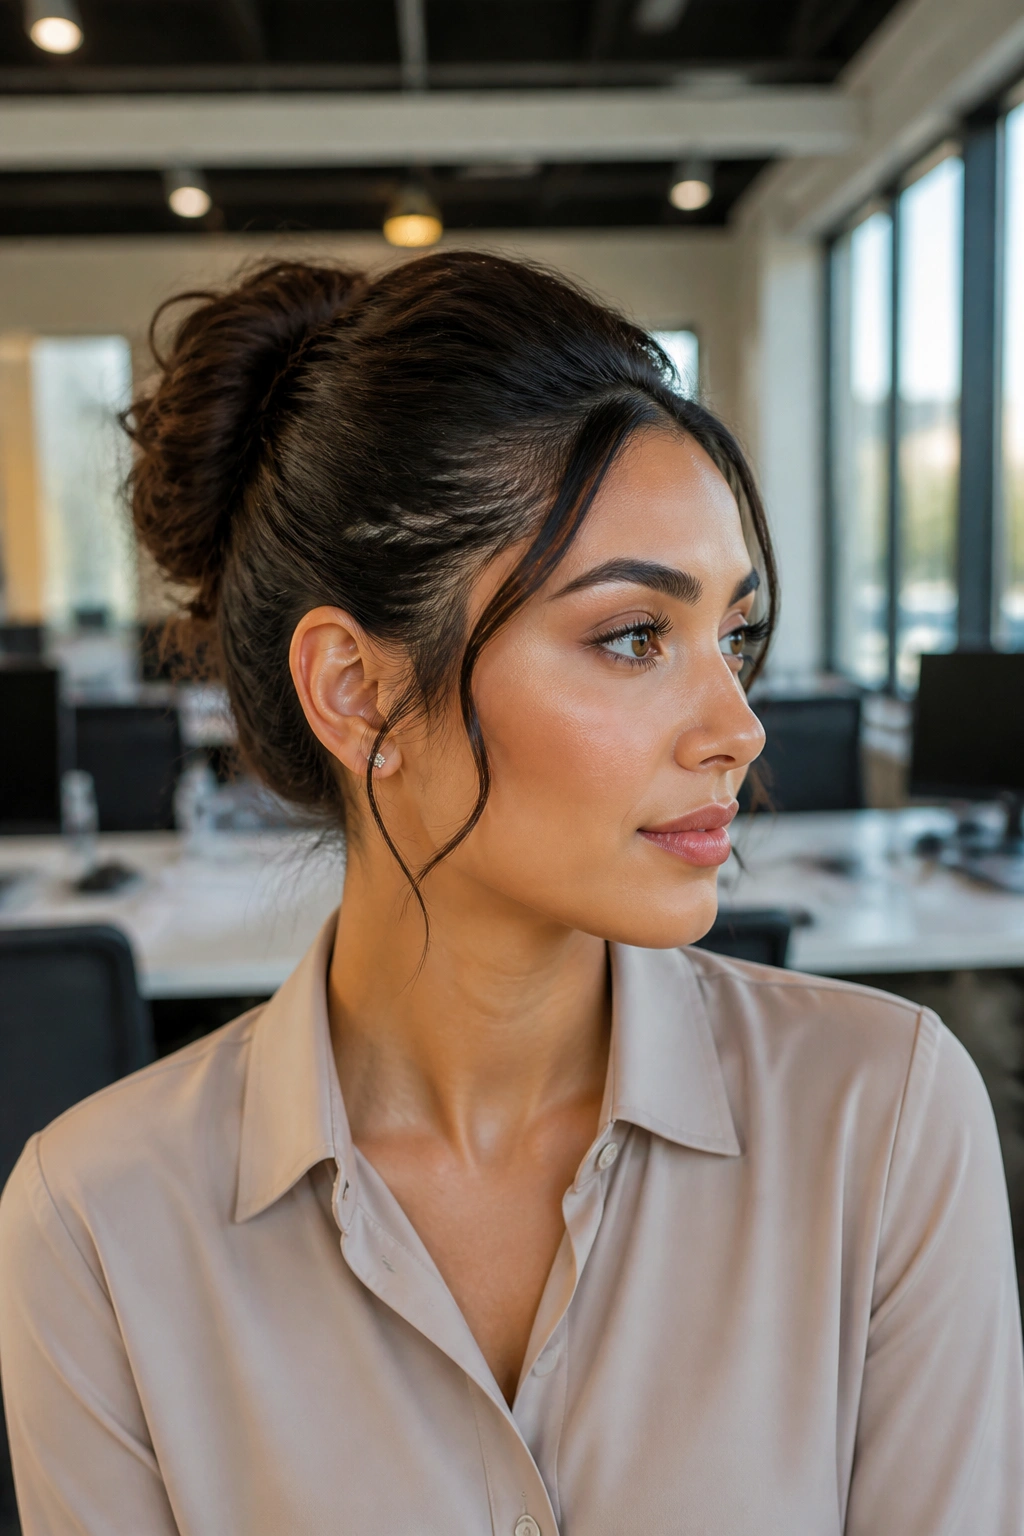
A messy bun can be good. A bad messy bun can look like you gave up halfway through. The difference is the edges. Keep the bun soft and loose, but smooth the hairline and sides so the shape still looks deliberate.
The part people get wrong
Too many people make the bun itself the focus and forget the perimeter. That is backwards. Brush the sides back with a little cream or spray, gather the hair into a mid or high bun, then twist only loosely before pinning. Leave a few face-framing pieces if your hairline suits it, but do not let the whole crown frizz out.
- Works well on day-two hair
- Needs 4 to 6 bobby pins for security
- Better on medium to thick hair than on very short layers
- A matte bun looks softer than a glossy one
This is the style I use when I want a little volume without looking overdone. It is casual, yes, but not careless.
17. The Side Braid into Low Chignon
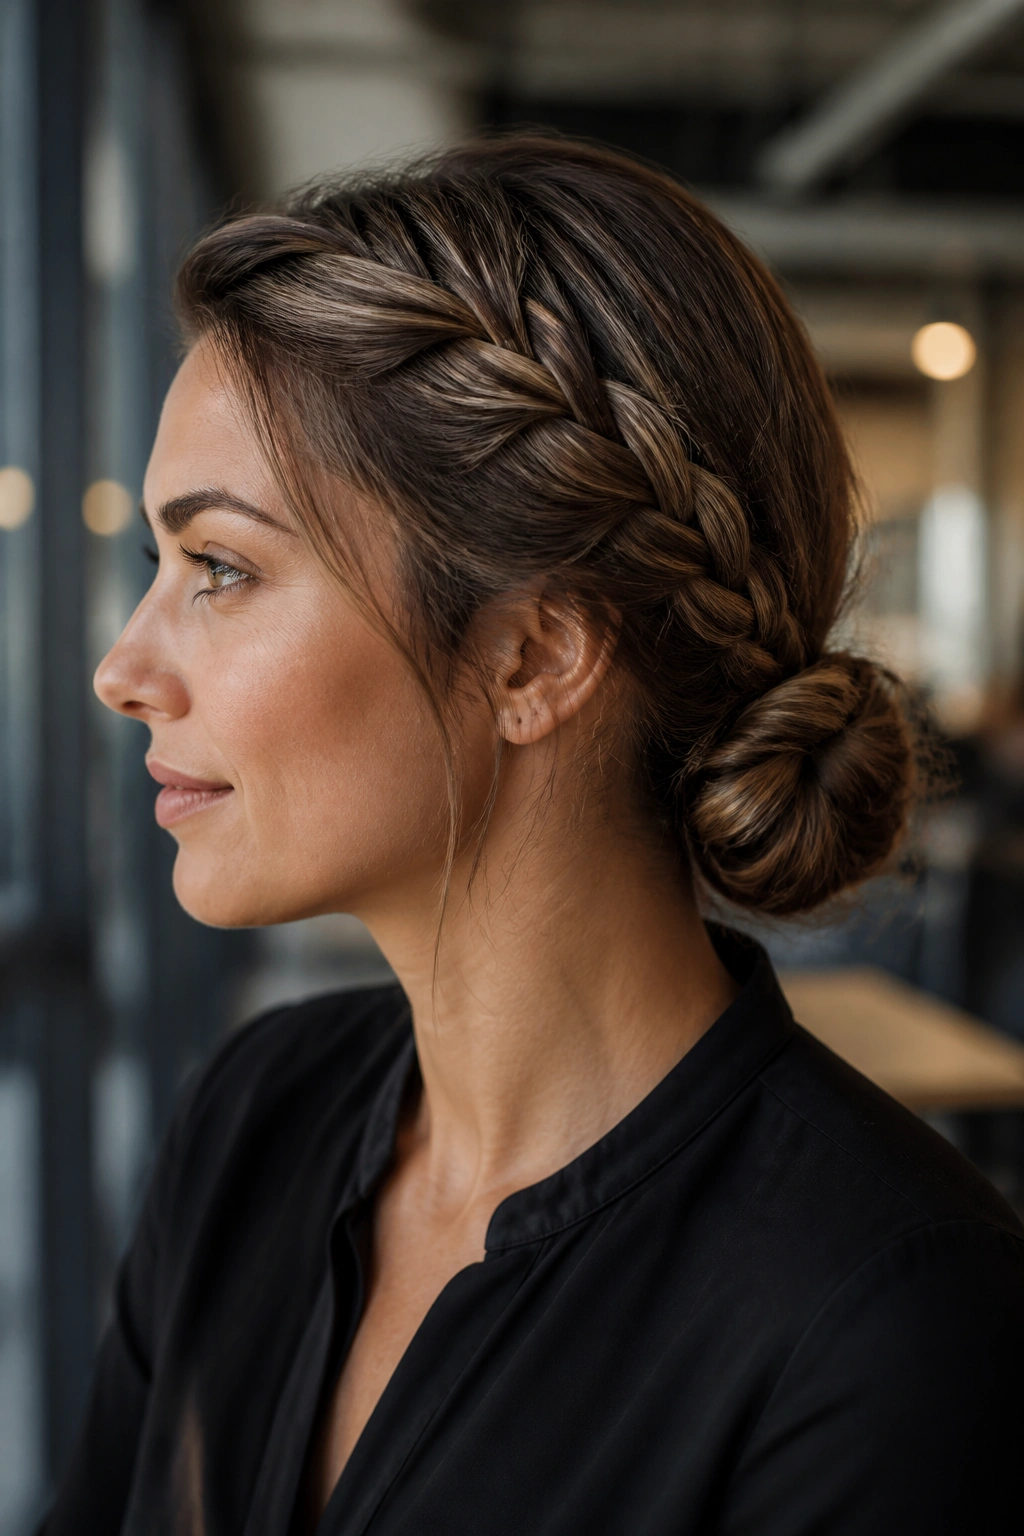
If your hair is thick and tends to puff up by midafternoon, a side braid into a low chignon is worth knowing. You braid from one side of the head, guide the braid toward the nape, then wrap the end into a compact chignon. It keeps the bulk contained and makes the style feel anchored.
The side braid adds structure around the face, which is useful if you wear glasses or want one side tucked back without committing to a full updo. I like this style better than a straight middle braid on fuller hair, because the diagonal line feels a little more graceful.
Pin the chignon with four pins in a square or cross pattern. That stops the knot from rotating, which is a real annoyance with heavy hair. A little spray on the braid before you wrap it helps keep the surface smooth.
18. The Defined Curls with a Single Statement Clip
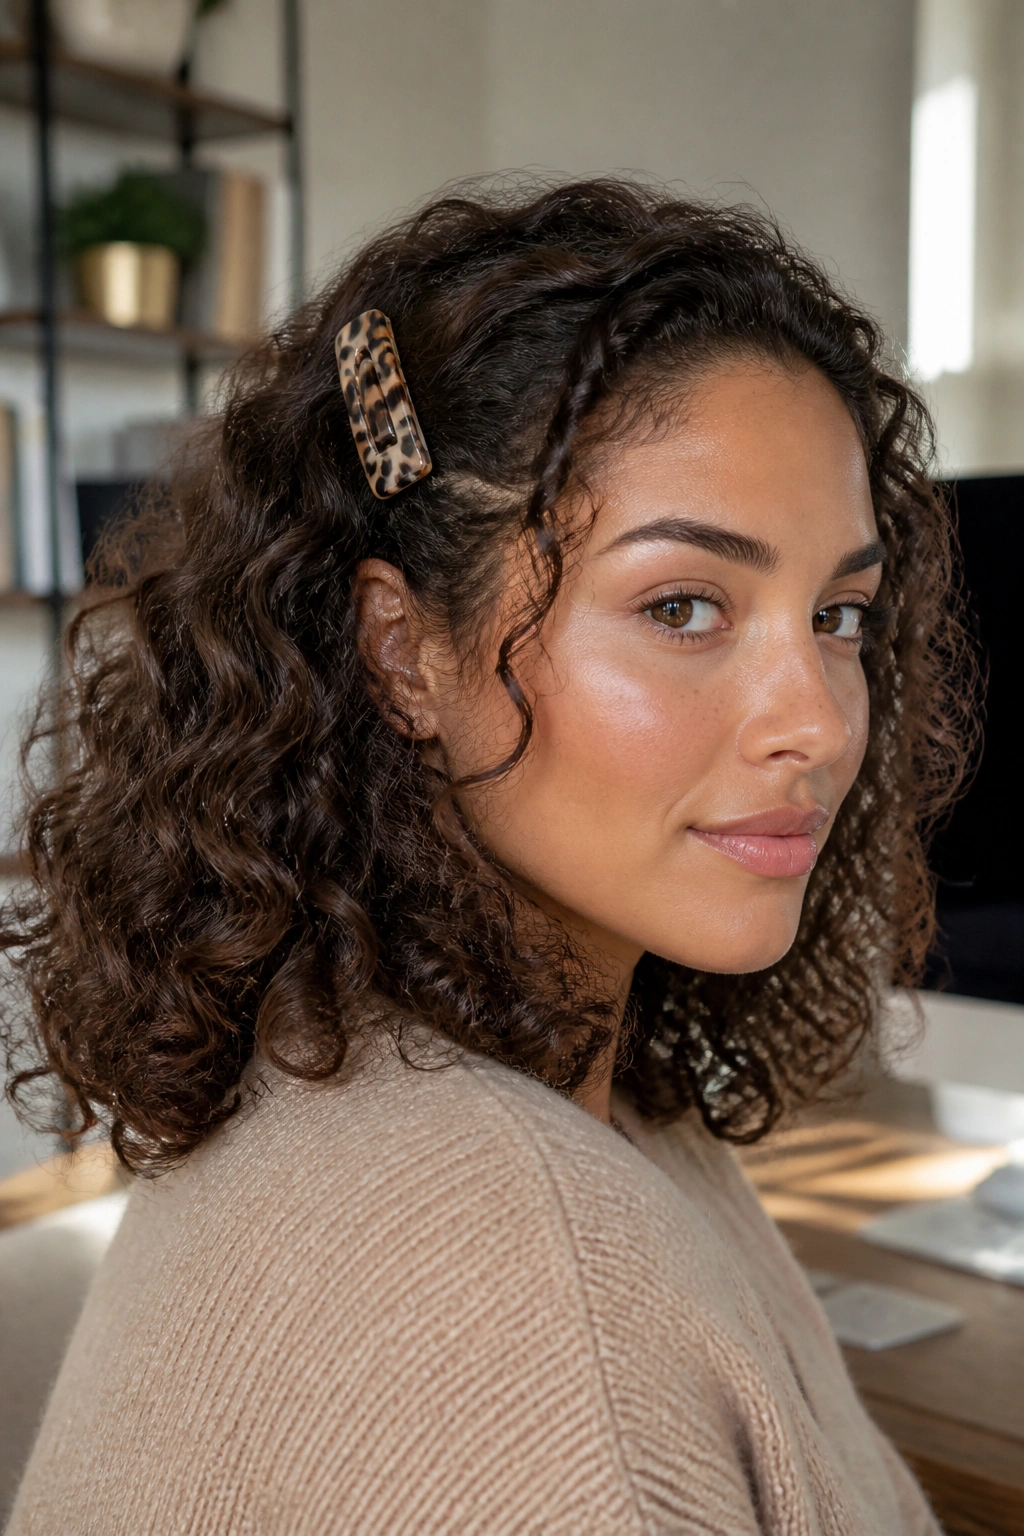
Should curls always be pulled back for work? No. Sometimes the smartest move is to leave them down and make one side neat with a single clip. That keeps the curl pattern visible while stopping the front from falling into your eyes every ten seconds.
Refresh the curls with a little water and curl cream if needed, then place a strong clip just above one temple. I prefer a barrette or a metal snap clip with enough grip to hold a thick section. If you brush dry curls, the whole shape can go fuzzy fast, so use your fingers or a wide-tooth comb instead.
This works especially well on shoulder-length curls and longer. The style feels intentional because one detail is controlled, while the rest of the hair stays loose and full. You get movement without the chaos.
19. The French Twist with a Hair Stick
A hair stick French twist has a flatter profile than a clip and can feel lighter on the head, which is nice when you are wearing a style for eight or ten hours. It looks polished, but not stiff. That is a rare combination.
Gather the hair at the back, twist it upward against the head, and slide a hair stick or strong U-pin through the roll to anchor it. If you are new to this, the first try may feel awkward. It took me a few attempts to stop stabbing the pin into the wrong layer. Once it clicks, though, the shape holds well.
This is best for medium to long hair and for people who like a cleaner silhouette. It is not the fastest style on the list, but it rewards a little practice. A low gloss spray on the surface keeps flyaways down without making the hair feel sticky.
20. The Topsy-Tail Low Bun
A topsy-tail low bun is one of those styles that looks clever without being difficult. You make a low ponytail, split the hair just above the elastic, flip the tail up and through the gap, and then tuck the ends into a soft bun or loop at the base. The whole thing feels neat, secure, and slightly more interesting than a standard bun.
I like this because it gives you a little volume where the hair flips, which helps fine or straight hair avoid looking flat. It also works on layered hair better than some smooth buns, because the tuck hides uneven ends instead of trying to show them off. If the style feels too loose, add two pins where the bun meets the base.
A final thought worth keeping in your head: the best workday hairstyle is the one you can redo in under five minutes if the morning goes sideways. That is the real test. Not how fancy it looks in a photo. Not how complicated the technique sounds. Just whether it can live through a normal day and still look like you meant it.
