



Salt and pepper hair with highlights looks best when the gray is treated like part of the design, not a problem to hide. The wrong tone can make the whole head look streaky in a hurry. The right one softens the line between silver and brunette so the color reads polished instead of accidental.
A good colorist thinks about placement first, tone second, and brightness third. Gray strands reflect light differently, and they can grab cool pigment fast, which is why some ash formulas look flat or muddy if they sit too long on porous hair. That little detail matters more than most people realize.
The looks that work here are the ones that respect contrast. Fine babylights, a single bright money piece, ribbon foils, soft balayage — each one changes how the silver reads, and each one gives a different mood.
1. Salt and Pepper Hair With Cool Silver Babylights
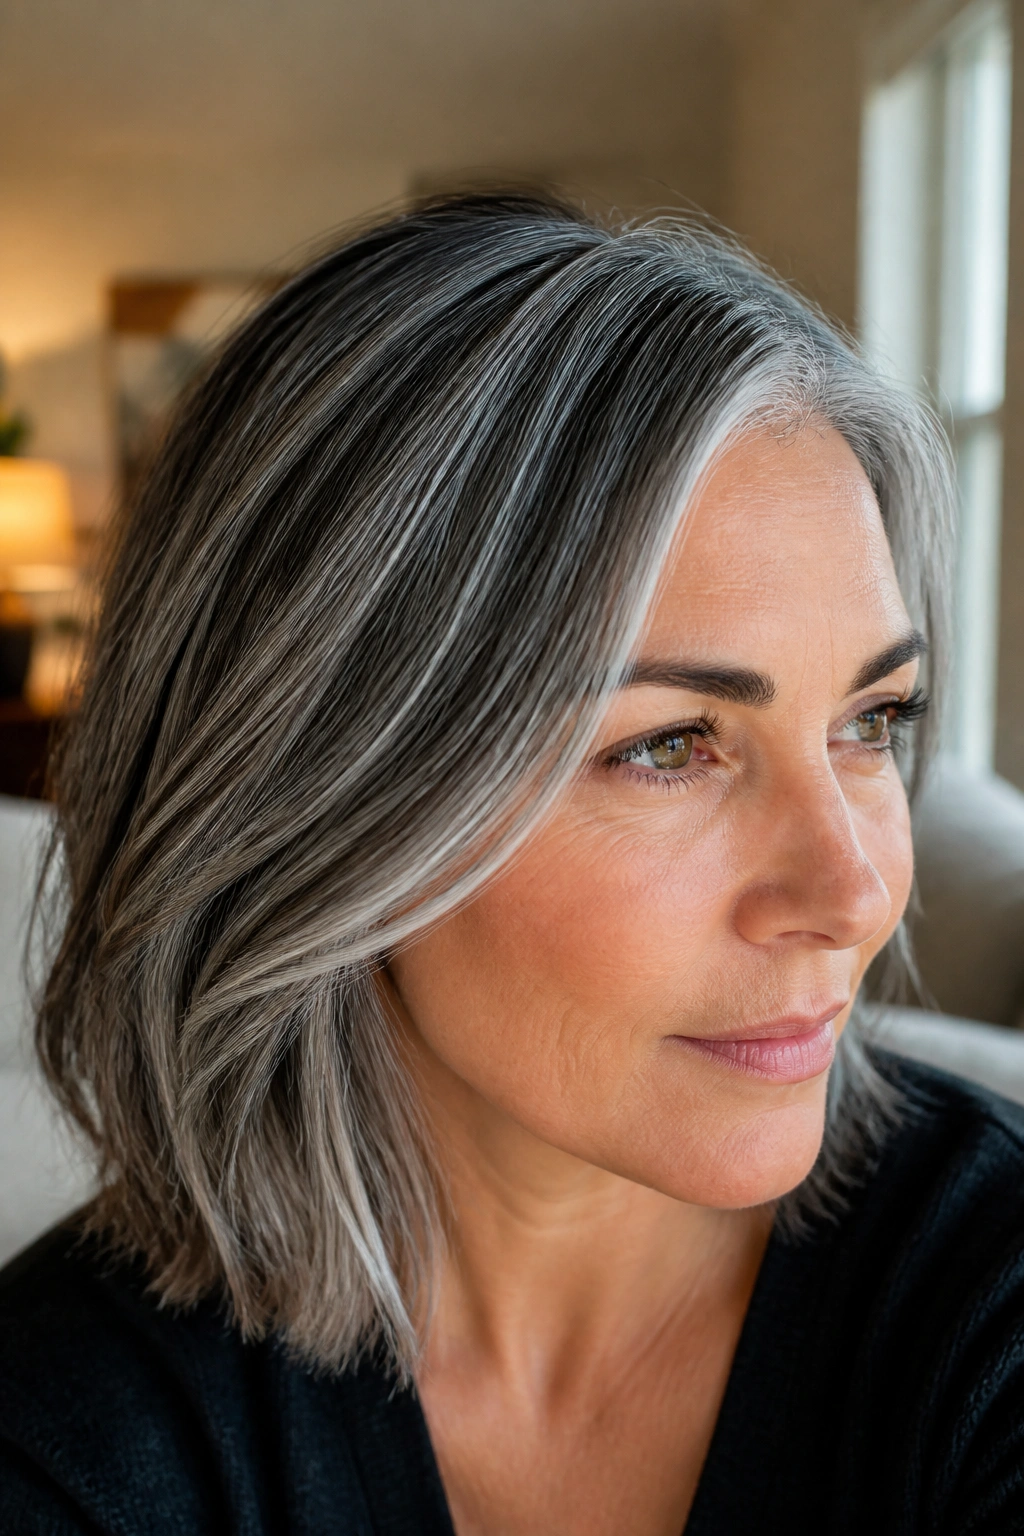
Fine babylights are the least dramatic way to make gray look polished, and that is exactly why they work. They slip between the natural silver strands instead of fighting them, so the whole head starts to look brighter without turning into a stripey mess.
Why It Blends So Well
The trick is size. Ask for baby-fine sections — think 1/16 to 1/8 inch — woven through the crown, temples, and part line. On salt and pepper hair, that tiny placement keeps the eye from locking onto one obvious highlight stripe.
Tone matters too. A silver beige or cool pearl toner keeps the gray looking crisp, while a hard ash formula can go flat if the hair is porous. That’s one of those annoying little truths people learn the hard way.
- Best on medium-length cuts, layered bobs, and soft waves
- Looks especially clean when the gray is already scattered through the top layer
- Needs a gloss after lightening so the silver reads smooth, not chalky
- Grows out softly because the foils are so fine
My advice: ask for a demi-permanent toner, not a harsh permanent blonde. The finish is kinder to gray hair, and the grow-out is much easier to live with.
2. Smoky Ash Face-Framing Highlights
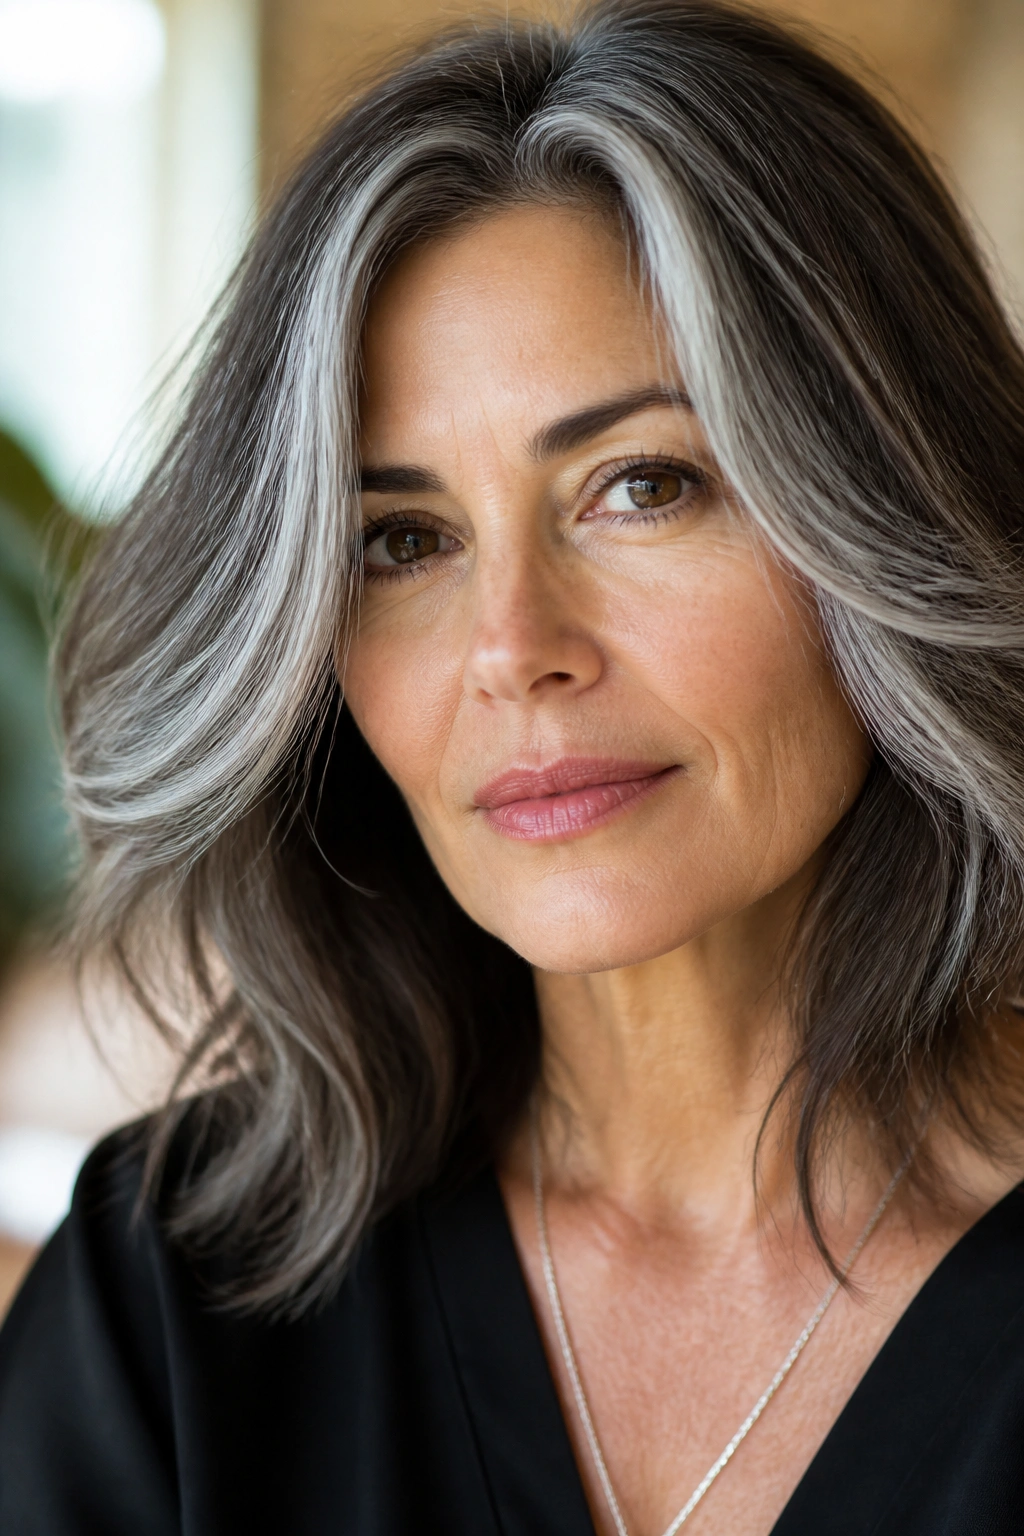
Face-framing pieces change the whole haircut faster than a full-head color job. A few smoky ash ribbons around the cheeks and hairline can wake up tired-looking salt and pepper hair in under two hours at the salon.
This works because the front pieces do the visual heavy lifting. When they’re a shade or two lighter than the rest, they pull the eye up toward the face instead of letting the gray sit in one flat band across the top. It’s a small move with a big payoff.
The best version stays soft. You want smoky ash blonde, not a bright yellow blonde that shouts over the silver. On a lob or shoulder-length cut, the contrast lands right where you want it — around the eyes, jawline, and fringe.
The cut matters here. A blunt bob can handle a sharper front piece. Curly hair needs a gentler, more diffused version, because curls shrink the section and make it look brighter than it did in the bowl. That’s one of those things that looks simple until you sit in the chair.
3. Beige Balayage on a Dark Salt and Pepper Base

Want lift without the icy look that can make gray feel hard? Beige balayage does that job. It sits between warm and cool, which is useful when your natural color has both brown and silver fighting for space.
The appeal is balance. Beige doesn’t flatten the gray the way a heavy golden blonde can, and it doesn’t turn the whole head steely either. On a dark salt and pepper base, the result feels softer around the ends and calmer at the crown.
How to Wear It
- Ask for hand-painted pieces through the mid-lengths and ends
- Keep the root shadow at one to two levels darker than the lightest pieces
- Choose a beige toner with a little neutral warmth, not a yellow one
- Works best on wavy hair, layered cuts, and longer bobs
The grow-out is forgiving, which matters more than people admit. A balayage that looks great for ten days and then turns harsh is a waste of money. Beige holds its shape longer because the contrast is softer from the start.
4. Silver Ribbon Highlights on a Lob
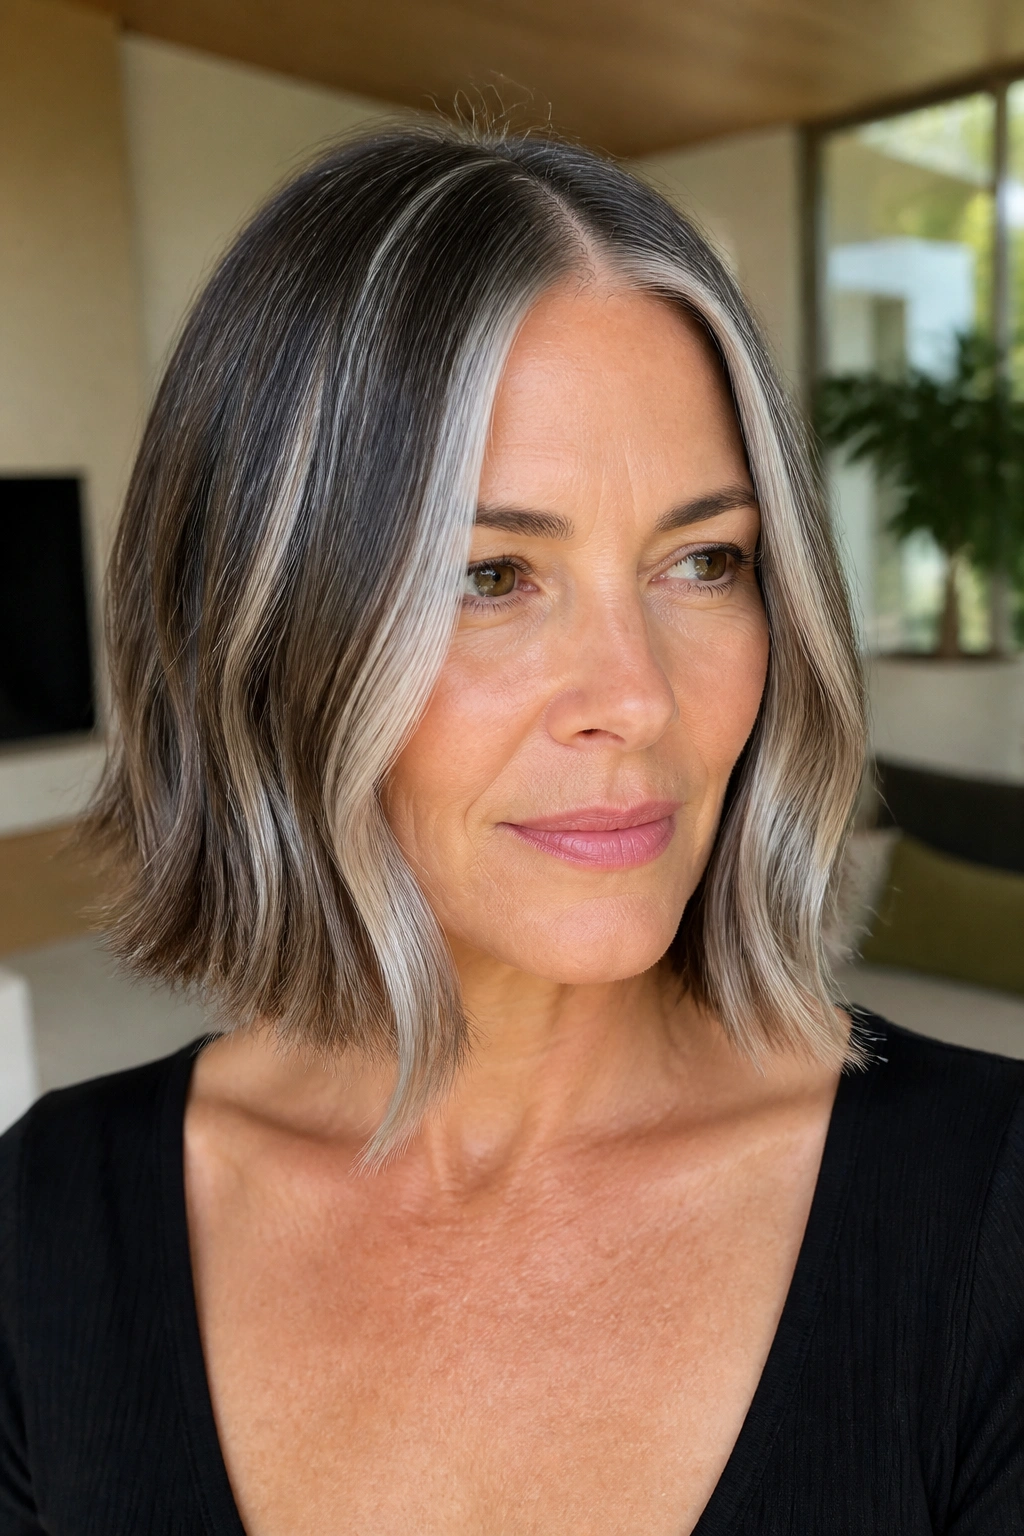
On a blunt lob, wide ribbons of silver can make the cut look cleaner. The shape already has structure, so the color can lean a little more graphic without feeling noisy.
The trick is not to overpack the head with light pieces. Think in ribbons, not clouds. A ribbon highlight is a visible panel, maybe half an inch wide, placed so it bends with the wave or the curve of the bob. Done right, it makes the haircut look sharper and the gray look intentional.
A lob loves this because the ends have enough weight to hold contrast. A shaggy cut can swallow the same color and make it look scattered. Here, the color sits on top of the geometry and does what it’s supposed to do.
- Best with center parts or slightly off-center parts
- Works well when the silver is concentrated through the front half of the head
- Needs a gloss every 6 to 8 weeks to keep the ribbons from going dull
- Looks strongest on straight or softly waved hair
Small warning: if the base is already very dark, ask the colorist to break up the ribbons with a few softer strands. Too much hard contrast can start to look boxy.
5. Chunky Charcoal Streaks for Strong Contrast
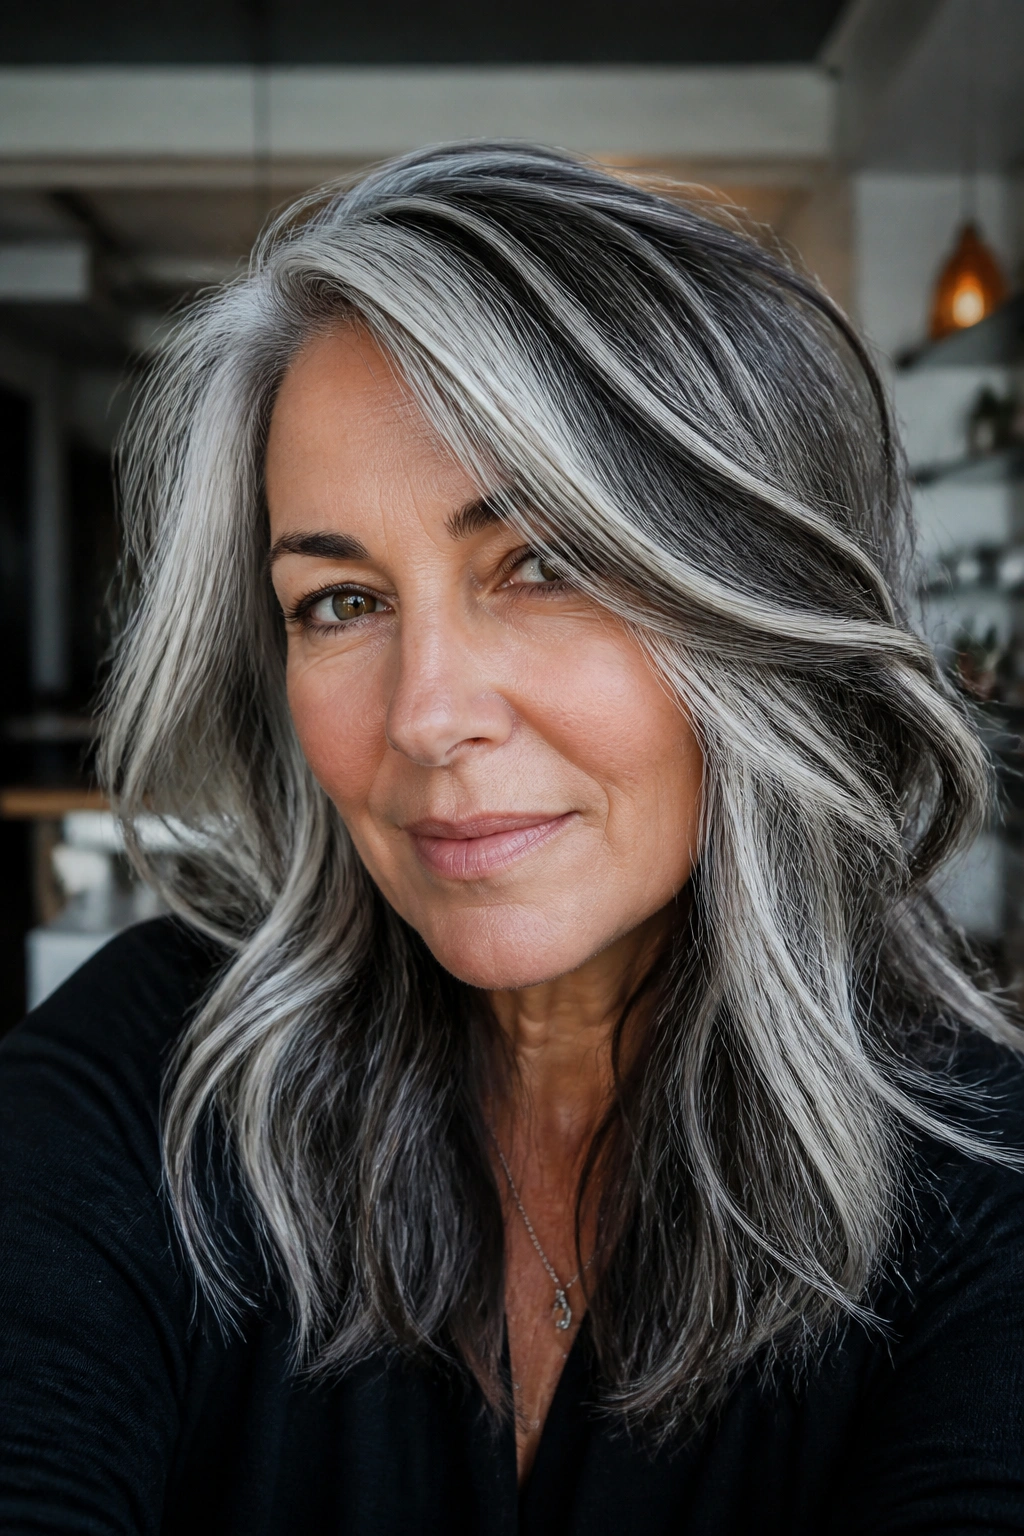
Not every salt-and-pepper head wants to be soft. Some people want the contrast turned up, and chunky charcoal streaks are a good way to do it without looking like a throwback to a bad foil job.
The idea is simple: place larger, deeper lowlights against the silver instead of trying to brighten everything. Those darker panels can be graphite, charcoal, or mushroom brown, depending on how much depth the hair needs. The silver starts to look brighter by comparison. That part never gets old.
This is a strong look on layered cuts, especially if the hair has movement. On fine hair, though, it can go heavy fast. In that case, keep the streaks fewer and place them under the top layer so the contrast appears in motion rather than sitting on the surface all day.
The mood here is confident, not delicate. If you like a little edge in your color, this is one of the better choices. If you want your gray to quietly disappear into the rest of the hair, skip it.
6. Champagne Highlights for Warmer Skin Tones
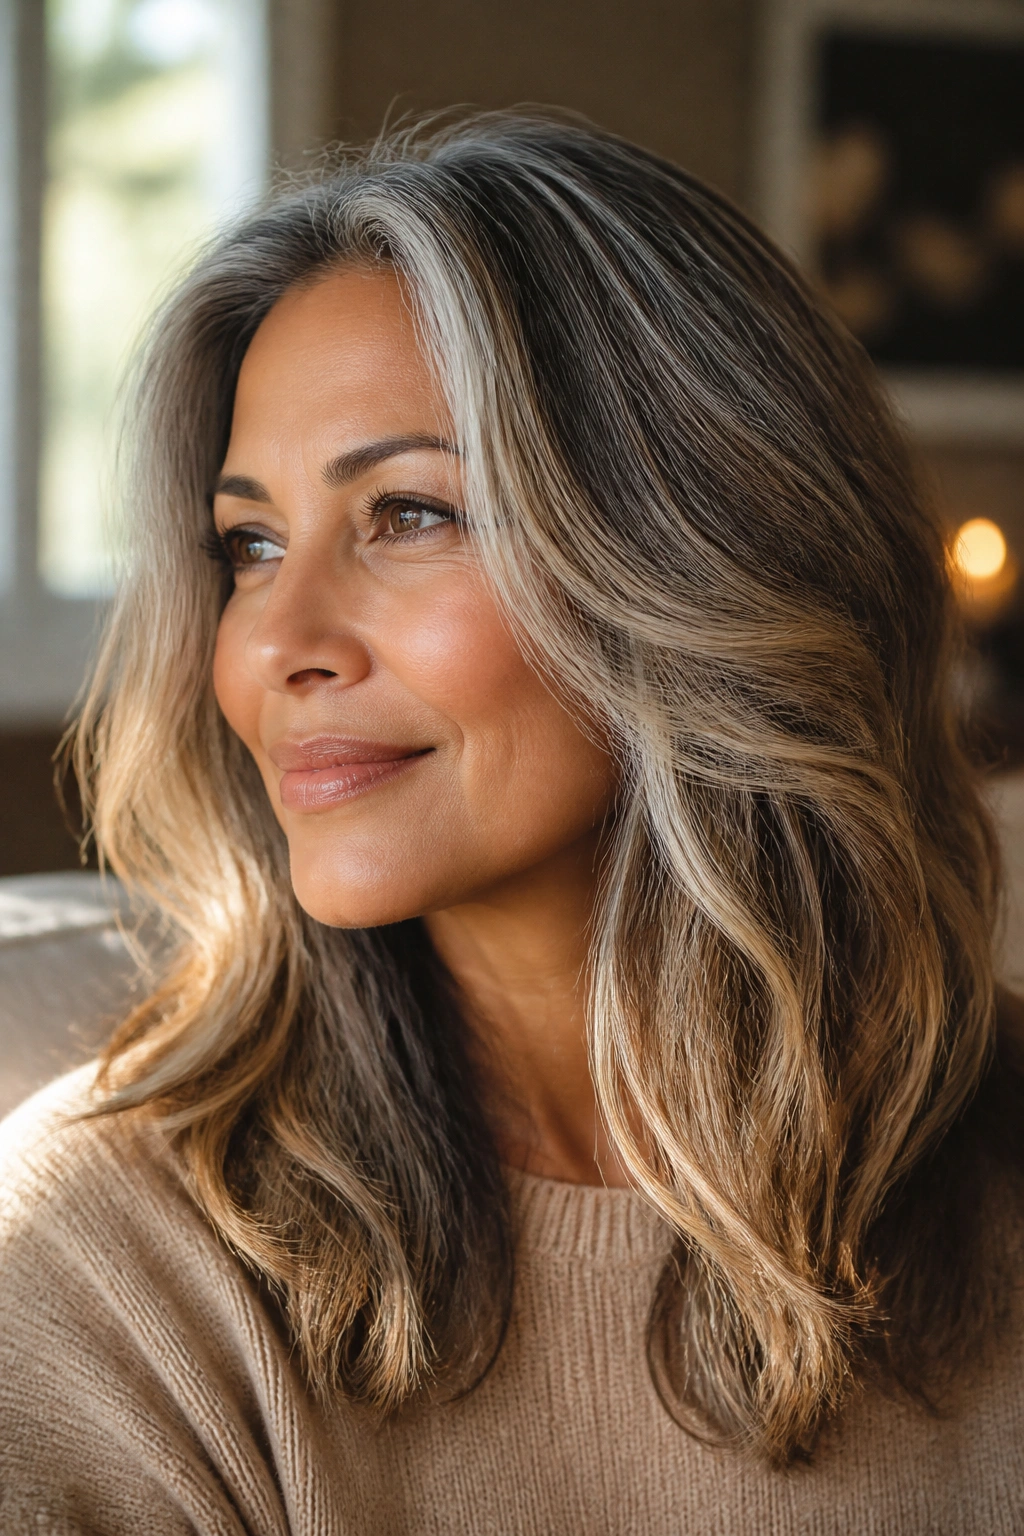
Unlike ash or silver, champagne brings cream and a touch of gold. That small shift makes a huge difference if your skin leans warm, peachy, olive, or golden.
Champagne highlights keep salt and pepper hair from reading too cold. A lot of gray-blending color ends up icy, and icy can be chic for about five minutes before it starts washing out the face. Champagne keeps the light pieces soft while still showing dimension.
The best version isn’t yellow. It’s a muted beige-gold, lifted enough to brighten but controlled enough to sit beside gray. Around the face, that warmth can make the whole complexion look less flat. On the ends, it gives the hair a gentle glow instead of a sharp flash.
This is the look I’d steer toward if you already wear cream, tan, camel, or warm brown clothing more often than black and charcoal. The hair will feel connected to the rest of your look instead of floating off on its own.
7. Salt and Pepper Hair With a Bright Money Piece
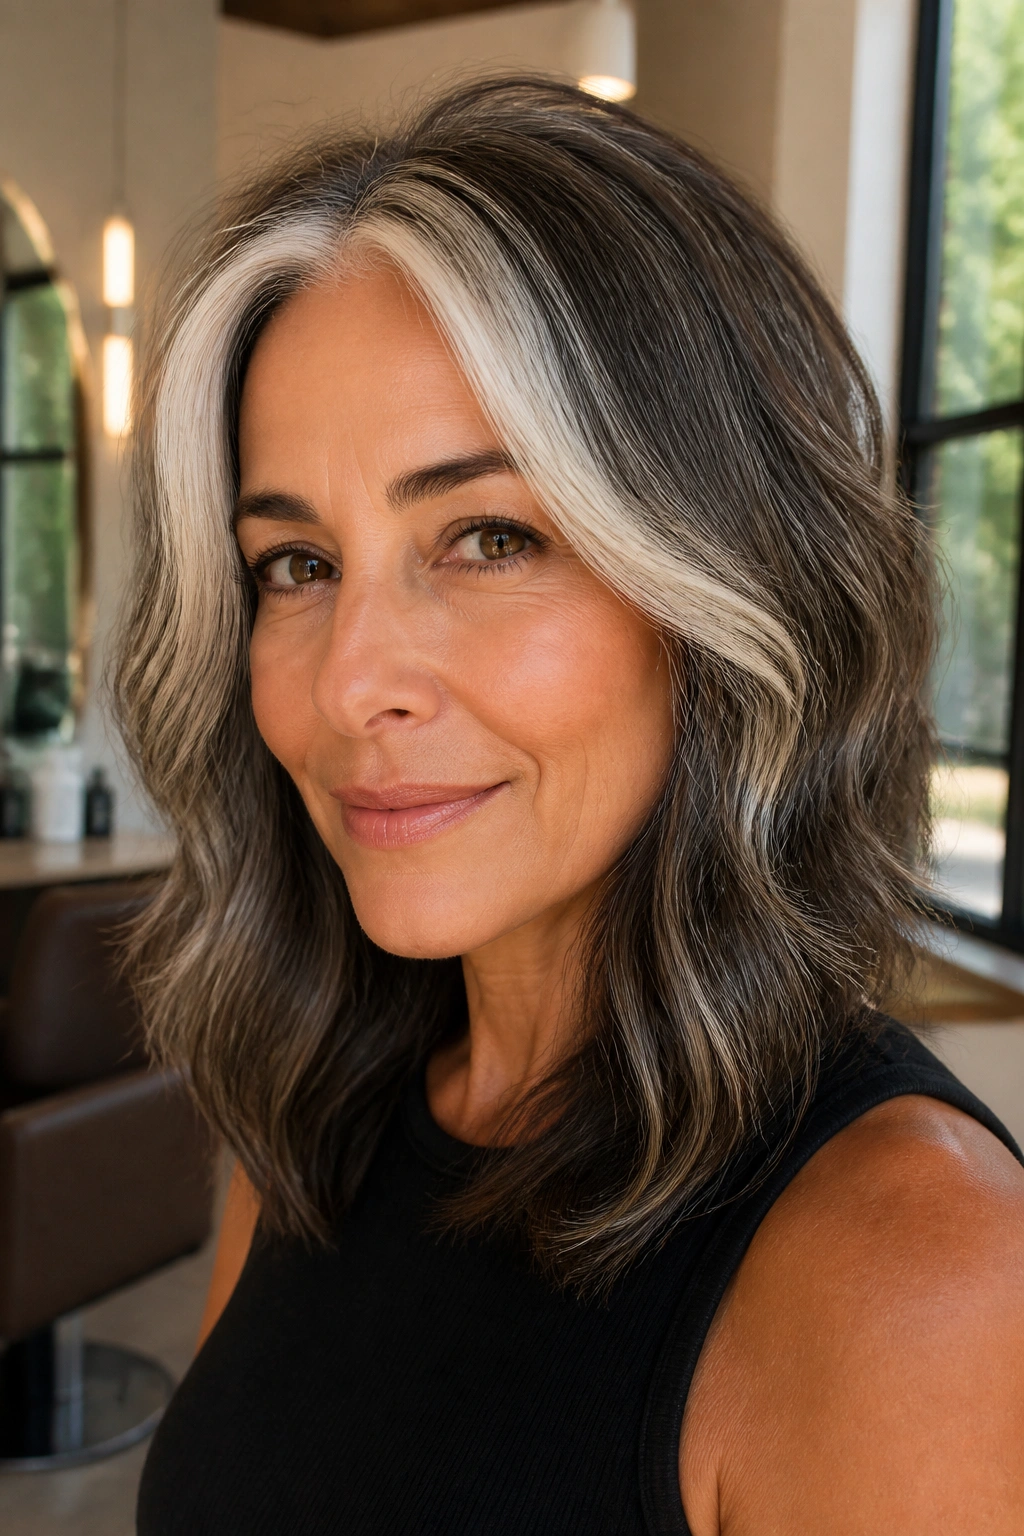
What if you want brightness near the face without repainting the whole head? A money piece handles that job with almost rude efficiency.
The bright strip at the hairline can be pearl, soft platinum, or an icy beige, depending on how bold you want it. Keep it around 1 to 1.5 inches wide and let it frame the face from the part down toward the cheekbone. Wider than that, and it starts to look pasted on. Narrower, and the effect gets lost.
How to Keep It Clean
- Blend the back edge with a soft smudge so the color does not stop suddenly
- Match the tone to the gray in the front hairline
- Keep the lightest parts a shade softer than white if your skin is very fair
- Use a purple shampoo sparingly; too much can make the front look dingy
A money piece is not subtle. That’s the point. It works best when the rest of the head stays quieter and the front gets to do the talking.
8. Frosted Ends With a Soft Root Shadow
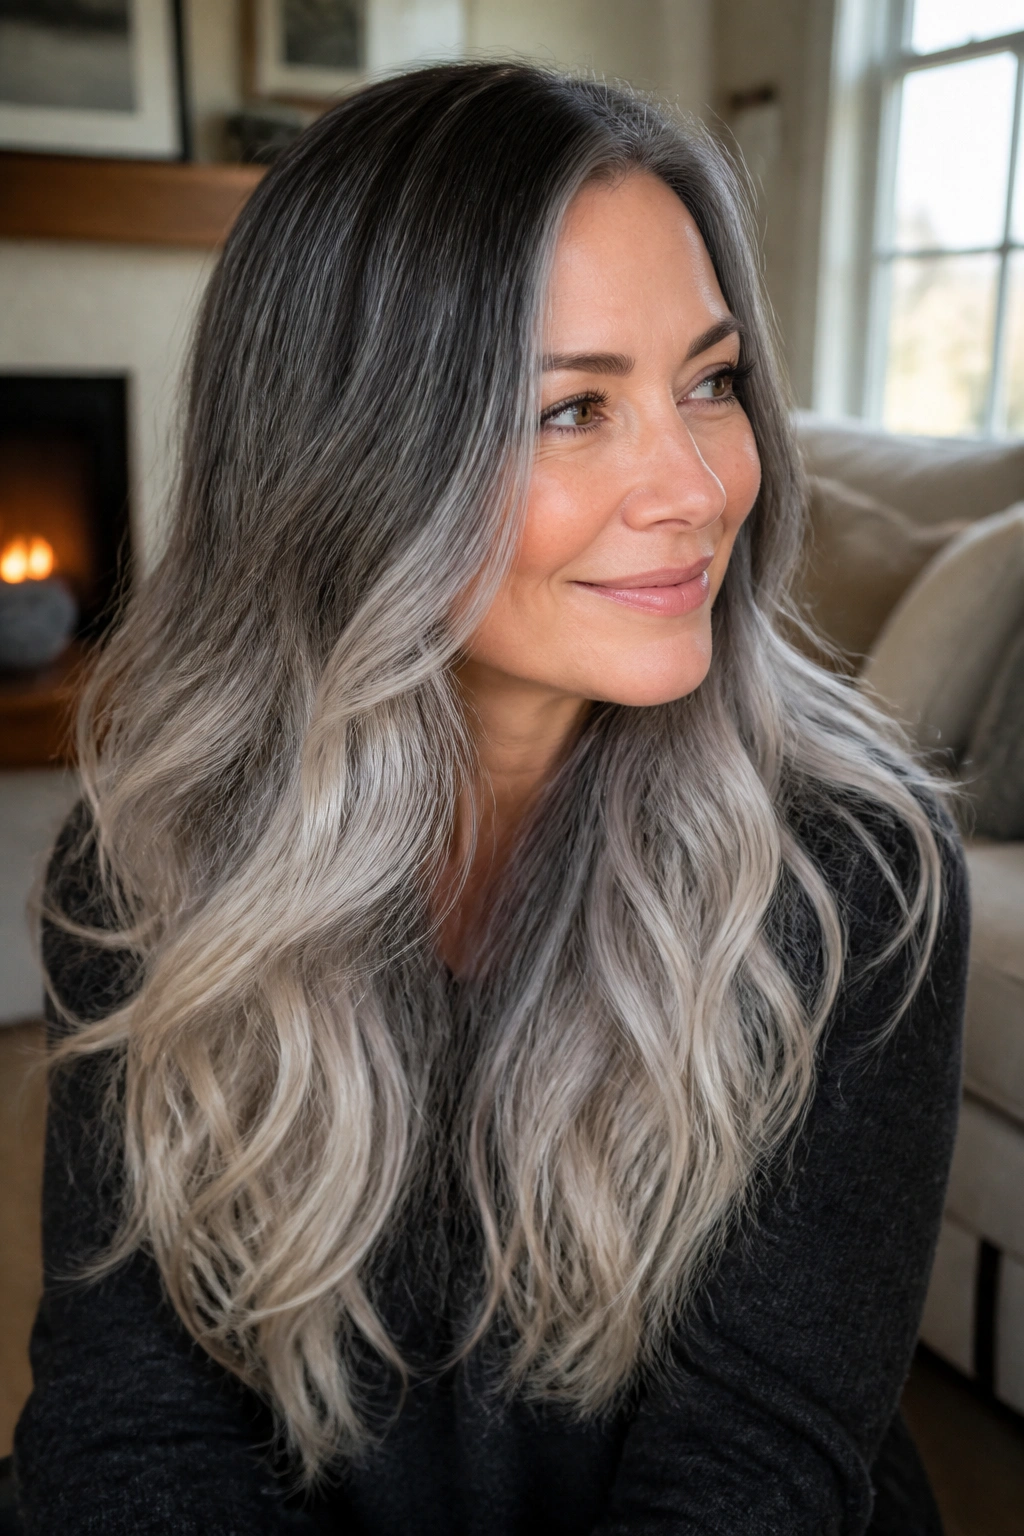
Long hair can carry a lot of contrast if the roots stay quiet. That’s why frosted ends with a soft root shadow make sense on salt and pepper hair that has length and movement.
The root shadow keeps the top section natural-looking — usually at level 5 or 6, depending on the base — while the ends are lifted to a frosty silver, pale beige, or very light pearl. You get a faded, airy effect that feels deliberate rather than overprocessed.
The ends need care. Lightened hair can feel dry fast, and frosted lengths show damage more quickly than darker ones do. If the ends start looking rough, the whole style loses its edge. A small trim every few months helps, and so does a bond-building mask that actually leaves the hair slippery, not coated.
This look suits waves and layered cuts best. Straight hair can handle it too, but you need a tidy cut at the bottom so the light ends do not look frayed.
9. Micro-Highlights for Seamless Gray Blending
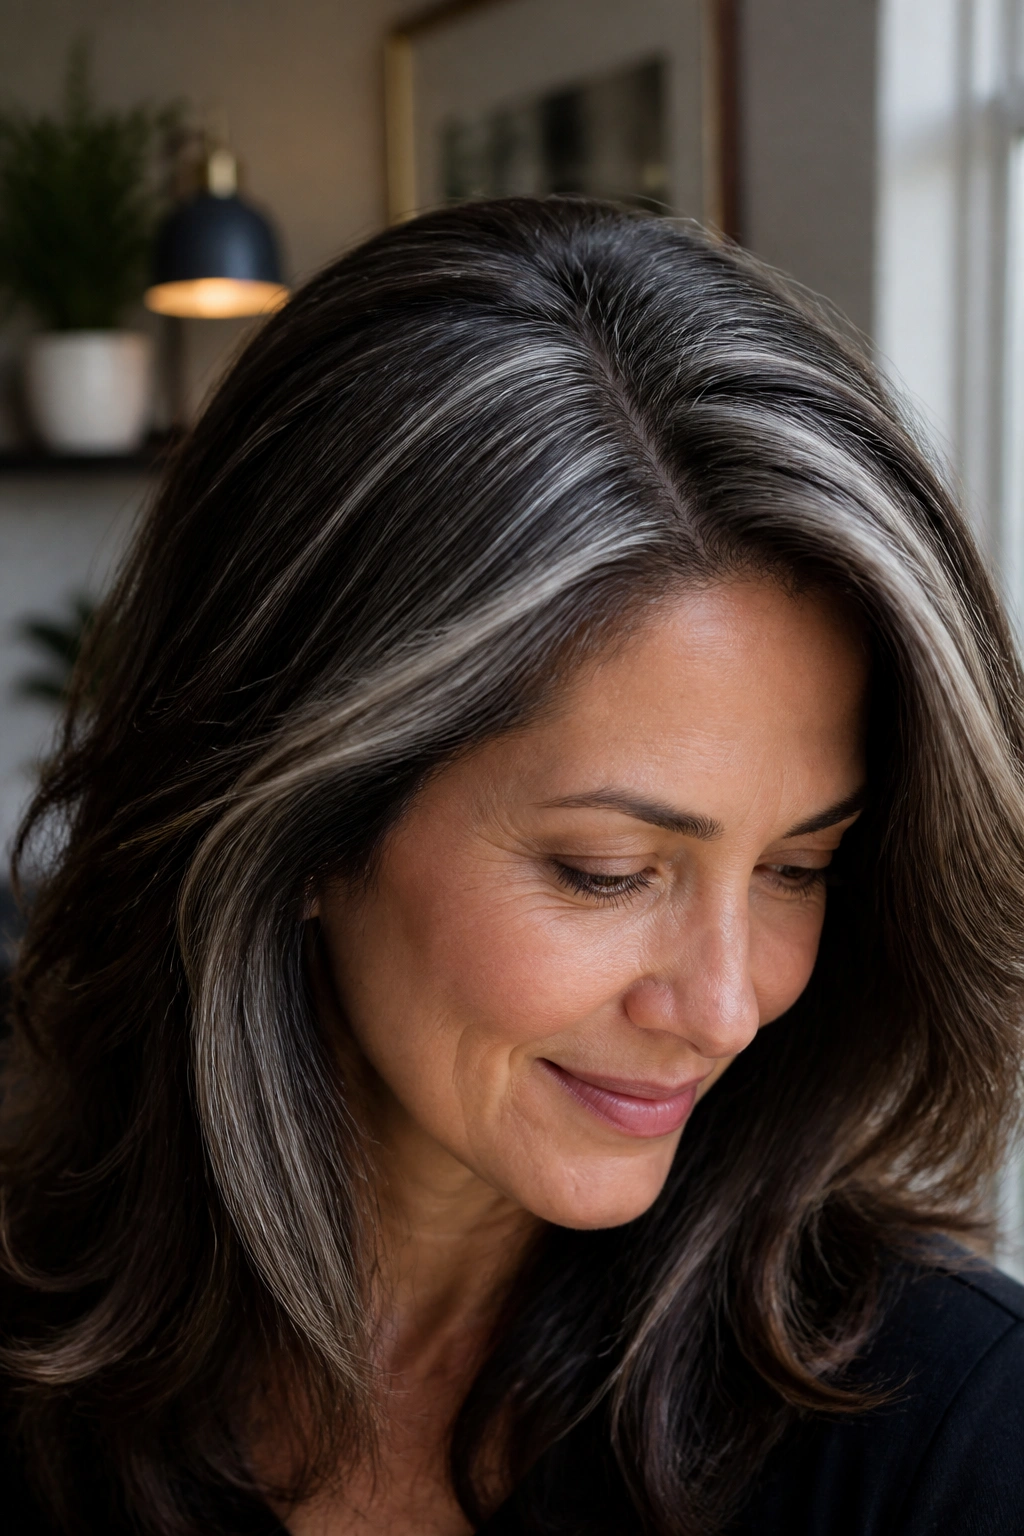
The smaller the slice, the softer the grow-out. Micro-highlights prove that point every time.
These tiny woven pieces blur the line between silver and brunette so the color reads blended instead of striped. The work takes longer in the chair, which is the part people do not always want to hear, but the finish is worth it. You’re building dimension in thin layers rather than trying to create a dramatic before-and-after shot.
What to Ask For
- Baby-weave foils around the part, crown, and hairline
- Lift that stays within one to two levels of the natural base
- A demi gloss over the top so the silver and brown sit in the same tonal family
- Extra attention through the temples, where regrowth shows first
This is the look for someone who wants the silver to feel blended, not painted. It grows out quietly. No hard line. No obvious root band. Just a softer, more expensive-looking mix of tones.
One catch: if the hair has already been lightened a lot, micro-highlights can disappear into the background. They work best on hair that still has some natural depth left in it.
10. White-Silver Panels on Short Pixies
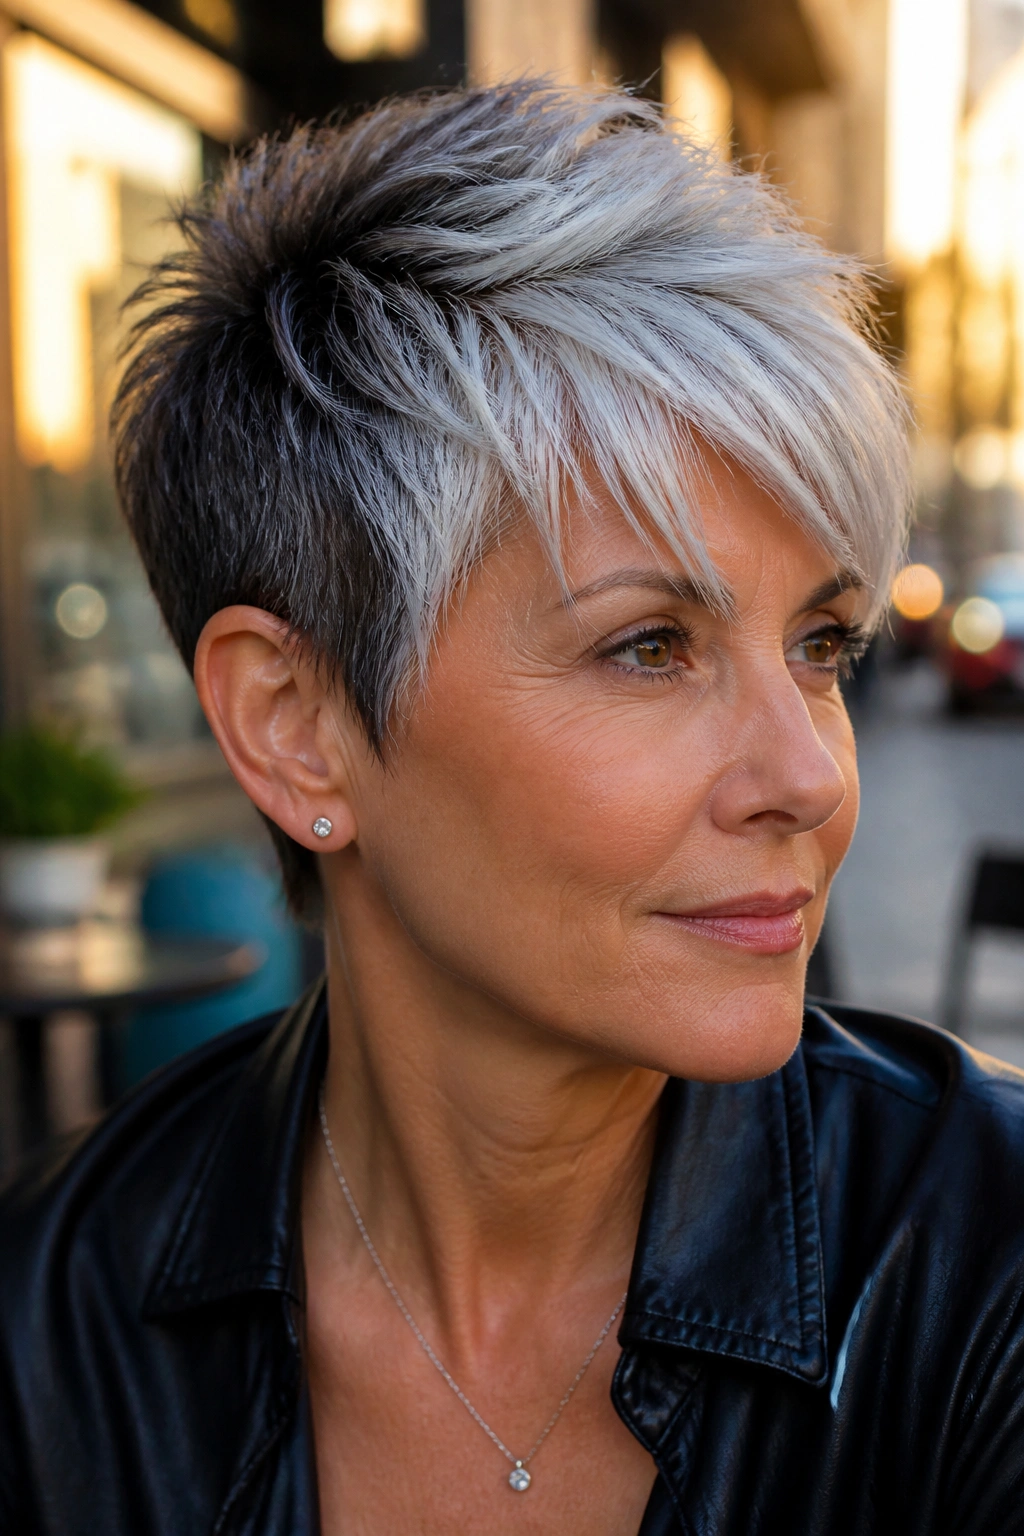
A pixie can handle more drama than people think. In fact, short hair sometimes needs a stronger color idea because there’s less length to show off softness.
White-silver panels on a pixie use the cut like a little sculpture. The brighter sections sit on top, at the fringe, or across one side of the crown, while the underlayers stay darker or natural. That contrast shows off the shape of the cut and makes the texture look sharper.
This works especially well when the silver in the hair is already strong and the goal is to own it. A short crop with white-silver pieces looks clean, not messy, if the panels are placed with intention. The edges around the ears and nape should stay neat so the brightness has a frame.
- Best on textured pixies and longer cropped bangs
- Strongest when the top is layered enough to show movement
- Needs frequent trims, since short cuts lose shape fast
- Looks striking with matte styling paste or a light pomade
A pixie leaves nowhere to hide, which is exactly why the color has to be good.
11. Mushroom Brown Lowlights With Silver Sparks

Highlights do not have to do all the work. Sometimes the smartest move is adding depth back in with mushroom brown lowlights so the silver has something to bounce off.
Mushroom brown sits in that cool, soft taupe zone that works well on salt and pepper hair. It is darker than beige, softer than espresso, and a lot less harsh than black. When it’s placed underneath the silver or through denser areas of the hair, the whole color gets more shape.
This is a good fix for hair that feels too flat after years of growing out dye. It also helps thick hair look less puffy, because the darker pieces visually compress the bulk a little. Not in a bad way. Just enough to bring the cut back under control.
The best placement is usually hidden or semi-hidden — nape, underlayers, or between larger silver sections. That way the lowlights create depth without making the head look patched.
12. Peekaboo Highlights Under the Top Layer
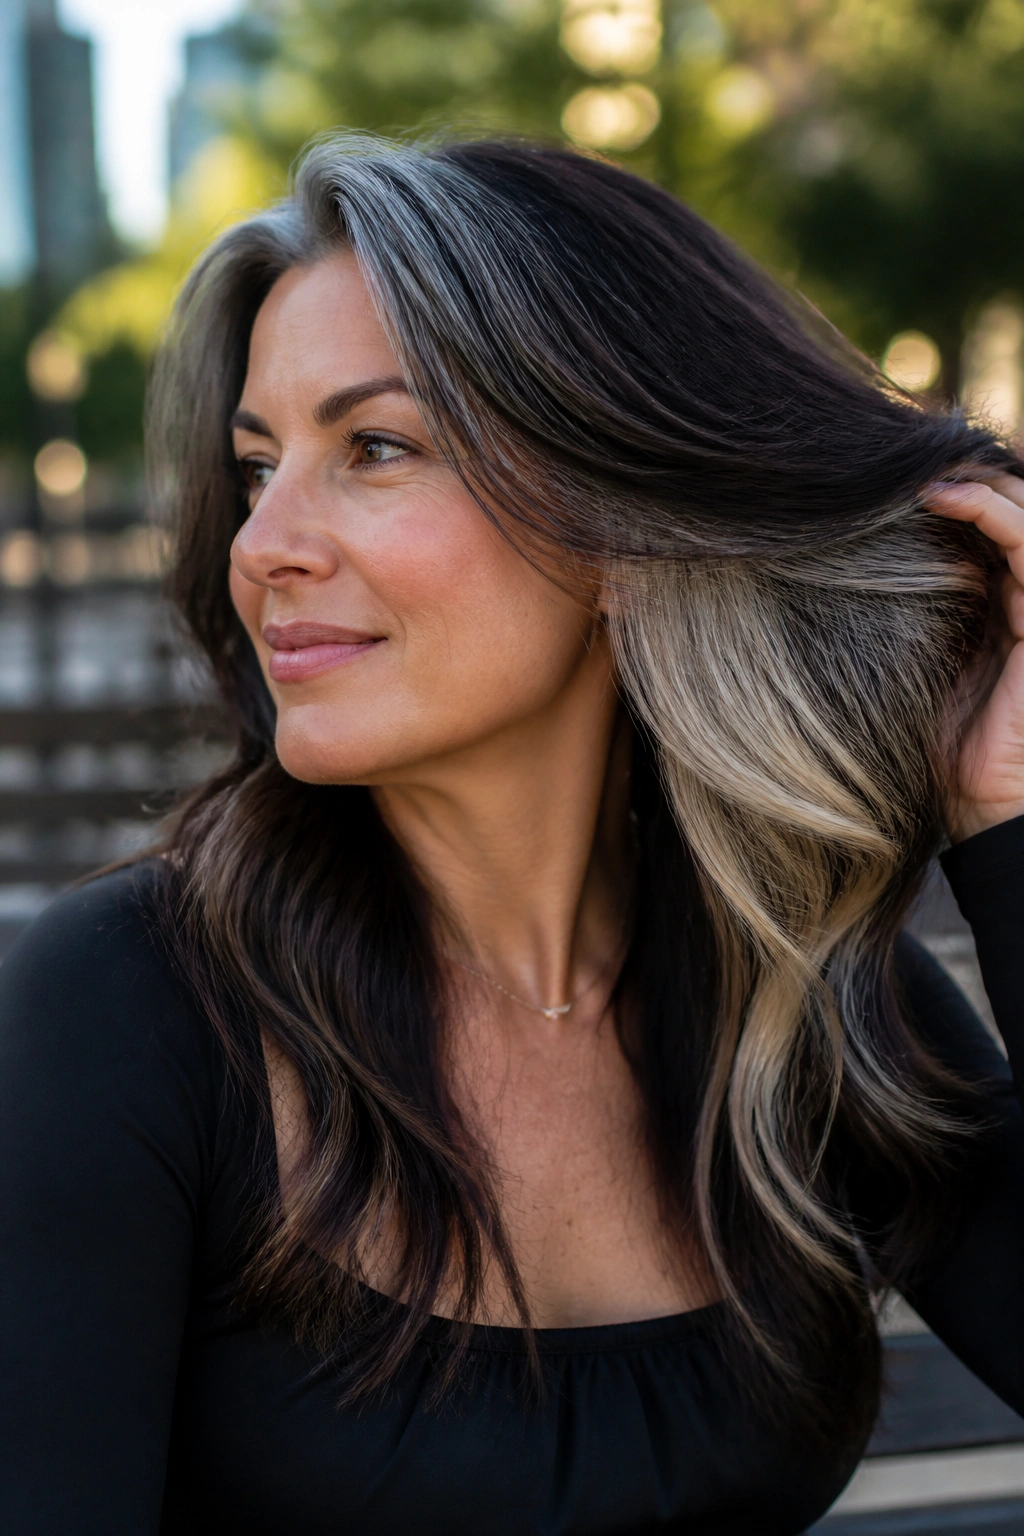
Want color that only shows when hair moves? Peekaboo highlights do exactly that.
The lighter pieces sit under the top layer, so the silver or smoky blonde flashes through when the hair swings, parts, or gets tucked behind the ear. It’s a clever choice for people who want a little edge without seeing the color all day long in the mirror.
The placement matters more than the shade. A peekaboo section that’s too high will show too much and lose the surprise. Too low, and nobody will ever see it. Under the crown, behind the temple, and near the nape are the zones that usually give the best payoff.
Where to Place Them
- Under the side panel near the temple
- Beneath the top layer at the crown
- Across the nape for a hidden flash when hair is lifted
- Around a deep side part if you want the color to show only on one side
This is the look I’d pick for someone who likes a little mischief in their color. Quiet on the surface. Different when the hair moves.
13. Bronde Veil Highlights on Medium-Length Hair
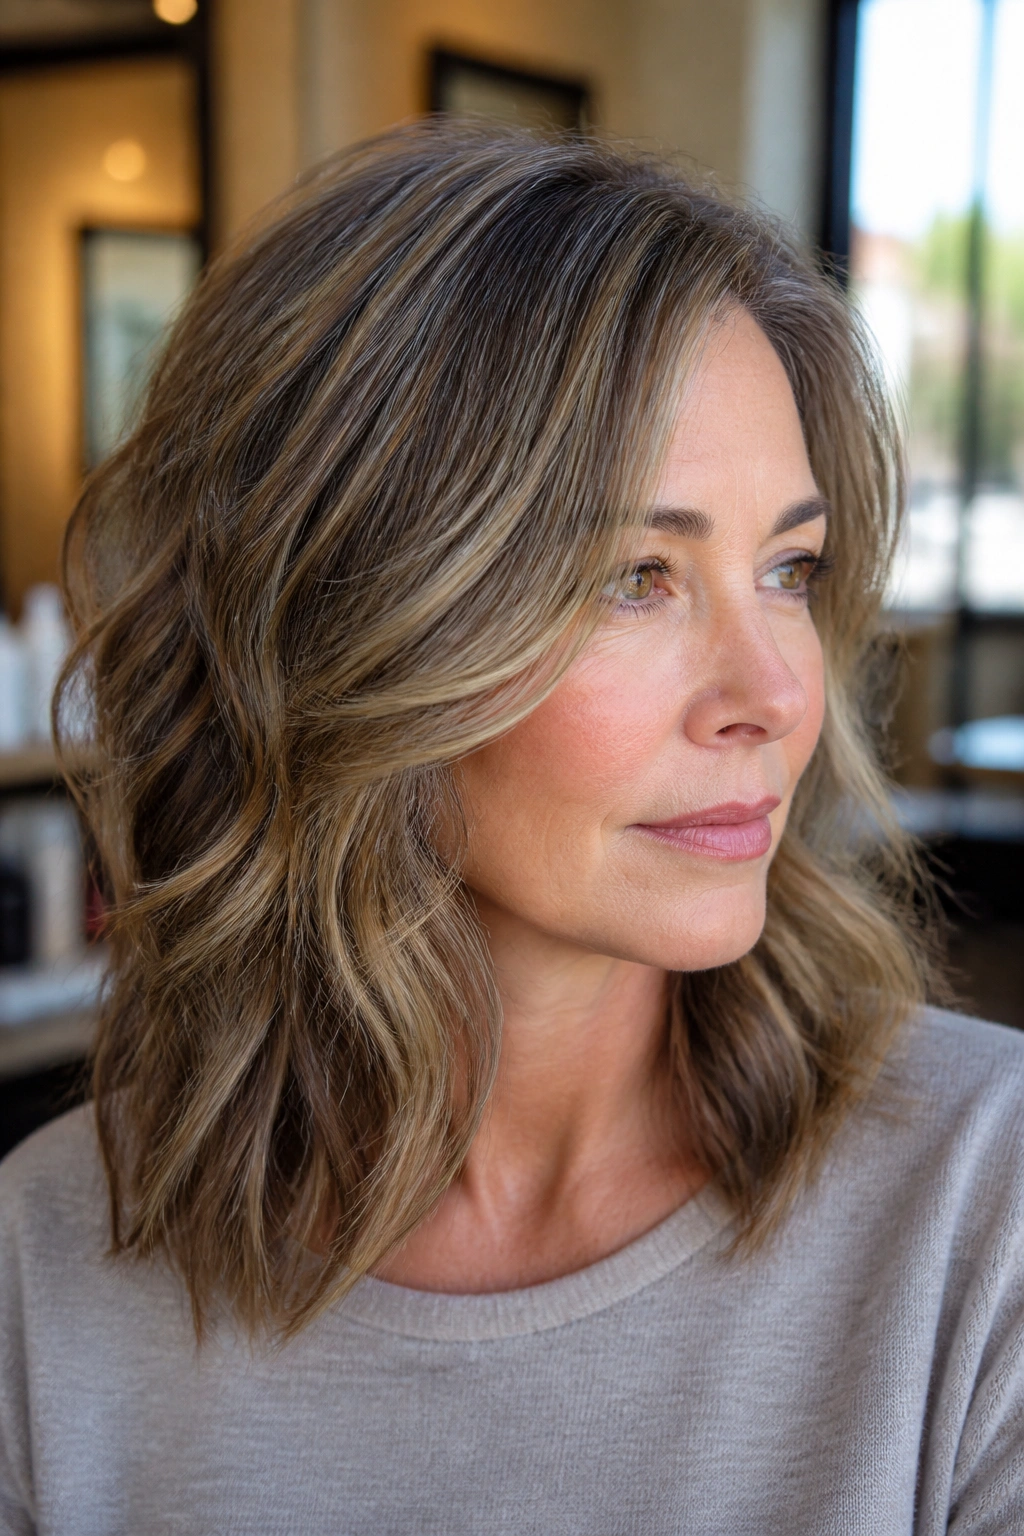
Bronde works when you want one foot in brown, one in blonde. On salt and pepper hair, that middle ground can be exactly right.
A veil highlight is softer than a ribbon and less obvious than a streak. It’s a diffuse layer of lighter pieces spread through the top and sides so the whole head gets a light haze instead of a patchwork effect. On medium-length hair, that gentle spread gives the cut movement without turning the silver into the main event.
This look tends to suit people who want the hair to feel lived-in. Not flat, not loud. Just better lit. A mid-length cut with a few bends or waves is enough to catch the dimension, which is why this style works so well on collarbone lengths and soft layered lobs.
The toner should stay in the neutral-beige zone. Too cool, and the brown base can look dull. Too warm, and the salt-and-pepper pattern gets muddy. Bronde depends on that middle lane.
14. Copper-and-Silver Contrast for a Bold Mix
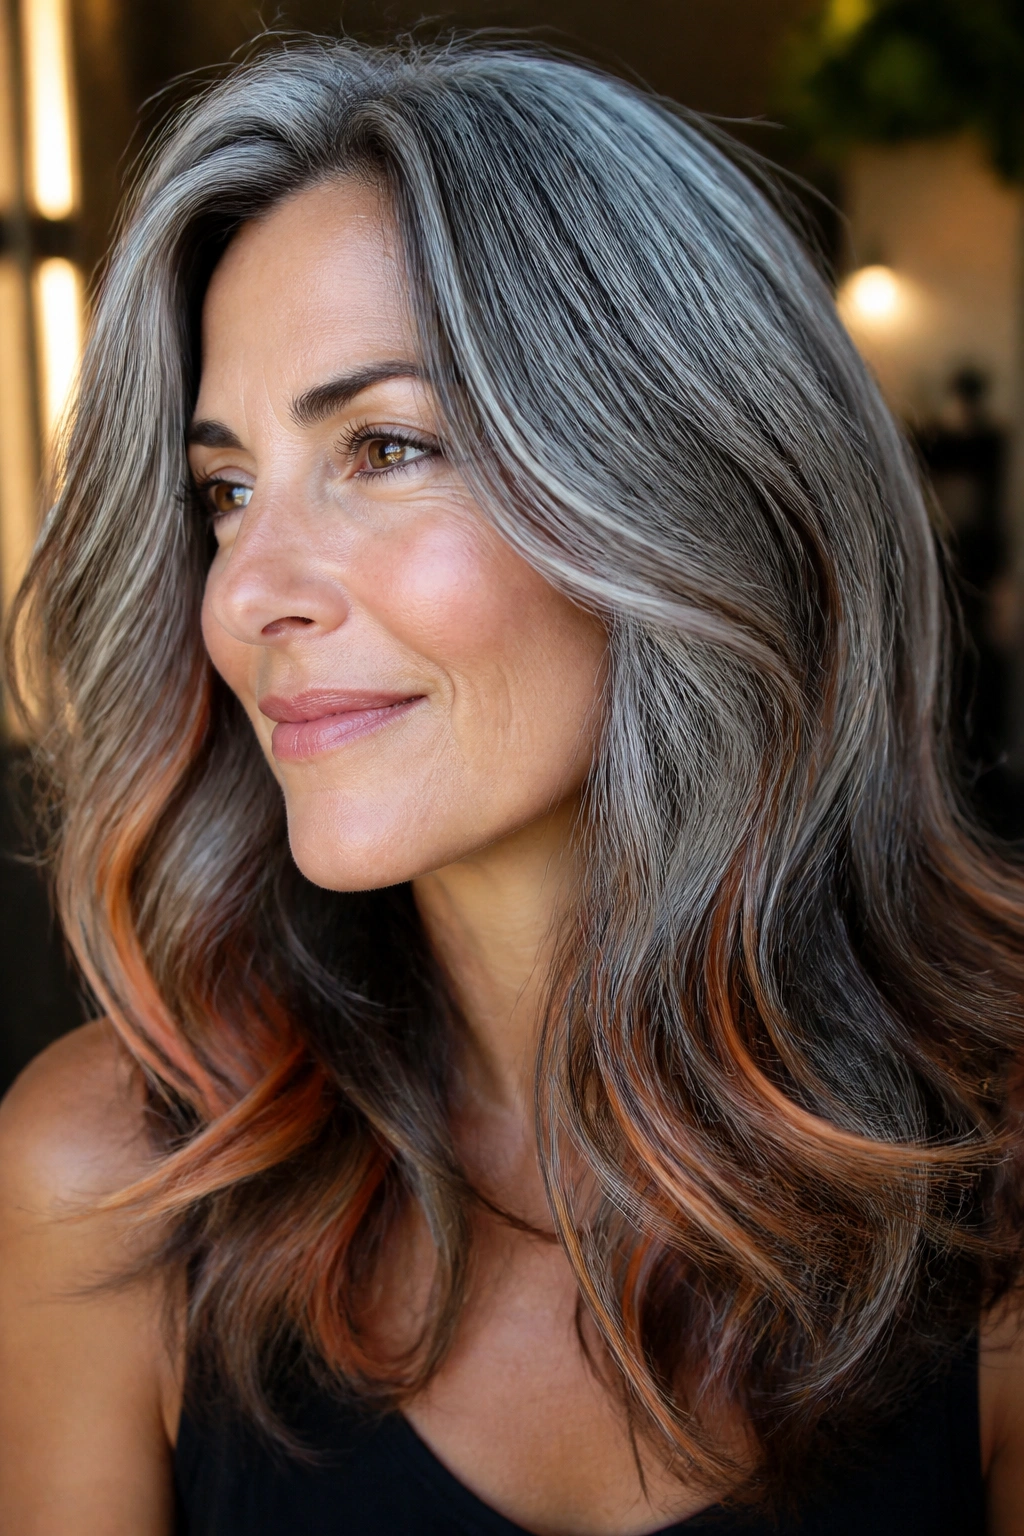
Gray does not have to stay cool. A little copper can make silver look sharper, stranger, and more interesting.
That does not mean coloring the whole head orange. Please don’t. The smart version uses copper or soft cinnamon in small ribbons, usually underneath the silver or around the ends, so the warm tone flashes out only when the hair moves. The contrast between the warm metal tone and the cool silver can be electric.
This works best on warm skin tones, hazel eyes, and layered cuts with movement. The copper catches light fast, so it should be placed where the hair bends, not in big heavy blocks. A few inches of warmth are enough. More than that, and the balance tips hard.
- Keep the copper muted, not brassy
- Refresh it often, since warm tones fade fast
- Use it in small sections if the base gray is strong
- Ask for gloss, not a permanent orange shift
This is a fearless look. Not everyone wants it. The people who do usually know within ten seconds whether they can wear it.
15. Salt and Pepper Hair With Highlights and a Clear Gloss Finish
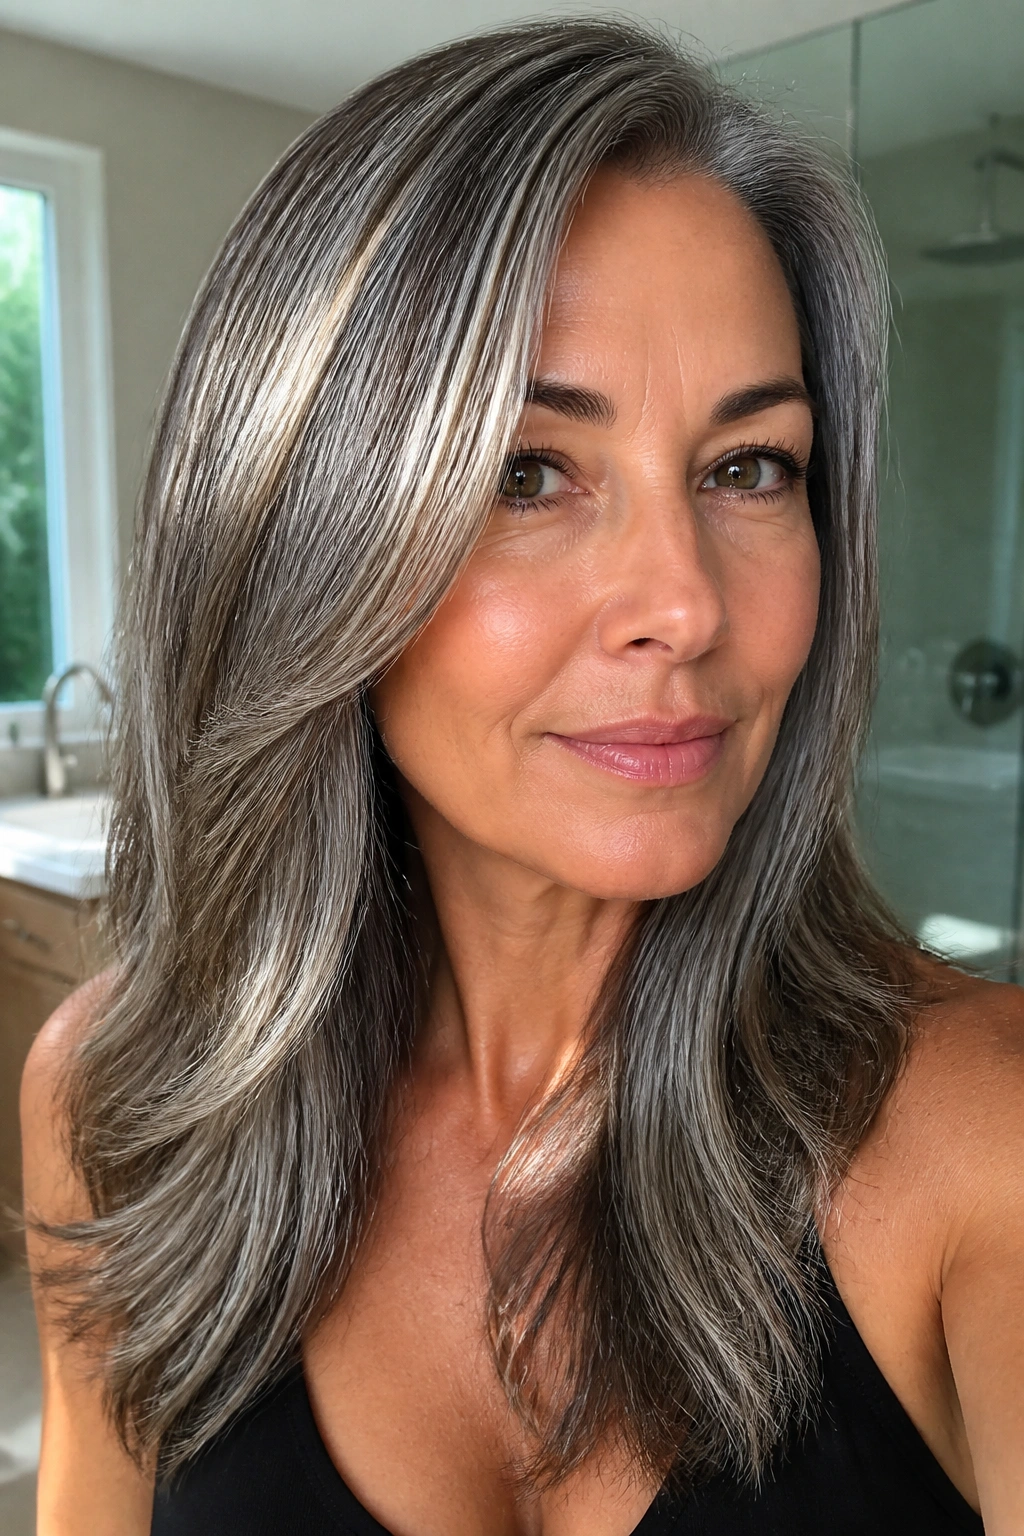
Sometimes the best version is not brighter. It is cleaner.
A clear gloss over salt and pepper hair with highlights can make the silver look smoother, the brunette pieces look richer, and the whole head look less dry. It is one of those finishing steps people skip because it sounds boring. Then they see the before-and-after shine in the mirror and change their mind.
This works especially well when the color already has a nice mix and just needs a polish. The gloss seals the cuticle enough to soften that rough, wiry feel gray hair can get around the temples and crown. It also helps the highlights sit together instead of looking like separate strands.
If you like a low-maintenance finish, this is the quiet winner. Not every client needs more light. Some need better tone, a smoother surface, and a haircut that lets the color breathe. That’s the whole point, really.
Final Thoughts
The strongest salt-and-pepper looks usually share one thing: they stop pretending gray is the problem. Whether the style leans icy, beige, warm, or high-contrast, the best result is the one that respects the natural pattern already in the hair.
If you’re taking one reference photo to the salon, make it the one that matches your actual gray pattern, not the one with the prettiest lighting. That little bit of realism saves a lot of disappointment.
And ask about toner. Always. It’s the quiet step that keeps highlights from turning harsh, dull, or weirdly flat after the first wash.
