



Music festivals are essentially high-intensity testing grounds for personal style. You have heat, humidity, dust, crowds, and hours of movement all working against whatever look you spent the morning assembling. That is precisely why hair chalk remains the undisputed champion of festival styling. It offers a radical departure from your everyday appearance without the commitment of chemical dye or the permanent damage that comes with bleaching your hair to get those neon pigments to show up. Whether you are aiming for a subtle shift in tone or a total neon transformation, hair chalk delivers high-impact color that you can wash out the moment you step into your shower after the weekend ends.
Authentic, vibrant results depend entirely on your technique. If you simply drag a dry stick of chalk over a strand of hair, you might end up with a dusty, patchy mess that transfers onto your clothes within the first hour. The secret lies in understanding how the pigment interacts with your hair texture. High-porosity hair drinks up the chalk immediately, while finer, smoother strands might need a little extra help to hold the color. You aren’t just applying pigment; you are building a temporary bond. The following looks are designed to survive the mosh pit and the afternoon sun, provided you take a few extra minutes during your prep to lock everything in.
1. The Sun-Kissed Sunset Ombré
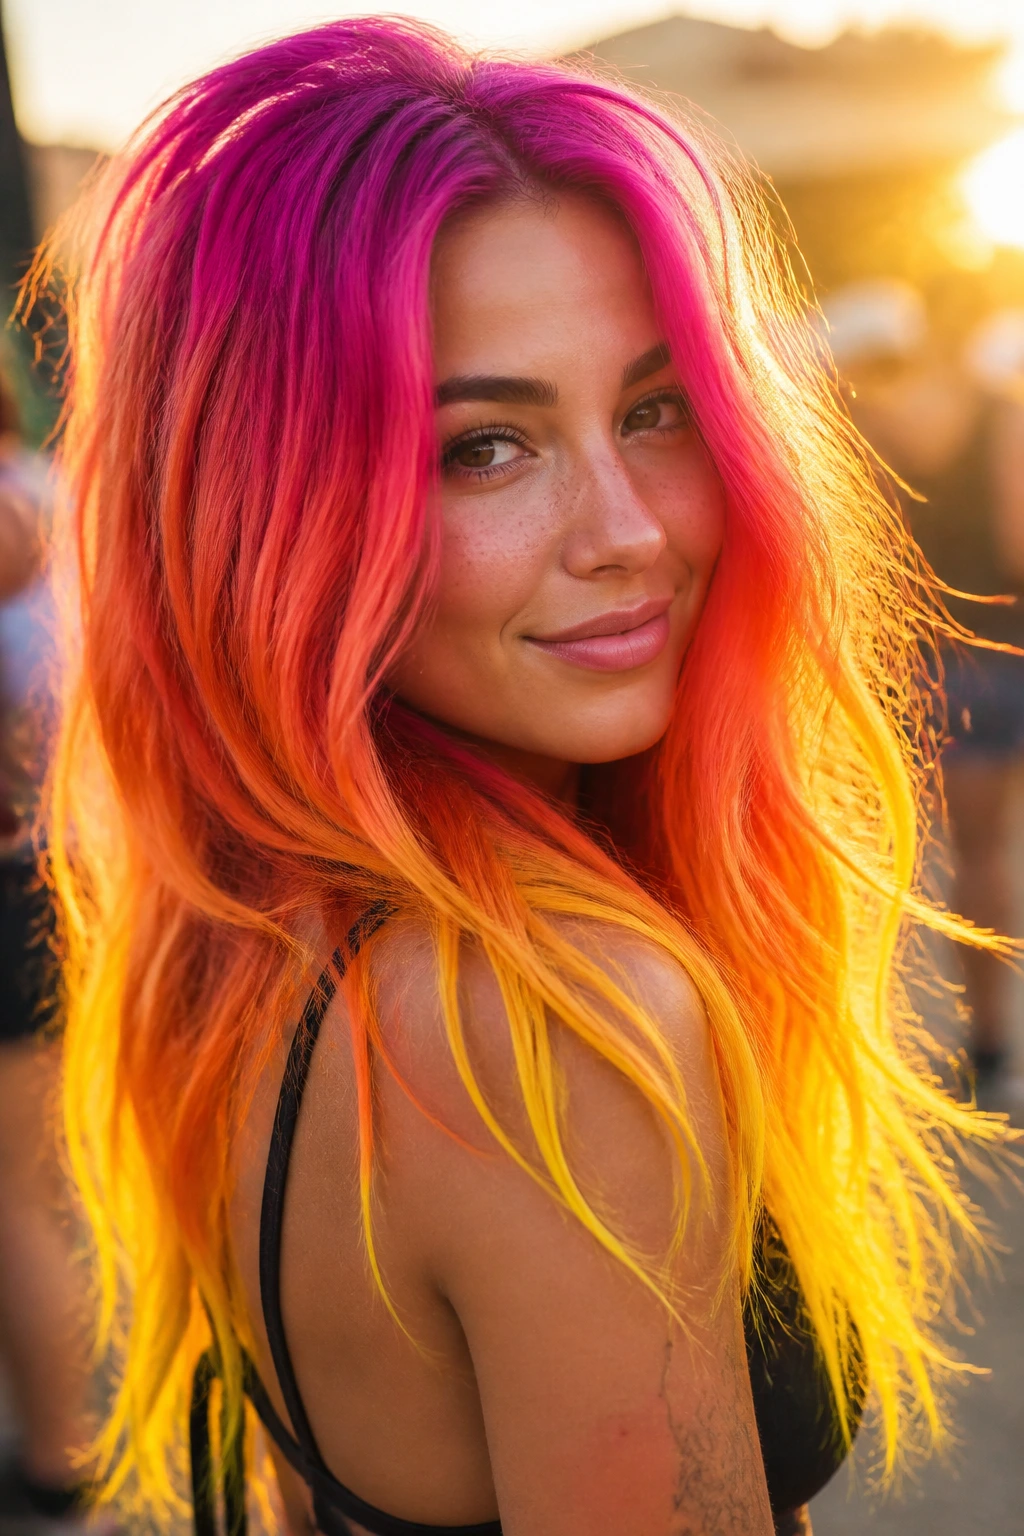
There is something undeniably effective about a gradient that mimics the sky during the golden hour. To achieve a sunset ombré, you need at least three colors: a deep magenta, a fiery orange, and a bright yellow. Start by sectioning off a small piece of hair. You want the darker, cooler tones at the roots or just below, transitioning down the length of the hair into the warmer, lighter colors near the ends. This requires a bit of patience because blending is the key to preventing a harsh, chunky appearance.
Why Blending Matters
If you leave defined lines between the colors, the effect looks artificial. Use your fingers to rub the colors together where they overlap. The heat from your hands actually helps melt the chalk slightly, softening the transition points. Start with the magenta, apply it to the top portion of the section, and then bring in the orange while the magenta is still fresh. Rub the two colors together to create a seamless orange-red blend. Repeat this process with the yellow as you move toward the tips.
Pro tip: Use a light-hold hairspray before you start to give the chalk something to grip onto. After you finish the blending, give it a heavy misting of setting spray to lock the pigments in place. If you don’t seal it, the color will likely end up on your shoulders by the time the first band starts playing.
2. Electric Neon Bangs
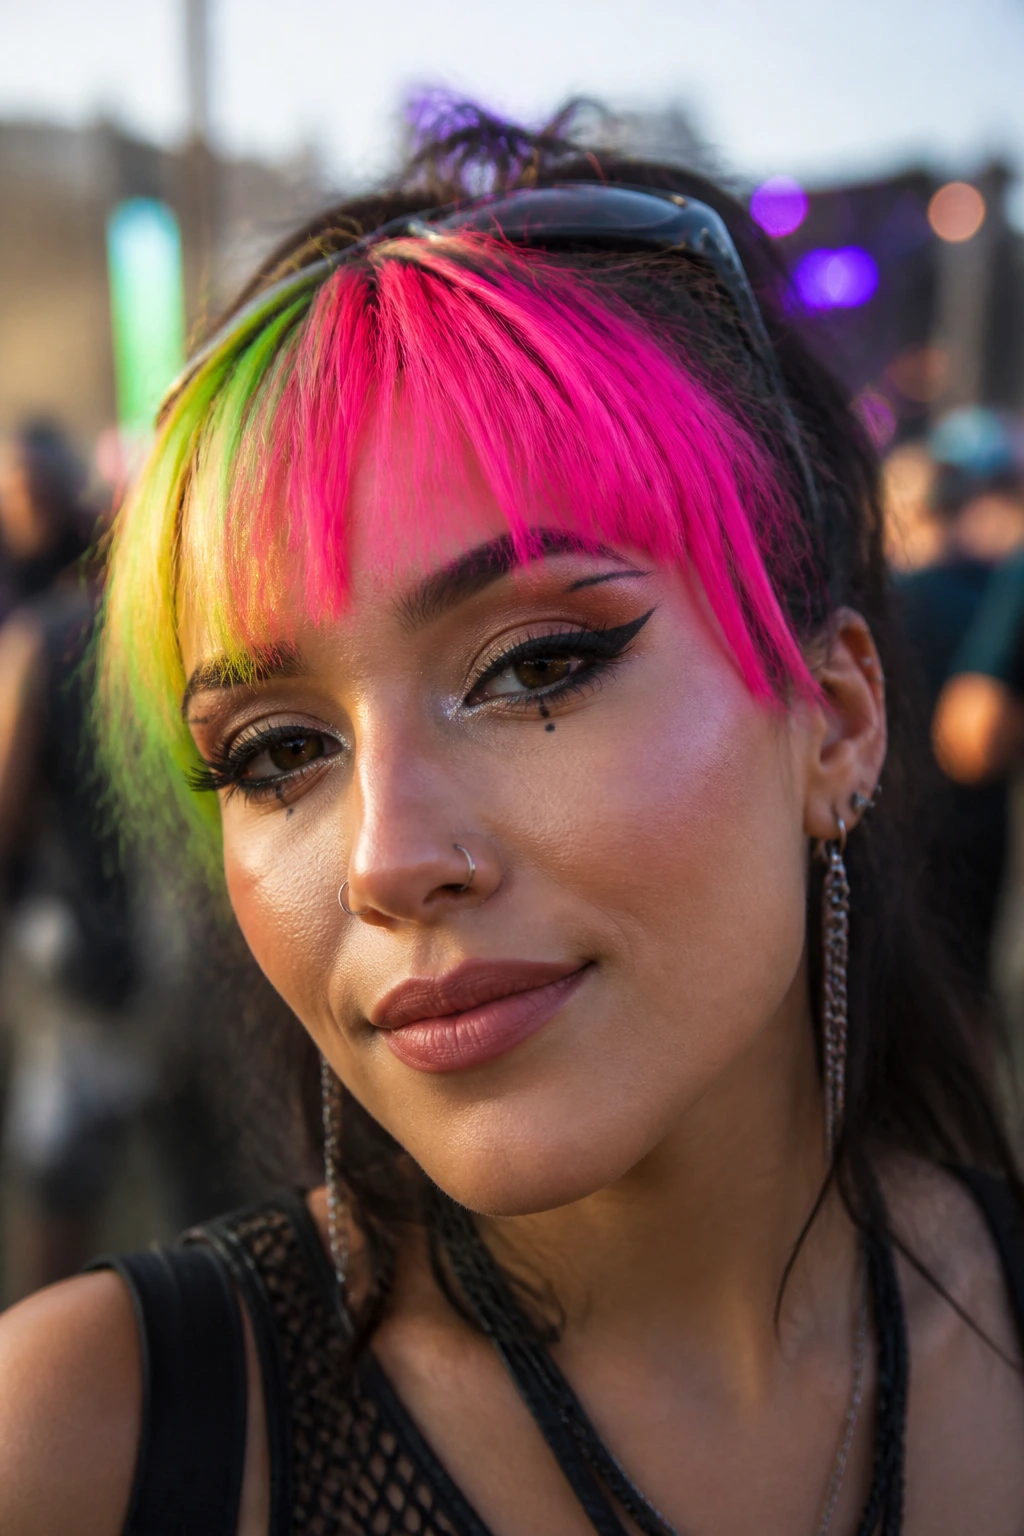
If you wear your hair with a fringe or heavy layers around your face, you have a built-in canvas for high-visibility color. Focusing the chalk solely on your bangs draws immediate attention to your face and makes a bold statement without requiring you to color your entire head. This look works best with high-contrast colors like neon green, electric blue, or hot pink. Because bangs tend to touch your forehead and cheeks frequently, you must be rigorous about sealing the color to avoid skin staining.
Application Strategy for Precision
- Use a fine-tooth comb to isolate your bangs from the rest of your hair to avoid accidental transfer.
- Wet the chalk slightly before applying it to the bangs; this creates a paste-like consistency that is much more vibrant and long-lasting than dry application.
- Use a small makeup brush to sweep away any loose, dusty particles from your hairline.
- Set the color with a blow dryer on a cool setting for about thirty seconds to accelerate the drying process.
Do not skip the blow-dry step. When chalk is wet, it is pliable and prone to rubbing off. Once it is completely dry and set with hairspray, it becomes a solid layer that is far less likely to migrate onto your forehead during a hot afternoon.
3. Hidden Rainbow Layers
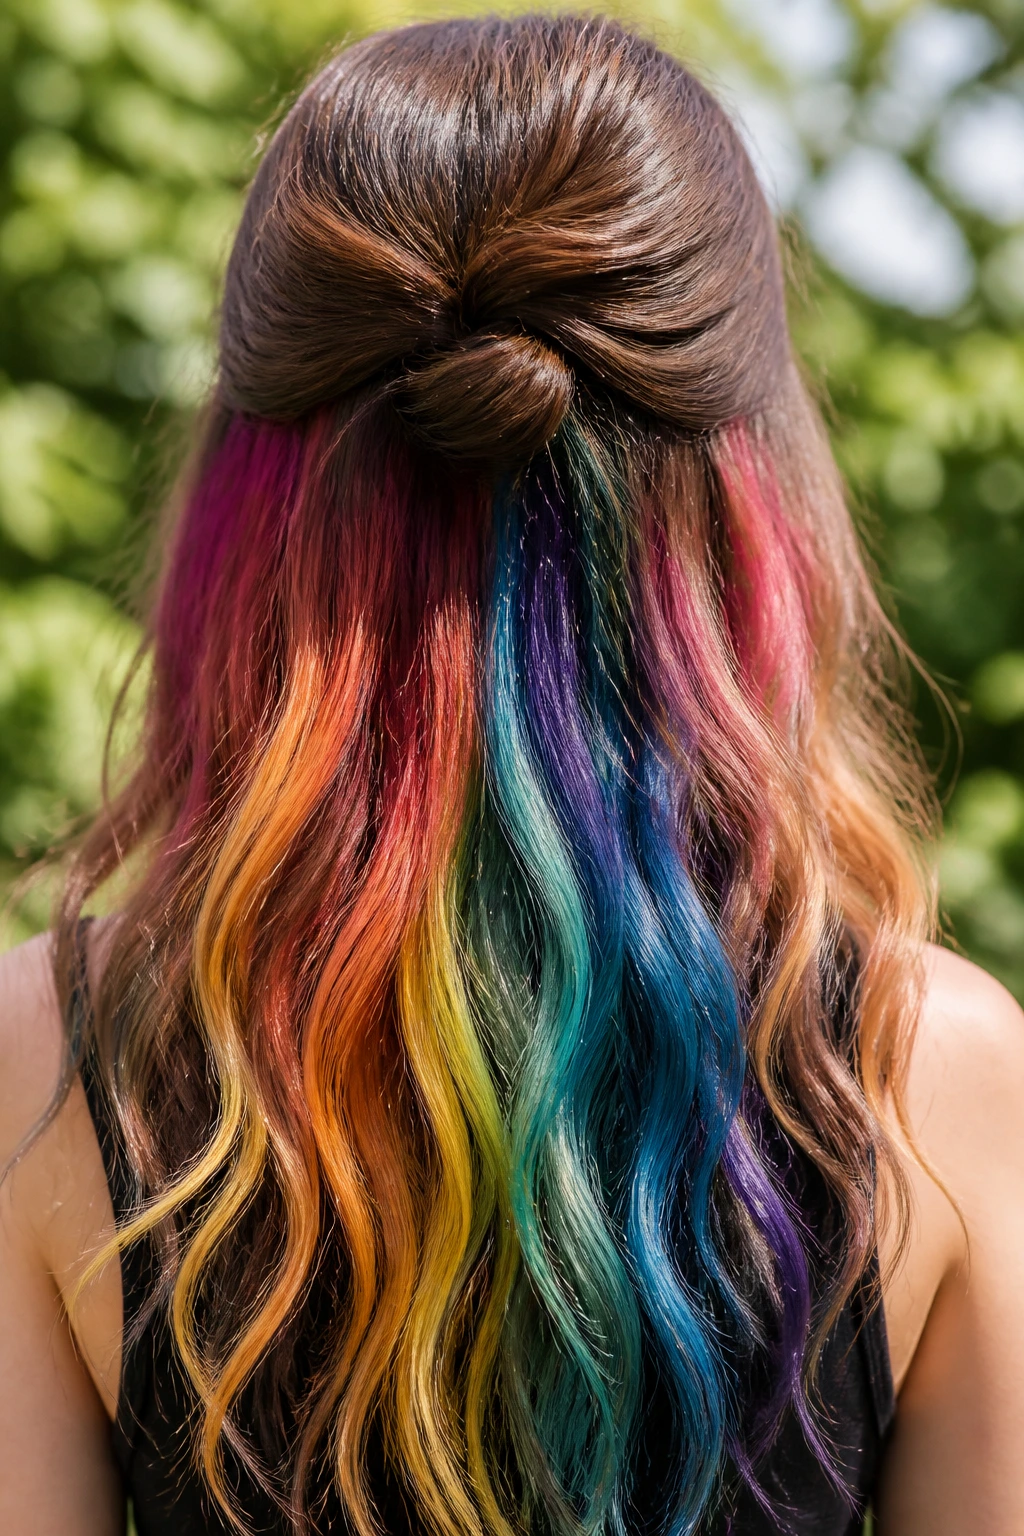
For those who prefer a more understated festival look, the hidden rainbow technique is the ideal approach. You only apply the color to the bottom layers of your hair—the sections that sit against the nape of your neck. When your hair is down, it looks completely natural. However, when you throw your hair into a messy bun, a high ponytail, or braids, the vibrant spectrum of colors is revealed. It is a subtle, fun reveal that doesn’t overwhelm your entire outfit.
Managing the Layers
Separate your hair into a top section and a bottom section using a clear elastic. Work on the bottom section first. You can be as precise or as chaotic as you like here. Take thick, chunky strands and saturate them with different colors of the rainbow. Because this hair rests against your back, ensure you are wearing a top that you don’t mind getting a little colorful, or use a setting spray that dries completely clear and non-sticky.
Why this works for long days: Since these strands are often tucked away or bunned up, they are protected from the wind and elements, meaning the color stays fresh much longer than it would on the top layers of your hair.
4. Pastel Mermaid Streaks
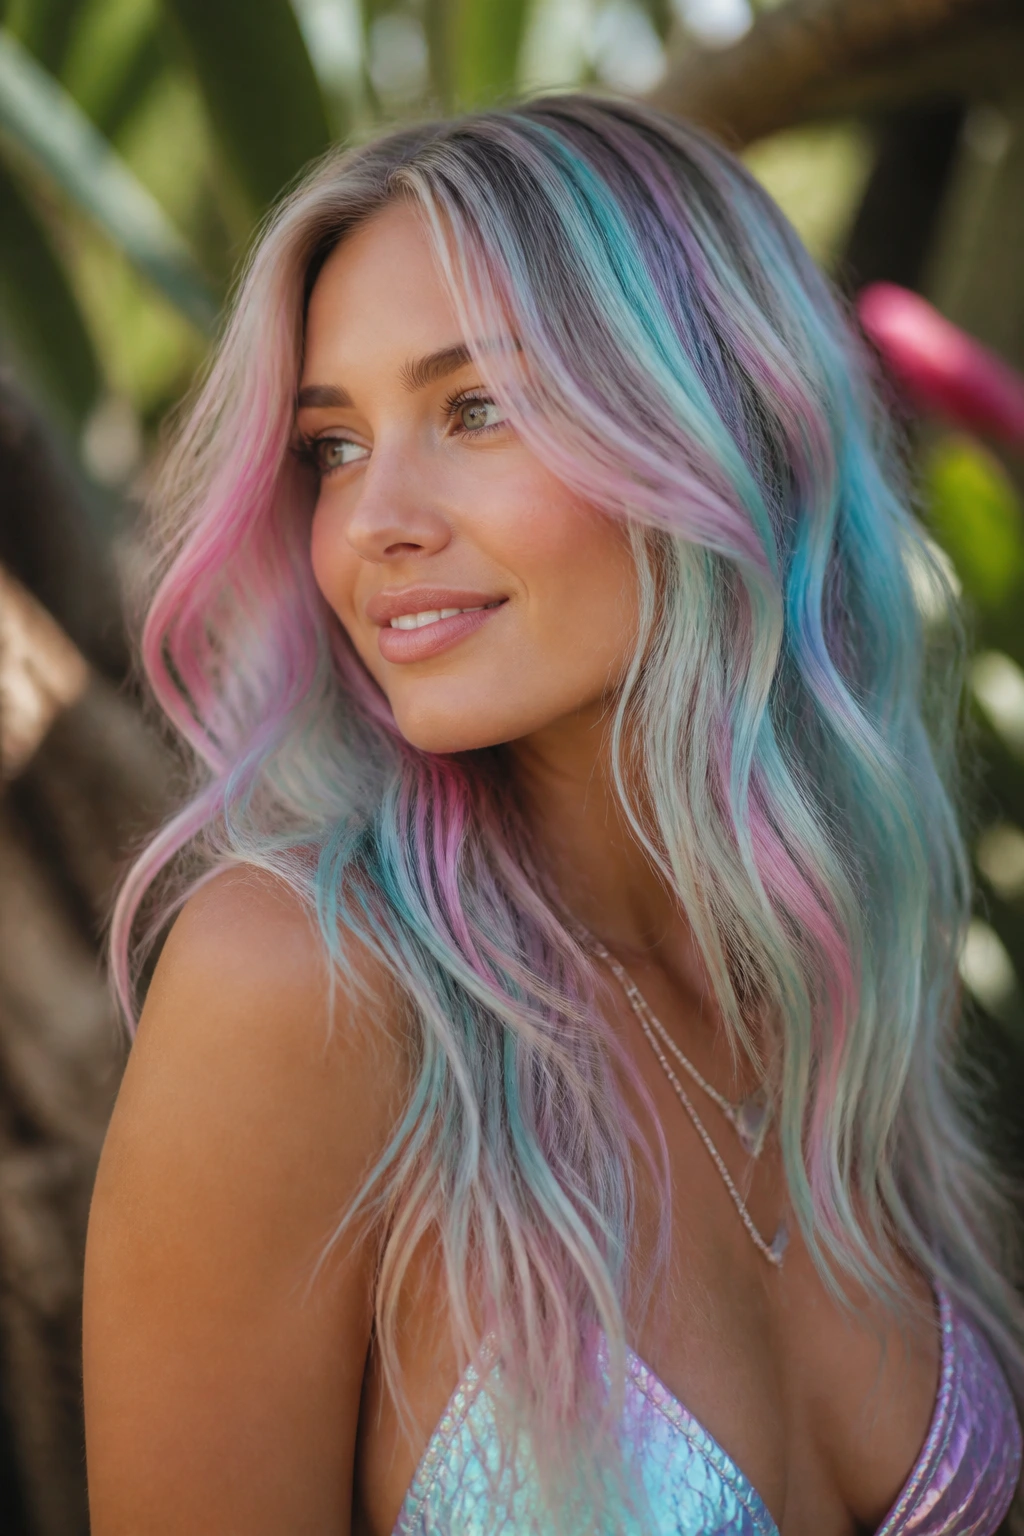
Mermaid hair is defined by soft, ethereal tones: mint green, lavender, baby blue, and pale pink. Unlike neon looks, which are about contrast, this look is about harmony. The best way to achieve the mermaid aesthetic is to alternate thin, vertical streaks of these pastel shades throughout your hair. The goal is a dimensional look that changes slightly depending on how the light hits it.
Technique for Softness
Pastel chalks can be difficult to see on dark hair. If your hair is naturally dark, consider applying a white chalk base first. This acts as a primer, neutralizing the natural color of your hair and giving the pastels something bright to sit on. It’s an extra step, but it is the difference between having vibrant, visible streaks and having hair that just looks dusty or grey.
The Finishing Touch
After applying the streaks, use a wide-tooth comb to gently distribute the product. You aren’t looking to blend the colors together into one muddy mess; you are looking to soften the edges of the streaks so they look like natural highlights rather than harsh painted lines. This makes the color look expensive and intentional, rather than like a craft project.
5. Bold Geometric Color Blocking
Color blocking is for the festival-goer who wants their hair to look like a piece of graphic art. This style requires more effort and probably a partner to help with the back of your head, but the payoff is worth it. Instead of painting thin streaks, you are going to color large, solid sections of hair. For example, color the left side of your head in a deep purple and the right side in a vibrant turquoise, keeping the line of separation perfectly clean along your natural part.
Precision Tools
You cannot achieve this look by just dragging a stick of chalk down your hair. You need to use a piece of stiff cardboard or a plastic playing card as a barrier. Place the card behind the section of hair you are coloring. This allows you to press the chalk firmly against the hair without getting color on the section underneath or next to it. It ensures that the color block remains sharp and distinct.
Style Tip: This look is incredibly striking when paired with sleek, straight hair. The sharp, graphic nature of the straight hair complements the clean lines of the color blocking. Avoid curling or wavy styles, as they tend to disrupt the clean edges of the blocks.
6. The Polka Dot Accent
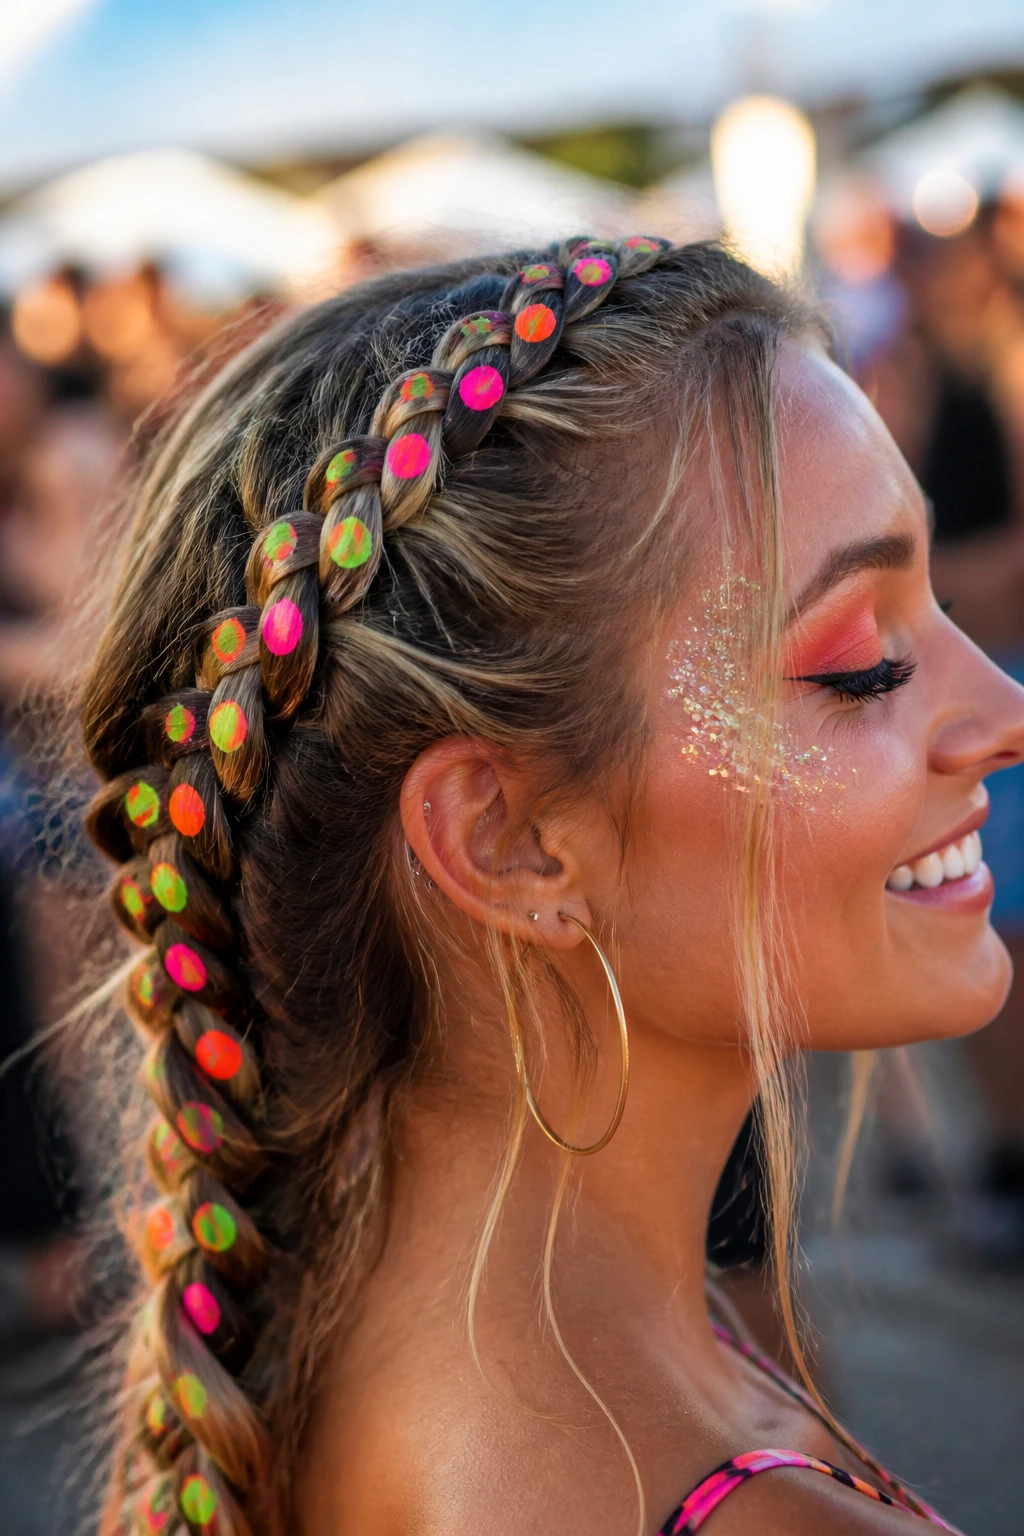
This is a playful, detail-oriented approach that adds a whimsical touch to any hairstyle. You aren’t coloring your hair; you are adding a pattern. To do this, you need a high-pigment chalk, ideally one that is slightly damp, and a very precise applicator. A clean makeup sponge or a cotton swab works well for this. You want to create small, deliberate dots of color scattered throughout a braid or a twist.
Why This Style Stands Out
Most festival hair is about big, broad strokes of color. By choosing a patterned approach, you demonstrate a level of intention and detail that catches the eye. It looks intricate, yet it is relatively simple to achieve. You can stick to one contrasting color, like white dots on dark hair, or go for a confetti effect by using multiple neon shades.
Application secret: Work on dry, unwashed hair. The natural oils in your hair help the chalk stick and prevent the dots from flaking off. If your hair is freshly washed and slippery, use a texturizing spray or dry shampoo first to give the surface some grit.
7. Stenciled Starfield
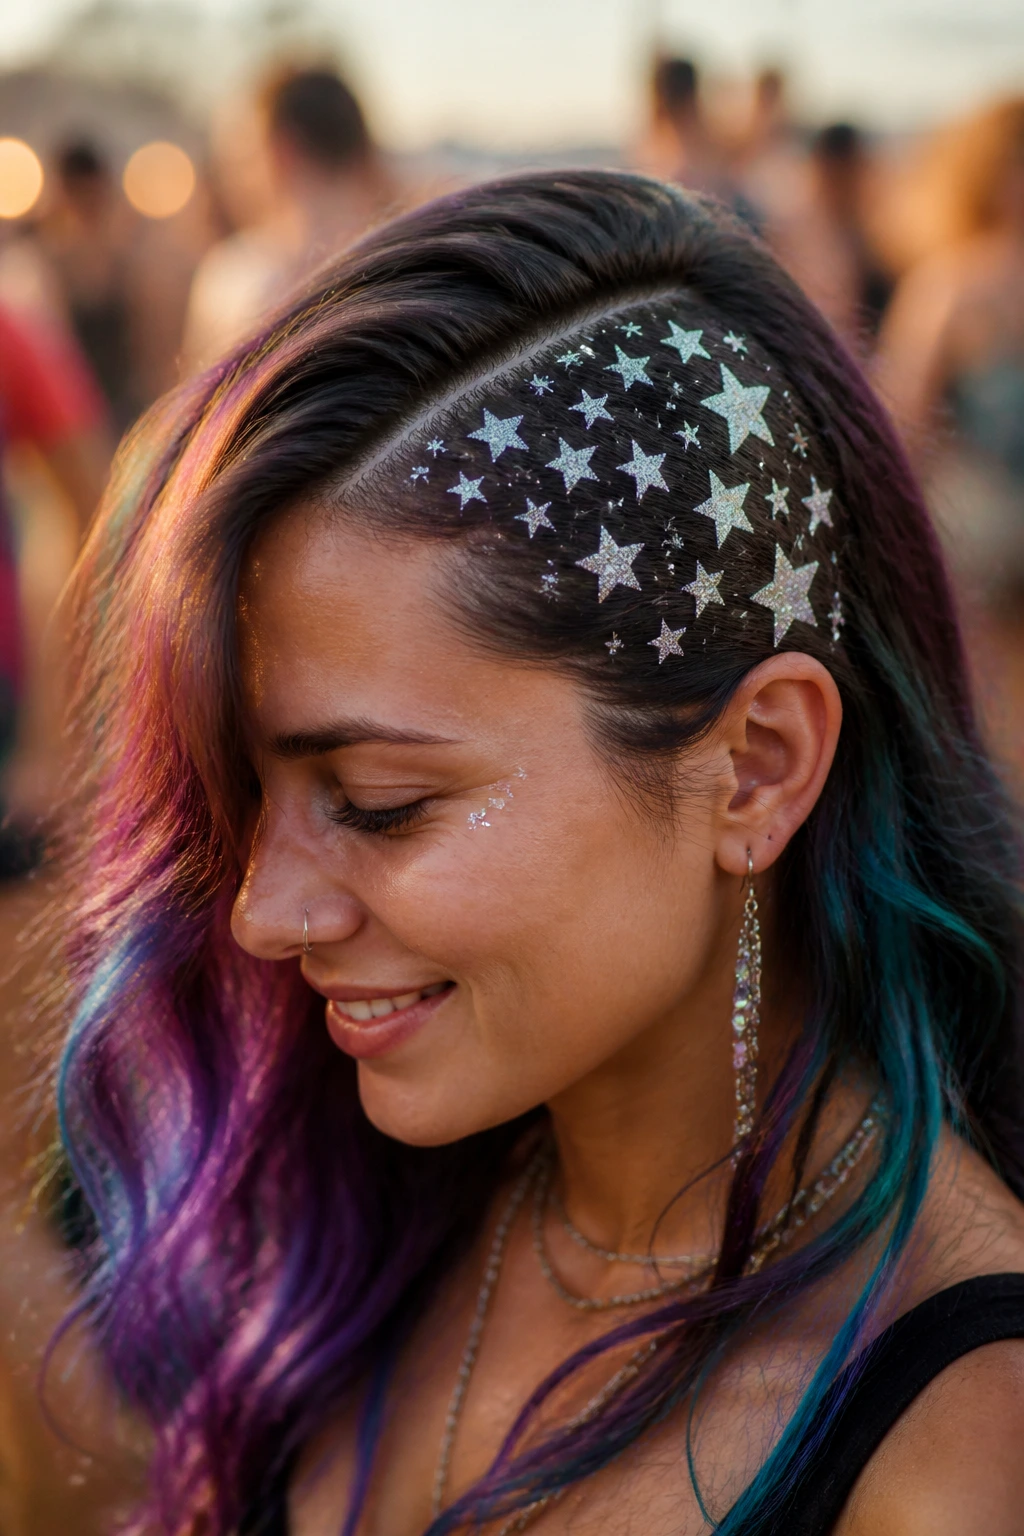
Bring the cosmos to your hair with a stenciled starfield. This requires a bit of pre-planning. You will need to create a simple stencil—a piece of cardstock with a star shape cut out of the center is perfect. Hold the stencil firmly against a section of hair, then rub the chalk over the cutout. You are essentially using your hair as a screen-printing canvas.
Getting Crisp Edges
The key to a good stencil is pressure. You have to press the stencil firmly against the hair, or the chalk dust will bleed underneath the edges, turning your sharp star into a blurry blob. Start with a white or silver chalk for the stars, and then maybe use a dark blue or purple chalk to fill in the background around the stars to make them pop.
This look is perfect for the side of a deep part or the nape of the neck. Don’t try to cover your entire head with stars; it becomes too much. Focus on one high-visibility area. It’s a sophisticated, cosmic look that pairs beautifully with glitter-based face makeup or celestial-themed accessories.
8. Dual-Tone Dip Dye
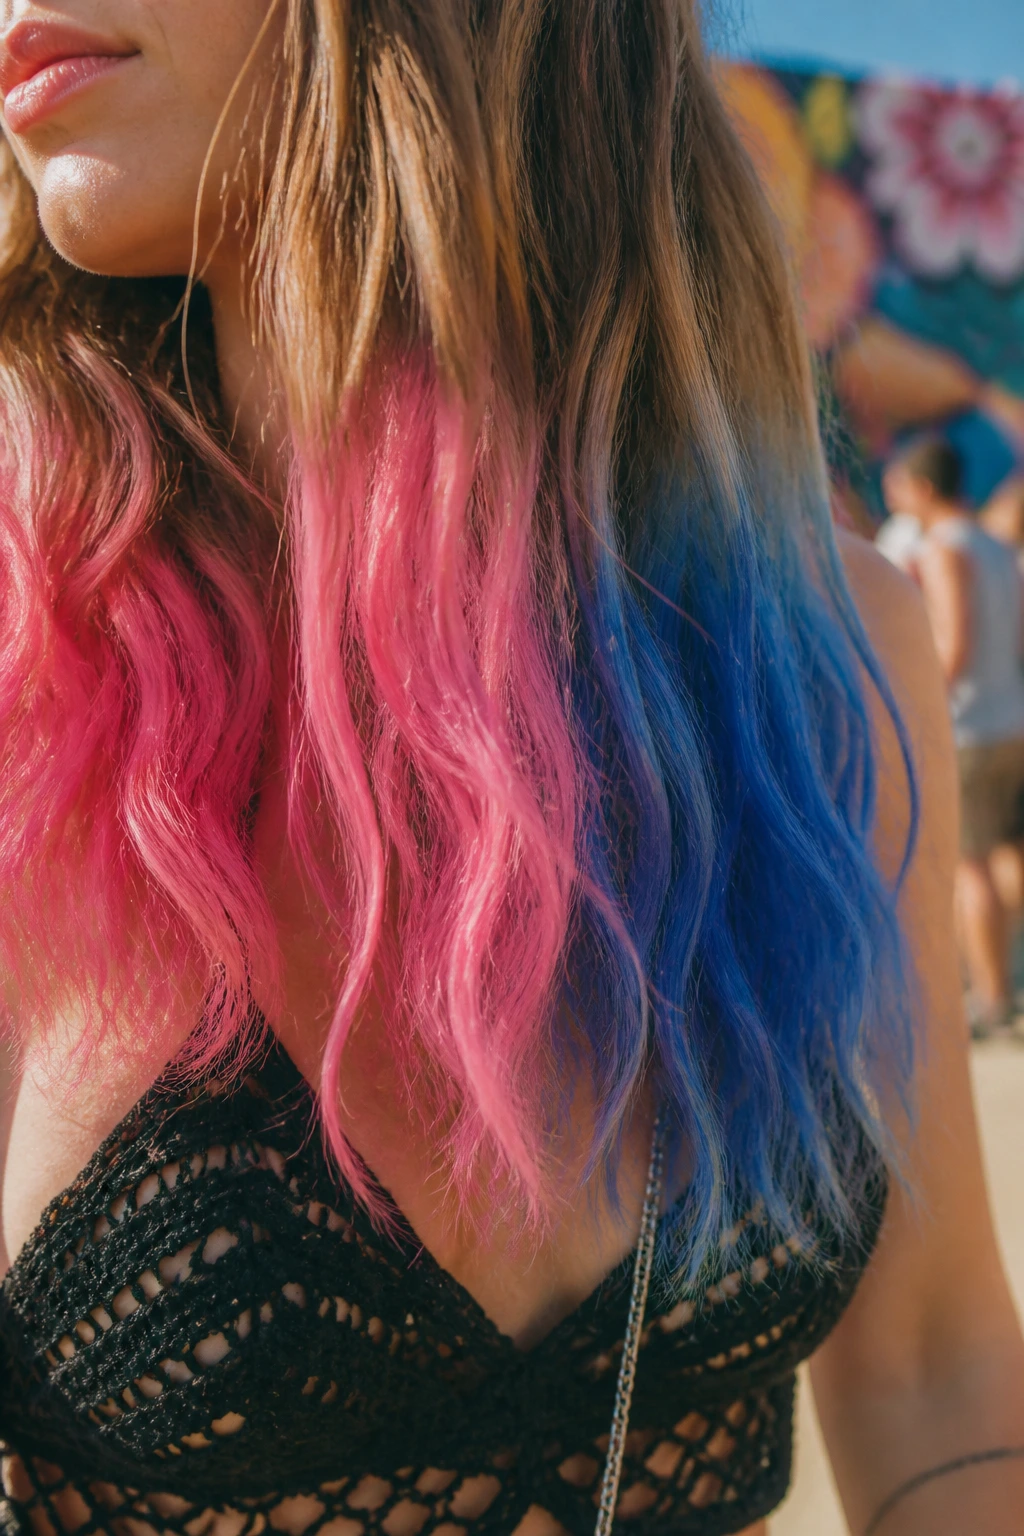
Dip dye is the most forgiving festival look because it only requires you to color the last two to three inches of your hair. It is the classic festival style for a reason—it’s low risk and high impact. You can get away with using bold, primary colors here that might be too much if applied to your roots.
The “Dunk” Method
If your hair is long enough, you can actually create a liquid chalk solution. Mix a small amount of water with grated hair chalk in a cup until it becomes a vibrant, pigmented liquid. Dip the ends of your hair into the cup and hold for a few seconds. This ensures total saturation of the ends.
Maintenance Notes
Since you are only coloring the ends, you don’t have to worry about color transfer on your forehead, neck, or clothes (unless you have very long hair that constantly brushes against your back). It is the easiest look to maintain throughout a long day. If the color starts to fade, you can easily touch it up in the bathroom using a standard chalk stick.
9. The Leopard Print Illusion
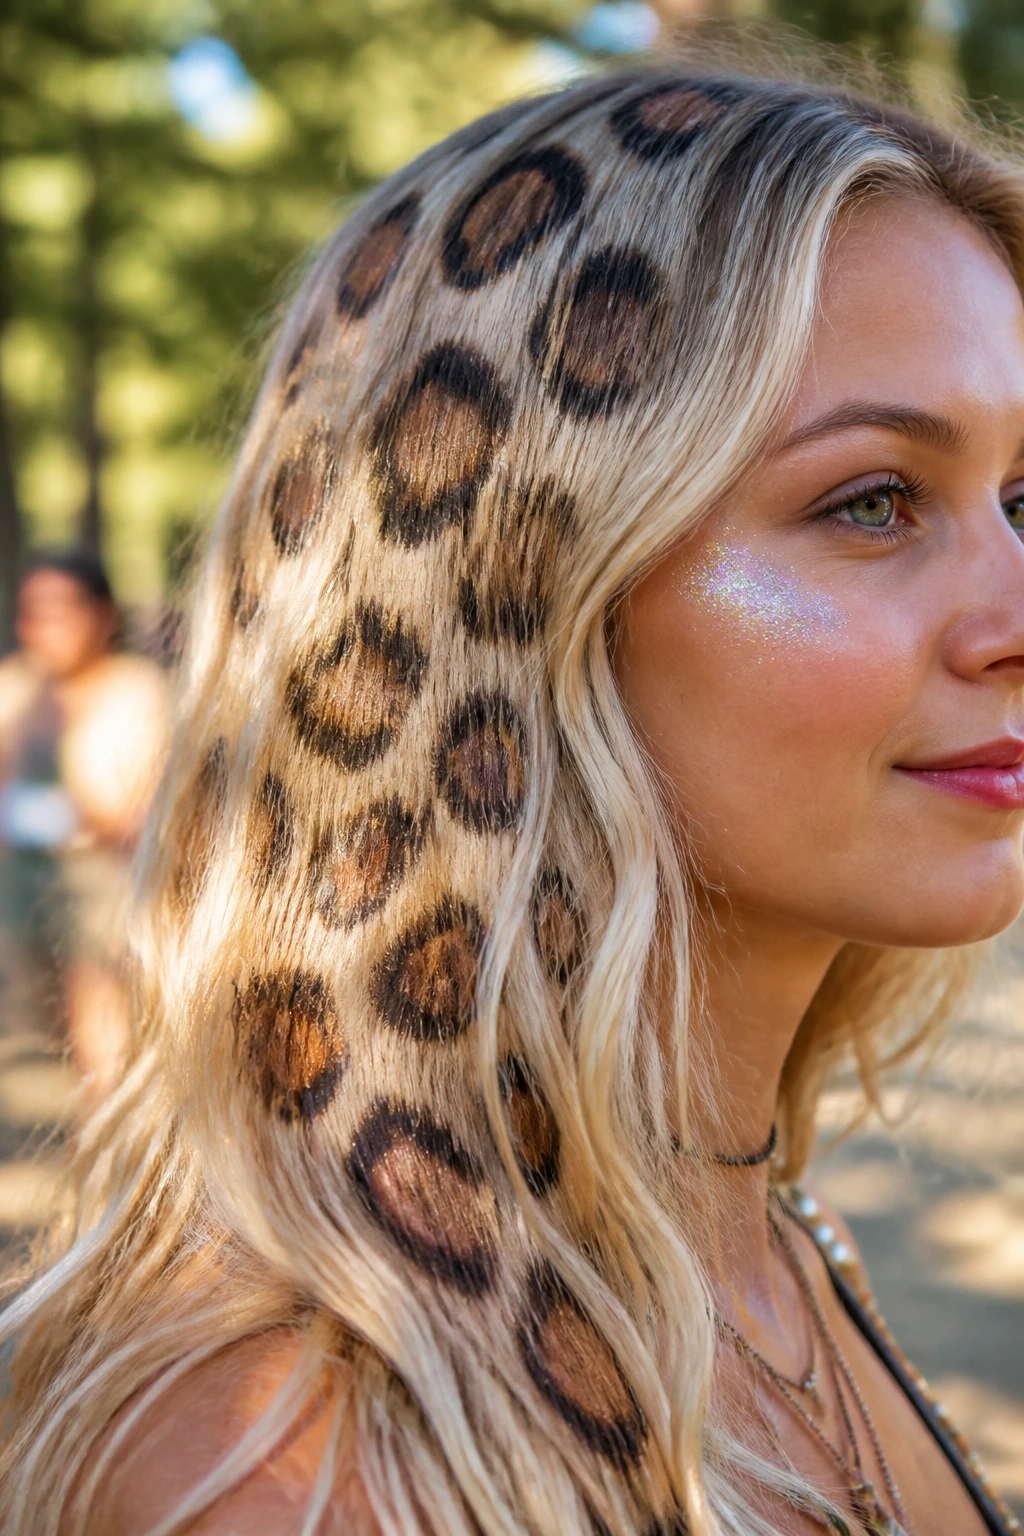
This is a step up in difficulty, but if you have a steady hand or a friend, it is a guaranteed head-turner. You aren’t drawing individual leopard spots. Instead, use a brown or black chalk to make irregular, C-shaped or broken-circle marks on your hair. Then, go back with a lighter color like gold or copper to fill in the center of those marks.
Why It Looks Authentic
Leopard print is all about the negative space. Do not try to make the spots perfect. The imperfections are what make it look like a pattern rather than a mistake. Use a thin eyeliner brush to apply the chalk if the sticks are too thick. By breaking the chalk off and mixing it with a tiny drop of water on a palette, you create a pigmented paint that allows for fine-line detail.
This look works best on light or blonde hair where the dark spots show up clearly. If you have dark hair, use a bright white or neon yellow chalk to draw the spots, which will create a similar high-contrast effect.
10. Subtle Money-Piece Highlights
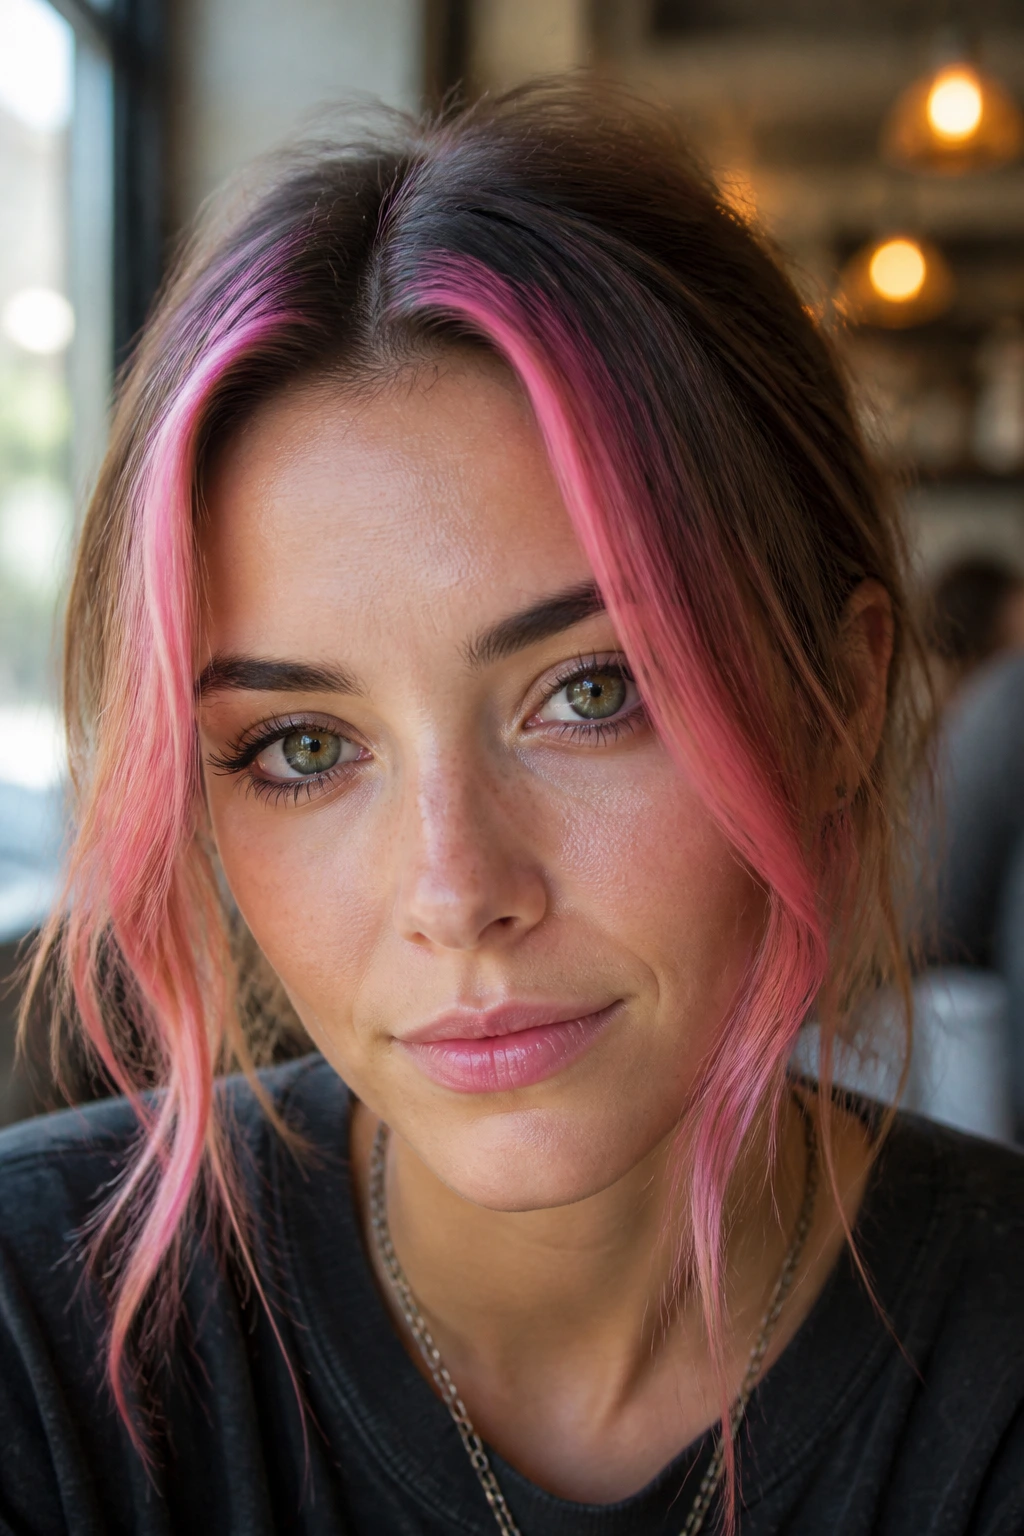
The “money-piece” is the face-framing highlight that has been a staple in hair trends for years. By doing this with chalk, you can try out the look for the weekend without ever touching a bottle of bleach. Isolate the two front strands of hair that frame your face and saturate them with a color that contrasts sharply with your natural hair—think bright pink on blonde hair or electric blue on black hair.
Positioning for Impact
Make sure you take enough hair to create a visible streak, but not so much that it covers your whole head. Usually, an inch-wide section is perfect. Because these strands are right next to your face, use a high-quality chalk that isn’t excessively dusty, so you don’t end up inhaling chalk particles or getting them in your eyes.
Why this works: It highlights your features and looks great in photos. Because it’s right at the front, it’s also the easiest section to fix if the color starts to dull during the festival.
11. Vivid Mohawk Stripe
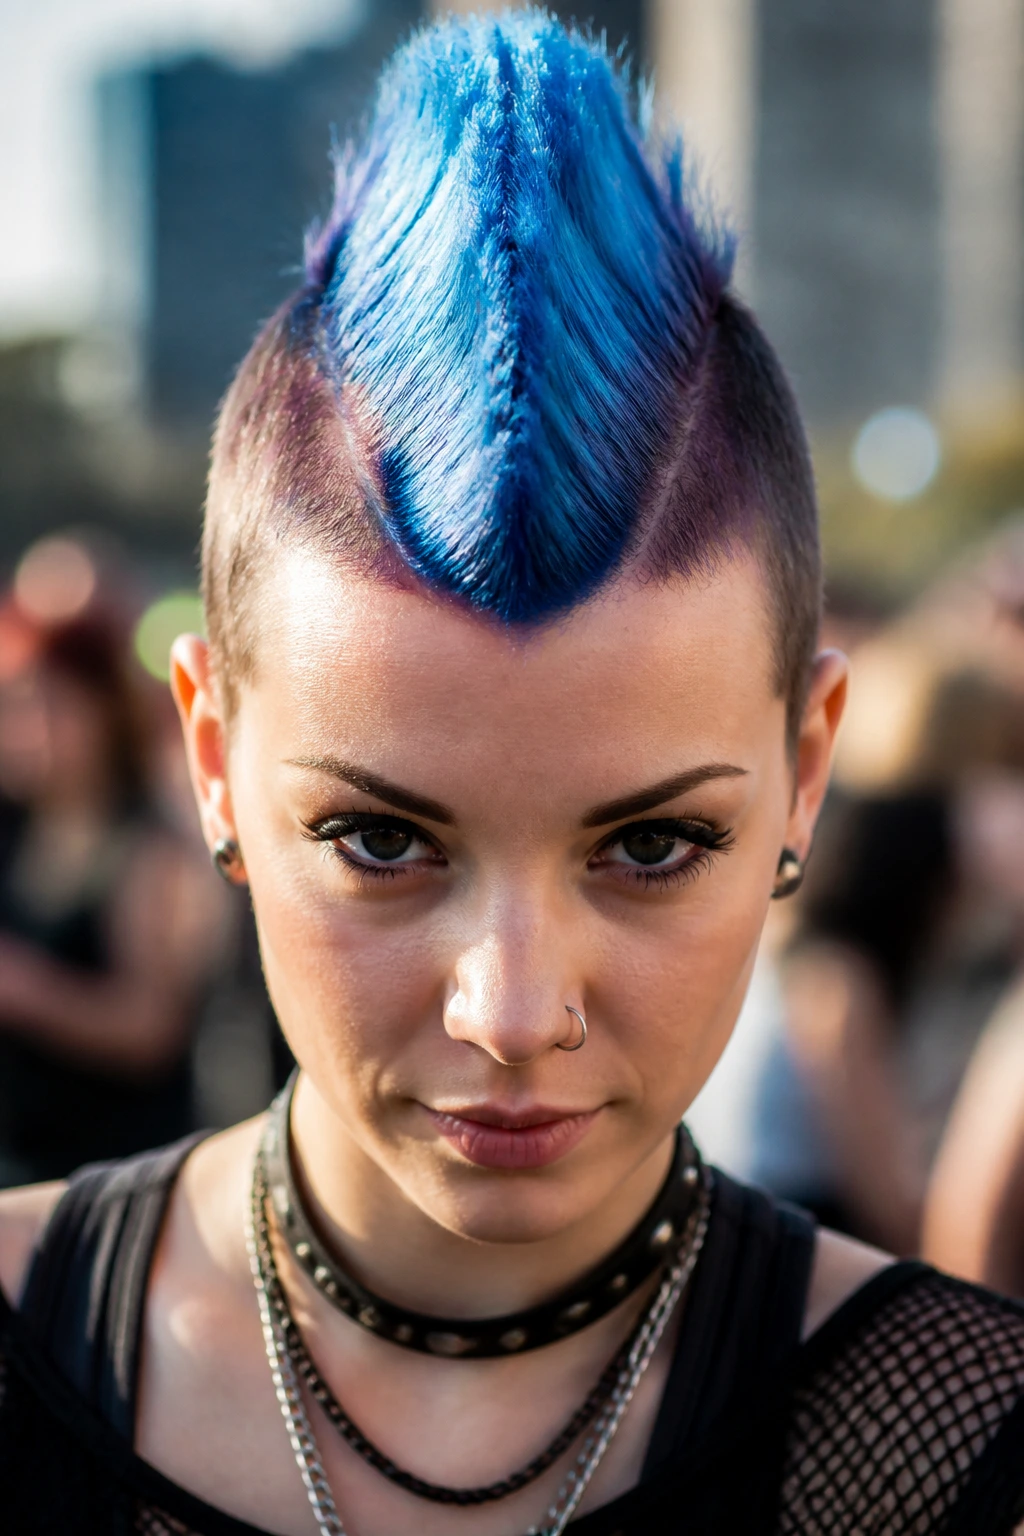
Whether you have a literal mohawk or just a very long, central braid, you can create a “mohawk stripe” of color. This involves coloring a thick strip of hair running from your front hairline all the way back to the crown of your head. It’s a bold, punk-rock aesthetic that screams “festival.”
Ensuring Even Color
The challenge here is the roots. It is easy to miss spots right at the scalp. Use a mirror to check the back of your head, or have a friend apply the color for you. Apply the chalk in short, firm strokes. If you try to do long, sweeping motions, you will miss the hair closer to the scalp.
Styling the Stripe
This look is best styled with texture. A messy braid down the center or a series of small, tight buns will help show off the color stripe. If you keep the hair flat, the stripe can look a bit like a flat paint job. Adding volume and texture helps the color look integrated and dynamic.
12. Glitter-Infused Color Swirls
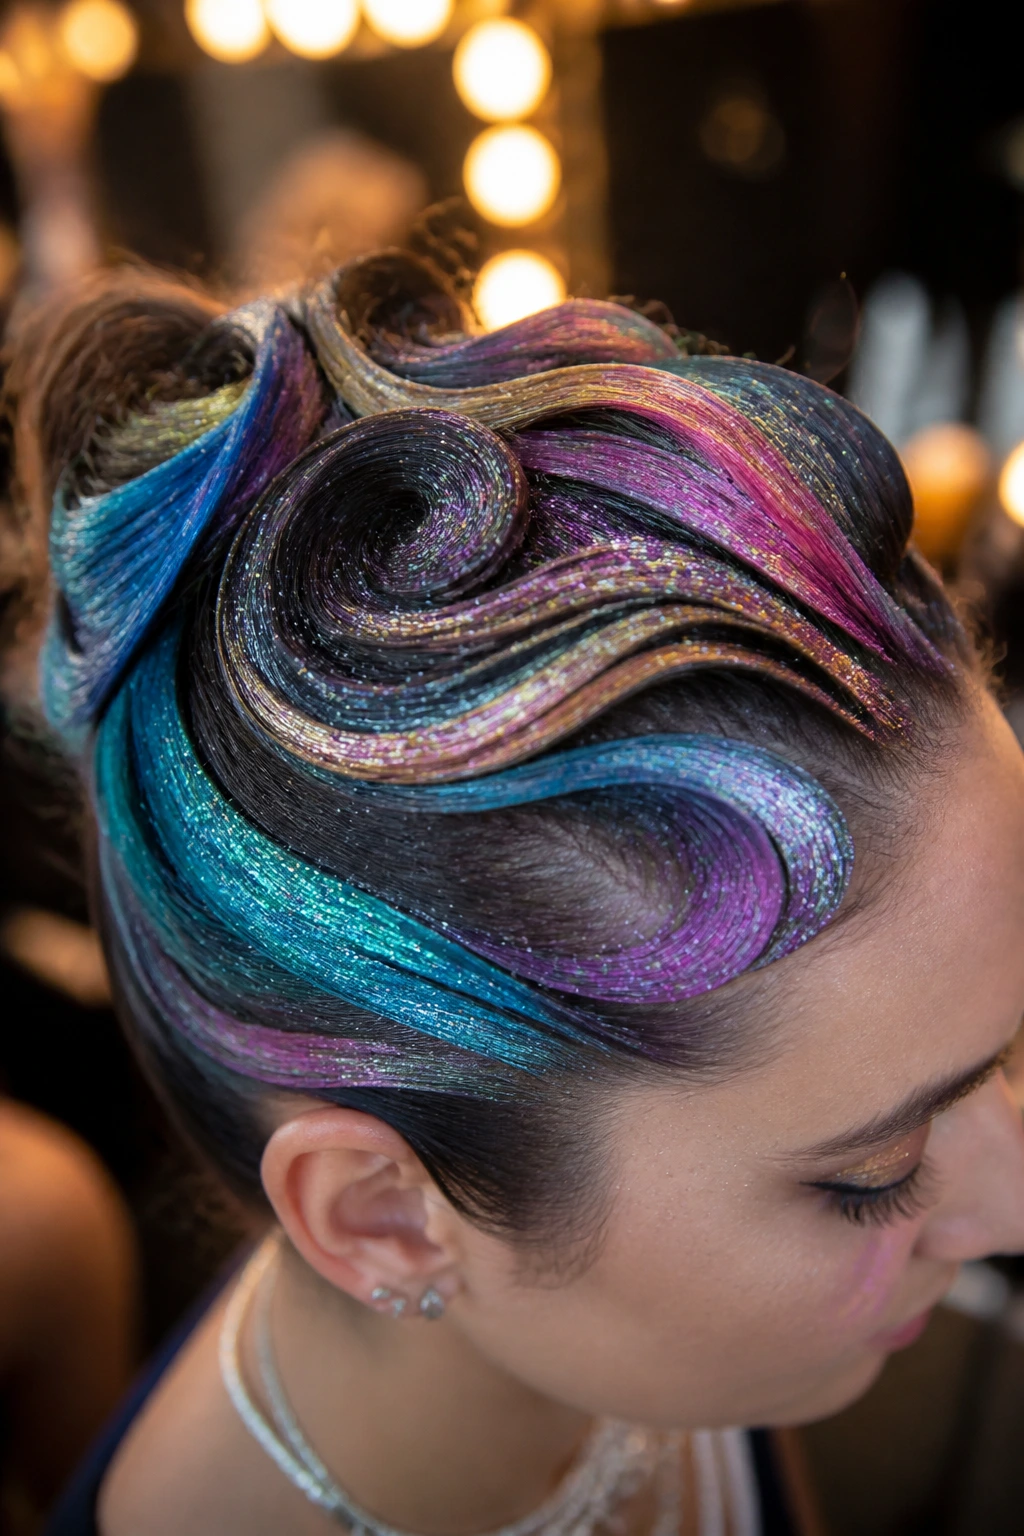
Sometimes chalk alone isn’t enough. If you want a bit of shine, mix your chalk with a clear styling gel or a glitter hair spray. By creating a paste with the chalk and the gel, you get a hybrid product that colors and holds your hair in place. This is perfect for sleek, high-slick styles like a snatched ponytail or space buns.
The Mixing Process
Take a small amount of clear gel on a plate. Scrape some chalk into it using a knife or the back of a comb. Mix until you reach a consistent, creamy texture. You can use this “colored gel” to paint specific sections of your hair. This is much less dusty than using dry chalk and creates a glossy, vibrant effect.
Bonus: This mixture acts as a strong hold. It will keep flyaways down and ensure your hairstyle stays put through hours of dancing. It’s a two-in-one styling hack that saves you time in the morning.
13. The “Cotton Candy” Messy Bun
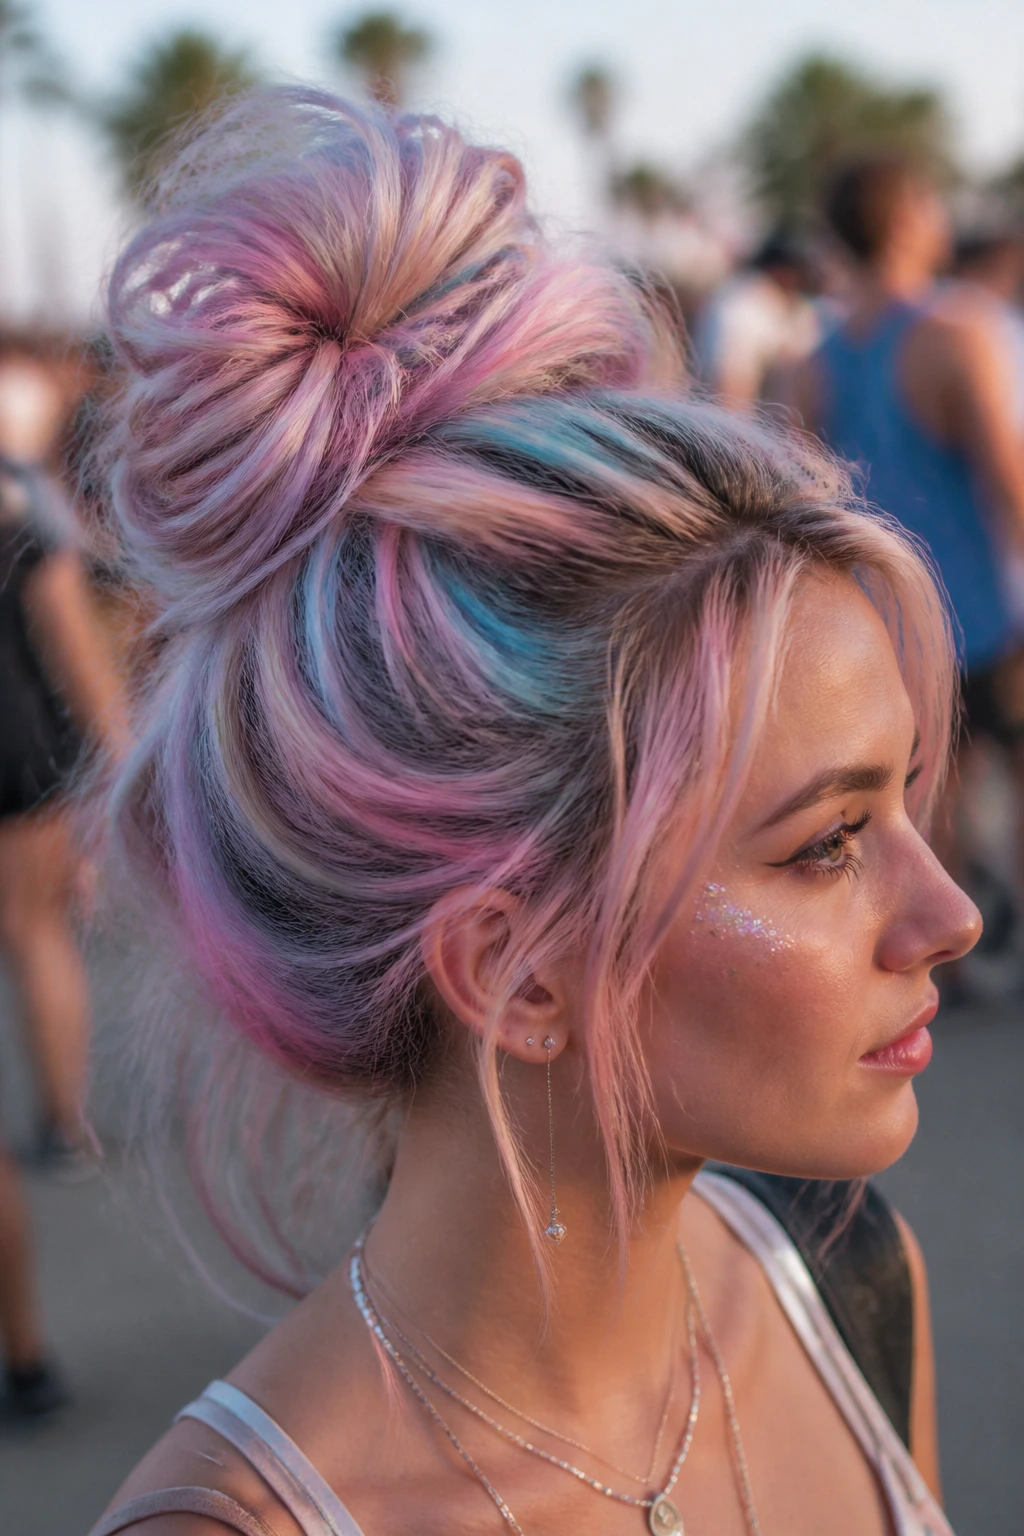
A messy bun is the default festival hairstyle, but it can look a bit boring. Elevate it by chalking the hair before you twist it into a bun. Use a mix of soft pinks, blues, and purples. Don’t be too precise; you want the colors to be streaky and variegated.
Why Pre-Chalking is Superior
When you wrap the hair into a bun, those pre-chalked streaks will twist and swirl around each other, creating a multi-tonal, cotton-candy effect that looks far more complex than it actually is. It’s a low-effort style that looks like it took an hour to perfect.
Setting the Texture
After you have twisted the bun, gently pull at the loops to loosen it. This spreads the color out and gives the bun that effortless, voluminous look. A little bit of texture spray after the bun is secured will help keep the colors separated and prevent them from blending into a single, muddy shade.
14. Sharp V-Pattern Undercut Accents
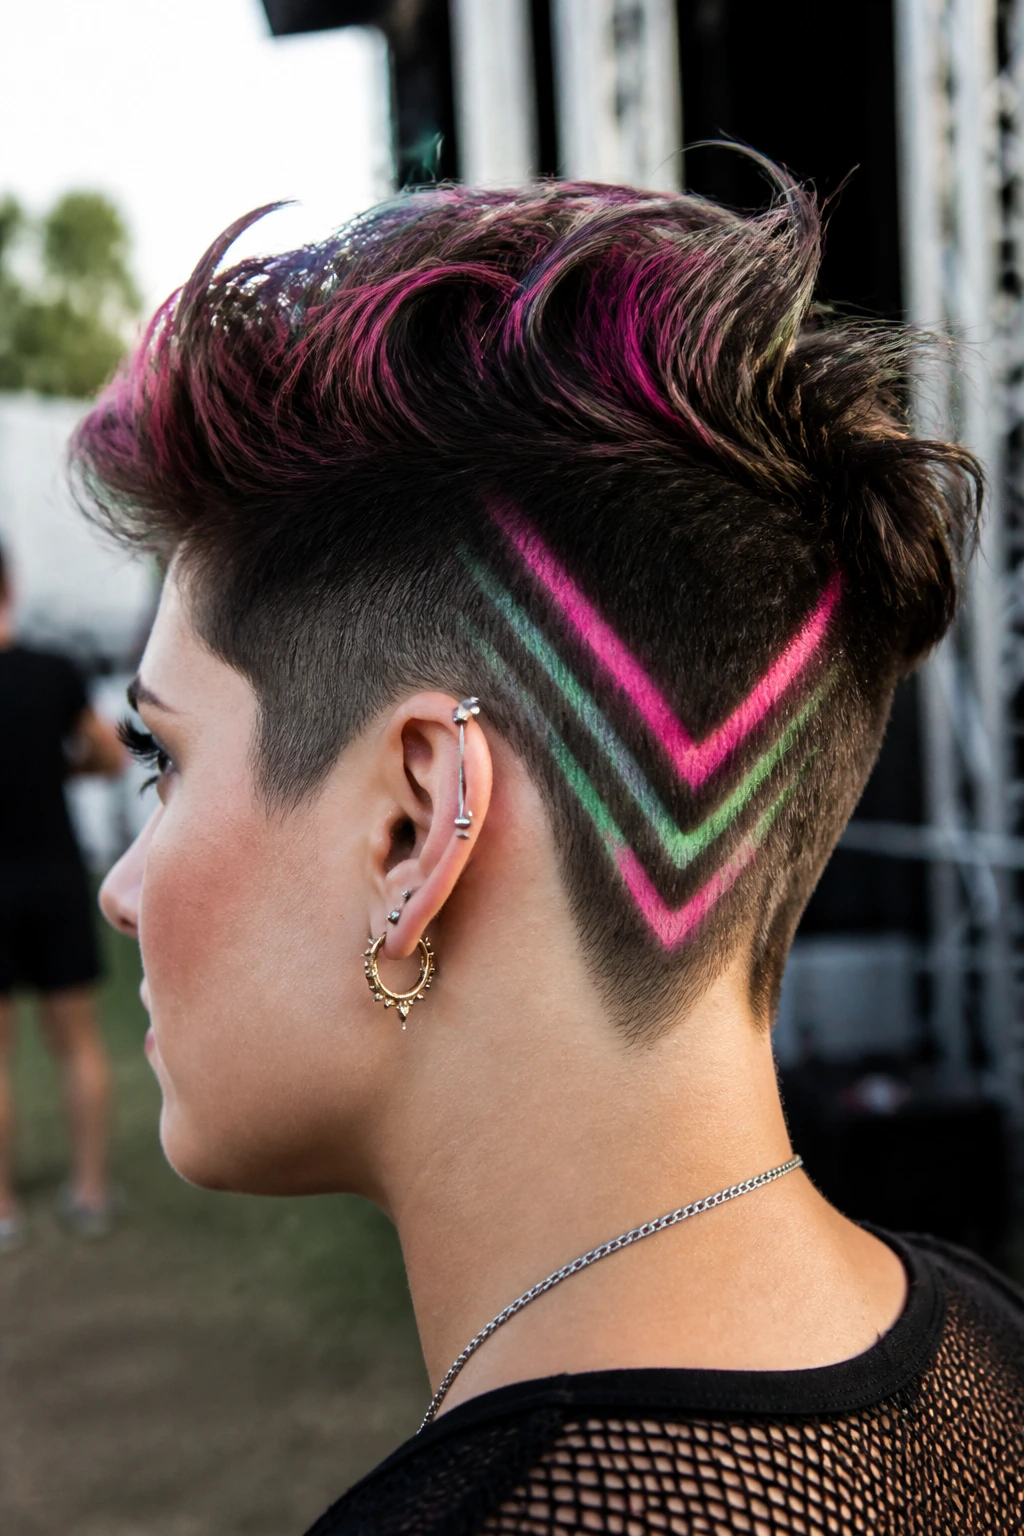
If you have an undercut, shaved sides, or even just very short hair at the nape of your neck, you have the perfect area for graphic art. Use the edge of the chalk to draw sharp, geometric lines—like a V-pattern or zigzag—directly onto the shorter hair.
Handling Short Hair
Short hair is stiff and holds chalk very well, but it also rubs off easily against your collar or hats. This is why you must use a strong-hold setting spray. If you are doing this pattern, don’t rub it in. The chalk needs to sit on the surface of the hair to remain vibrant.
Pro tip: Use a contrasting color to the skin. If your skin is pale, choose deep, rich colors that will show up. If you have darker skin, bright white or neon colors will provide the best contrast. It’s all about making the pattern pop against the skin beneath the hair.
15. The Graphic Eyeliner Match
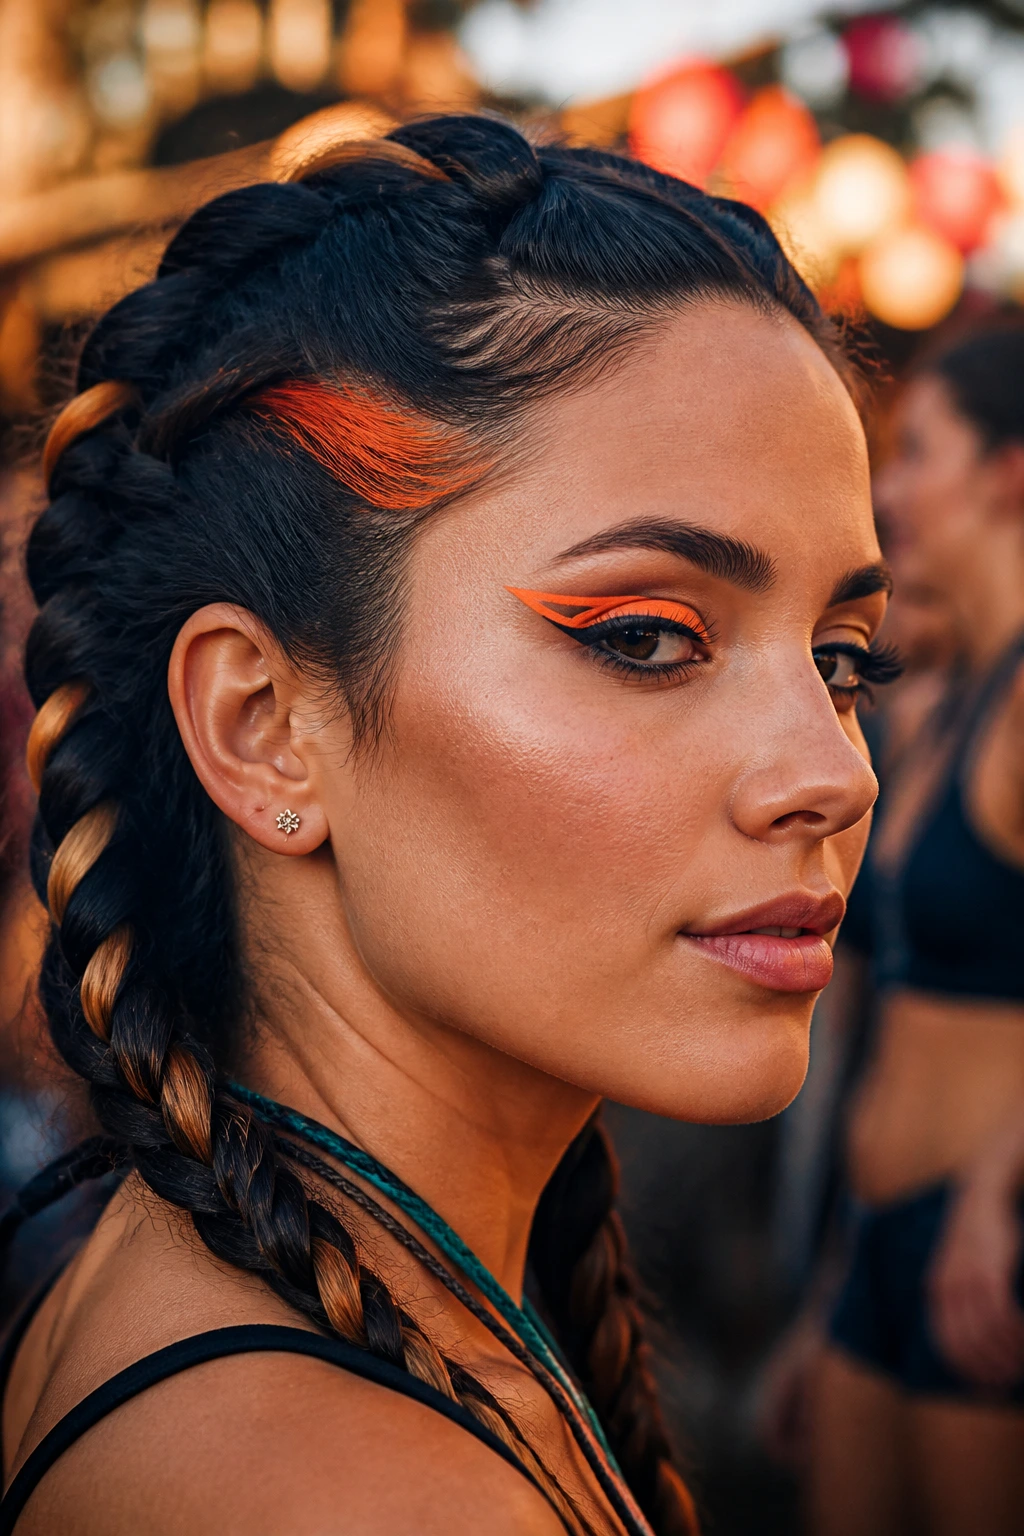
For the ultimate cohesive look, choose a hair chalk color that perfectly matches your liquid eyeliner or face paint. If you are doing a bold neon orange graphic liner, use the same neon orange on your hair. This deliberate coordination takes your festival look from “messy fun” to “high-fashion editorial.”
Coordination Strategy
Apply the chalk to a single, small section of hair near your temples. You don’t need to color your whole head. Just a single, well-placed highlight that draws the eye from your face to your hair is enough. It creates a seamless visual line that connects your makeup to your hair, making your entire look feel balanced and intentional.
This is the kind of detail that stands out in crowd shots and photos. It shows that you didn’t just throw color on your hair; you designed a complete aesthetic. Keep a small piece of the chalk in your bag for touch-ups—if your eyeliner runs from the heat, you can touch that up too, keeping the match perfect all day long.
Final Thoughts
The beauty of hair chalk is that it allows you to be someone else for a weekend. It doesn’t matter if the application isn’t perfect or if the color fades by the time the headliner comes on stage. The goal is to experiment, play with color, and avoid the permanence of chemical dyes.
Always prioritize the setting stage of your process. Whether you are using a simple hairspray or a dedicated setting mist, locking that pigment onto your strands is the difference between a look that lasts and one that melts away at the first sign of sweat. If you treat your hair like a canvas, you’ll find that hair chalk is one of the most versatile tools in your festival kit—so have fun, get messy, and enjoy the temporary transformation.
