



Transitioning to grey hair doesn’t mean you have to surrender your brunette identity. For years, the standard advice in salons was to cover every strand of grey with a dark, opaque blanket of dye. That usually leads to harsh regrowth lines, a flat, wig-like appearance, and a high-maintenance cycle of salon visits every three weeks.
Instead, lowlighting is the smarter, more modern approach for brunettes who are seeing a few—or a few dozen—grey hairs popping up. By weaving in strands that are slightly lighter or cooler than your natural base color, you create a dimensional canvas. This breaks up the solid block of dark color and allows the grey to blend in naturally rather than standing out like a neon sign.
It is about working with the light reflection of your hair. Brunette hair absorbs light; grey hair reflects it. When you add lowlights, you introduce varying depths, which mimics the natural highlights and lowlights that exist in virgin hair. The result is a softer, diffused look that makes regrowth much less obvious.
1. Cool Ash Brown
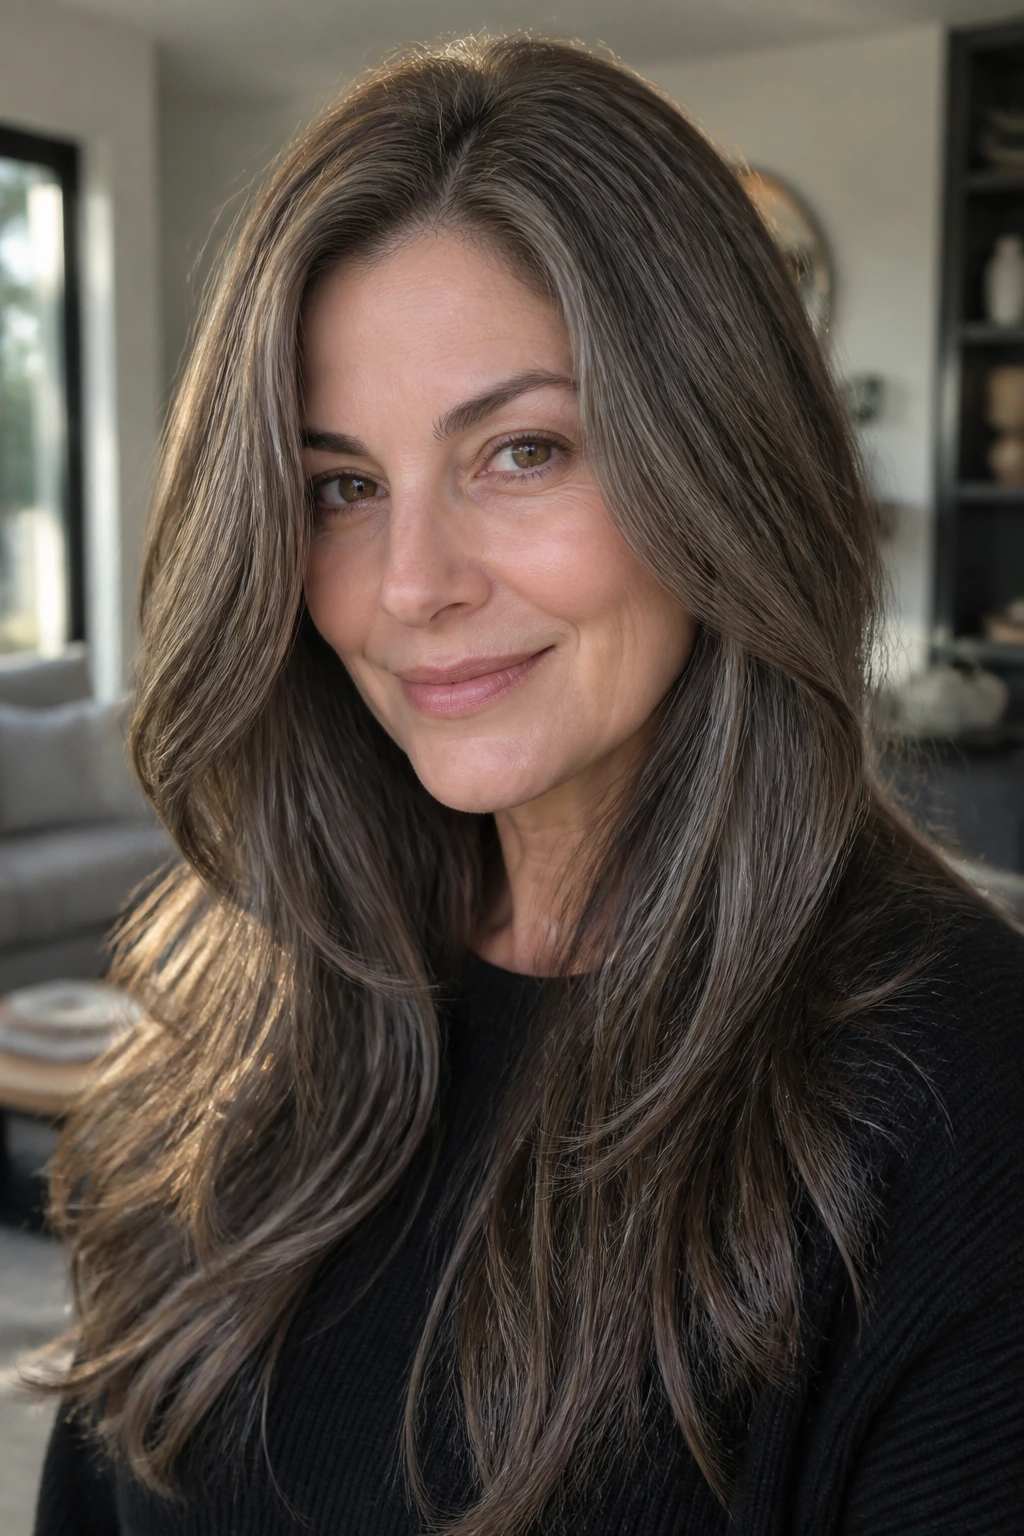
This is the gold standard for blending grey. Grey hair, particularly coarse or wiry strands, often possesses a lack of pigment that can look yellowish if left alone. By introducing a cool ash lowlight, you neutralize those unwanted warm tones.
Why It Works for Grey Blending
Ash brown lowlights act as a bridge. Because the ash tones are naturally devoid of intense warmth, they align perfectly with the silver and white spectrum of grey. They don’t try to hide the grey; they absorb it into the surrounding hair matrix.
- The Technique: Ask for a fine-weave foil application. Large, chunky slices can look outdated and blocky. A fine weave ensures the color is peppered throughout rather than sitting on top.
- Maintenance: Use a blue-based shampoo once a week. This keeps the ash tones from fading back into a muddy brown or an unwanted brassy shade.
Pro Tip: If your natural hair pulls red easily, go for a “smoky” ash brown rather than a standard ash to avoid that greenish tint that sometimes happens when ash dyes meet warm bases.
2. Soft Mushroom Brown
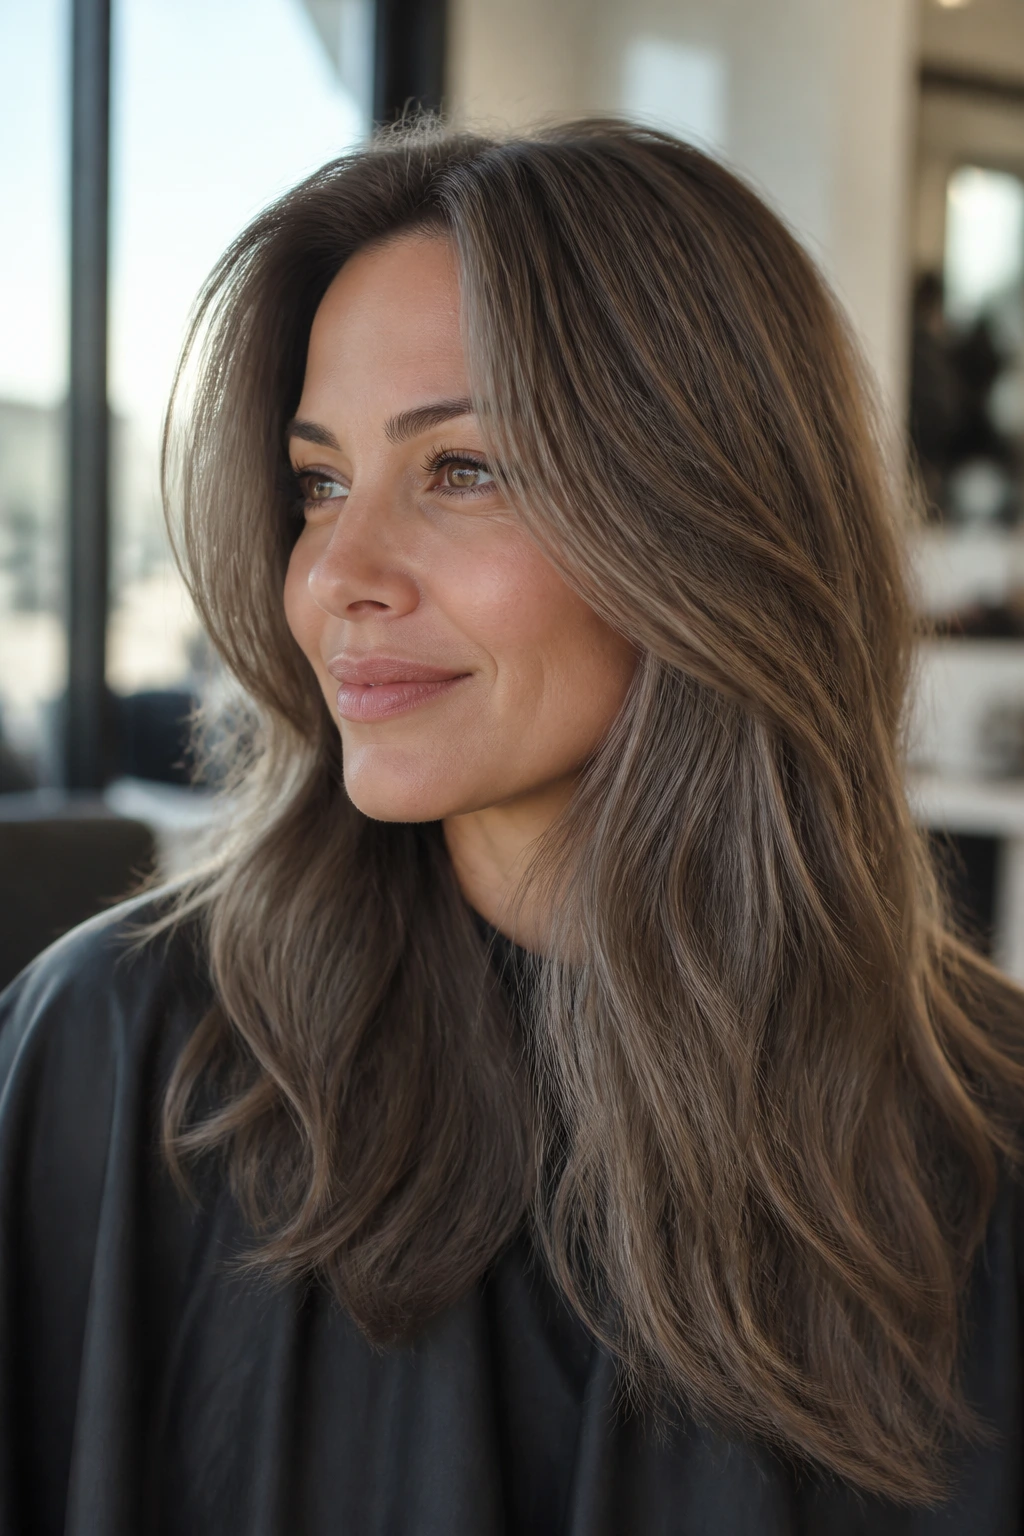
Mushroom brown is essentially a mid-tone earthy brown with a greyish, taupe undertone. It is arguably the most popular trend for a reason—it is subtle, sophisticated, and incredibly effective at camouflaging the transition.
Mushroom brown lowlights work because they occupy the same visual “space” as many people’s transition greys. They are not as dark as espresso and not as light as caramel. They sit right in that sweet spot of neutral, dusty brown that looks like it was born that way.
When you sit in the chair, request a gloss rather than a permanent color for these lowlights. Since the goal is to blend and not cover, a demi-permanent or acidic gloss will provide enough tint to soften the greys without creating a harsh, distinct line of demarcation when your roots grow out. This also preserves the integrity of your hair, which is crucial as texture changes during the greying process.
3. Smokey Chocolate
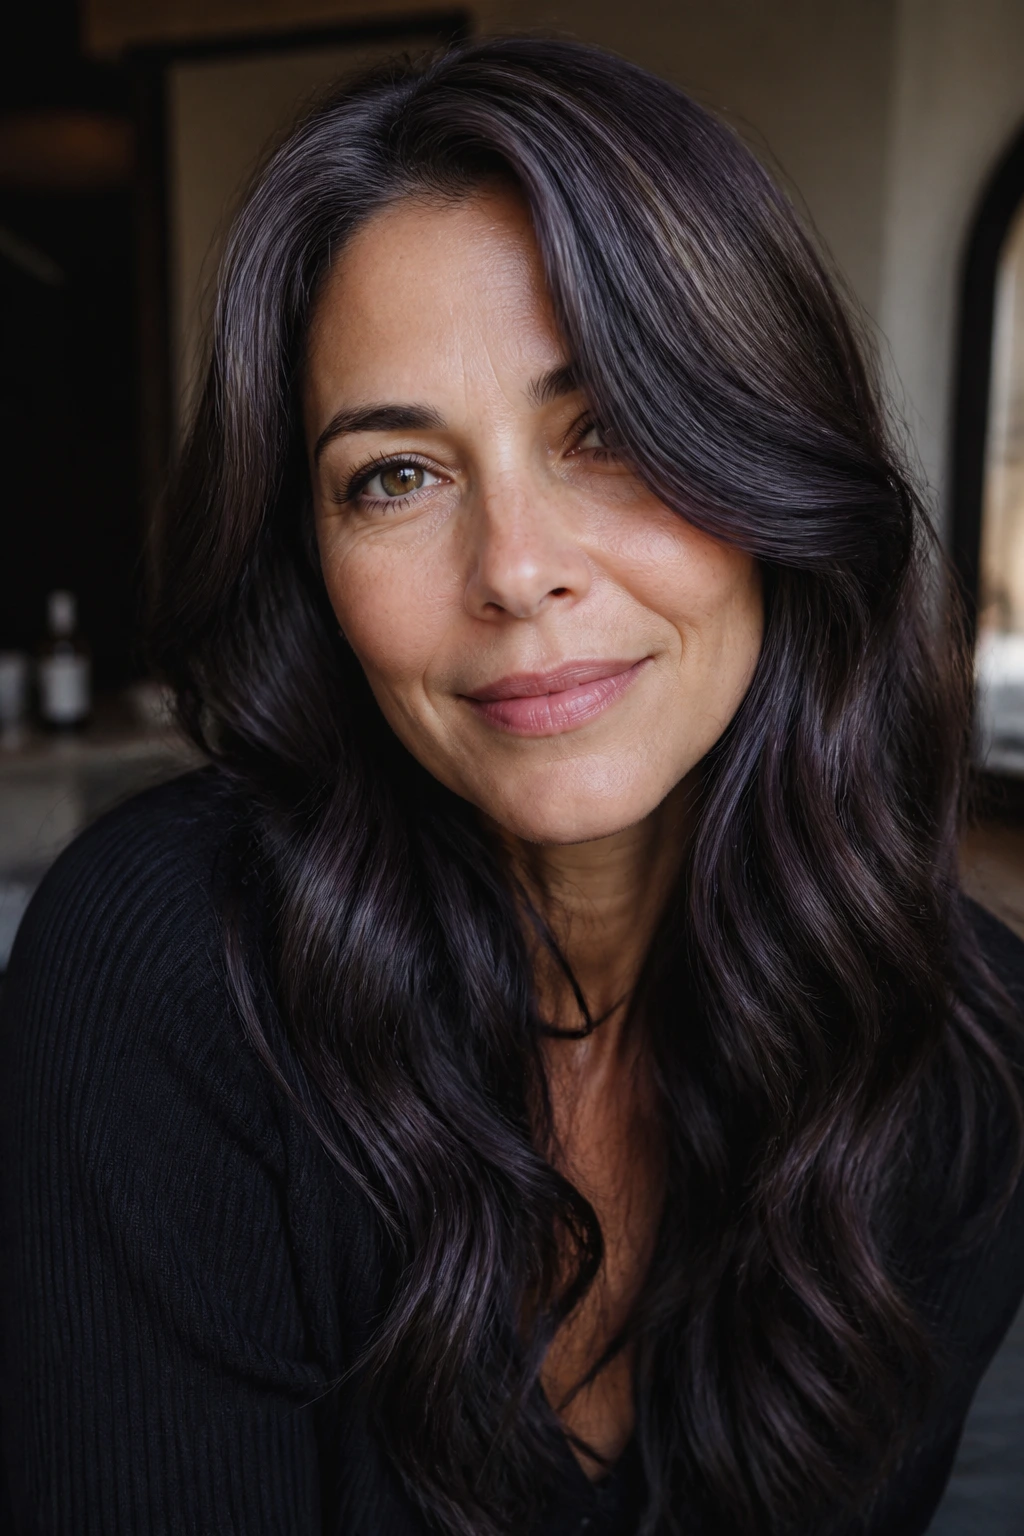
Chocolate brown can sometimes lean too warm or reddish, which creates a stark contrast against cool-toned grey hairs. A smokey chocolate, however, incorporates a touch of violet or blue pigment into the brown base.
This creates a rich, deep color that feels luxurious. It is excellent for someone who wants to keep their hair dark but is tired of the stark white root contrast.
The Visual Effect
The “smokey” aspect refers to the slight opacity of the color. It doesn’t reflect light as sharply as a standard gloss, which means the transitions between the chocolate strands and your natural greys are softer on the eye.
- Best For: Those with a naturally deep brunette base who are not ready to go significantly lighter but want to diffuse the grey.
- Styling Tip: These lowlights look best with a bit of texture. A loose wave or a tousled bob helps mix the lowlights and greys, creating a “salt-and-pepper” effect that looks intentional rather than accidental.
4. Caramel-Infused Lowlights
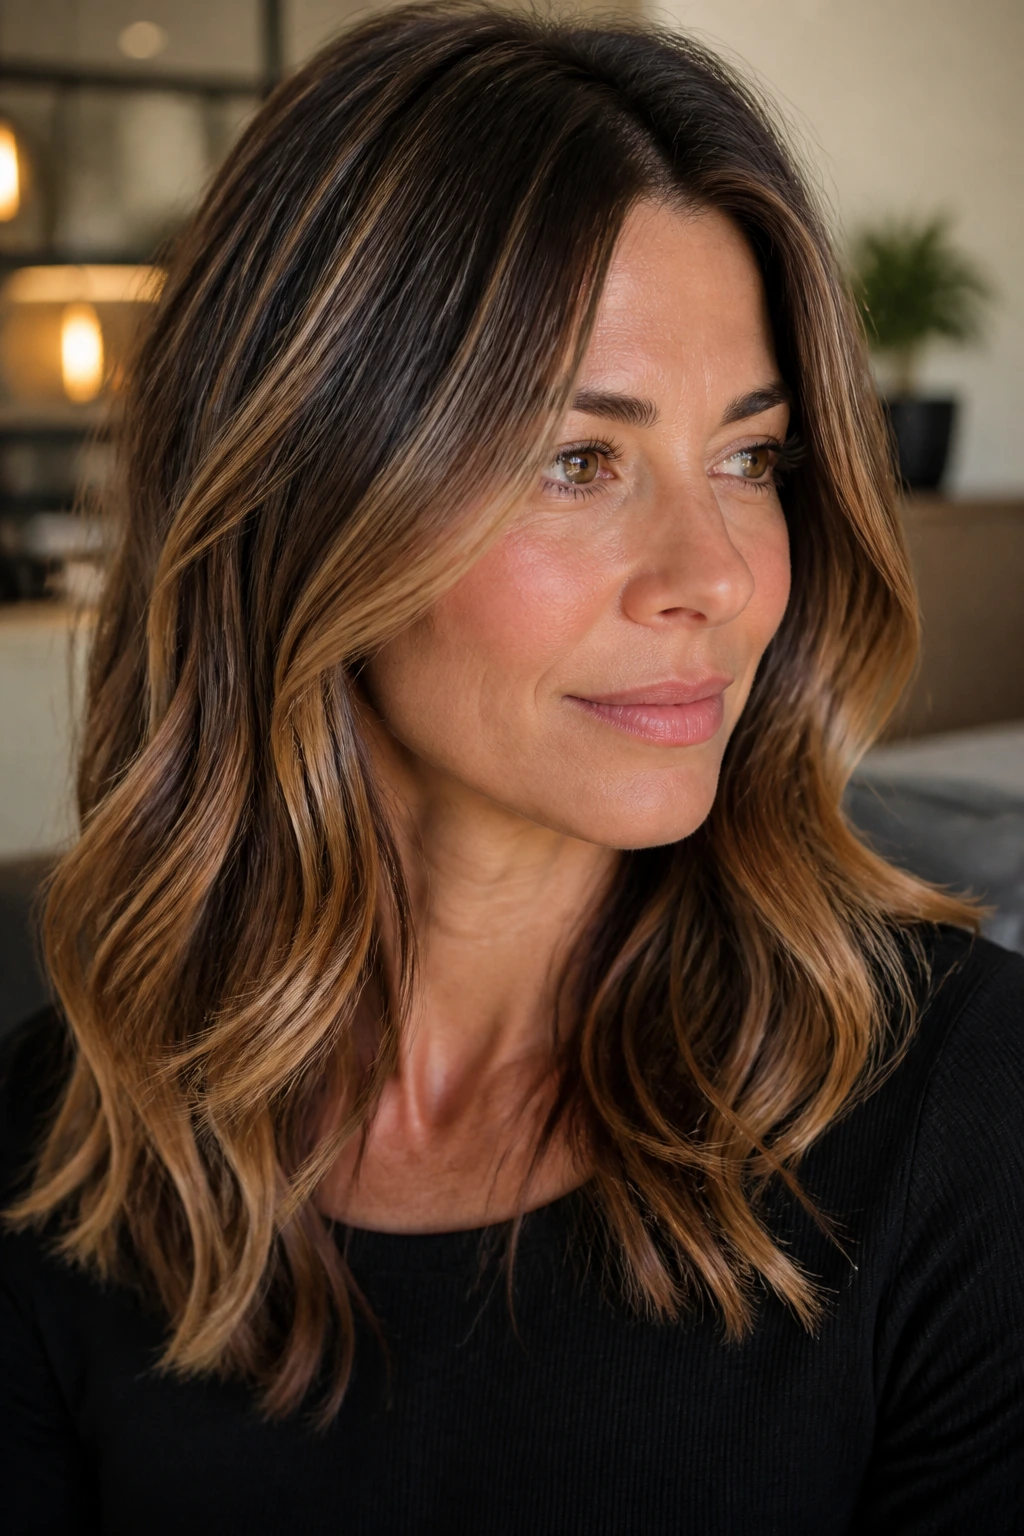
Wait, isn’t caramel too warm? Many people assume you must avoid warmth if you have grey hair. That is not necessarily true. If your skin tone is warm, a cool ash lowlight might wash you out.
Caramel-infused lowlights provide a “babylights” effect. They add movement and brightness. When placed strategically around the face, they frame your features and draw attention away from the crown where greys often cluster most heavily.
The key here is balance. If you are a dark brunette with significant grey, you do not want all-over caramel. You want ribbons of caramel woven through the mid-lengths and ends. This mimics the sun-kissed look of younger hair and distracts the eye from the roots.
5. Dimensional Espresso
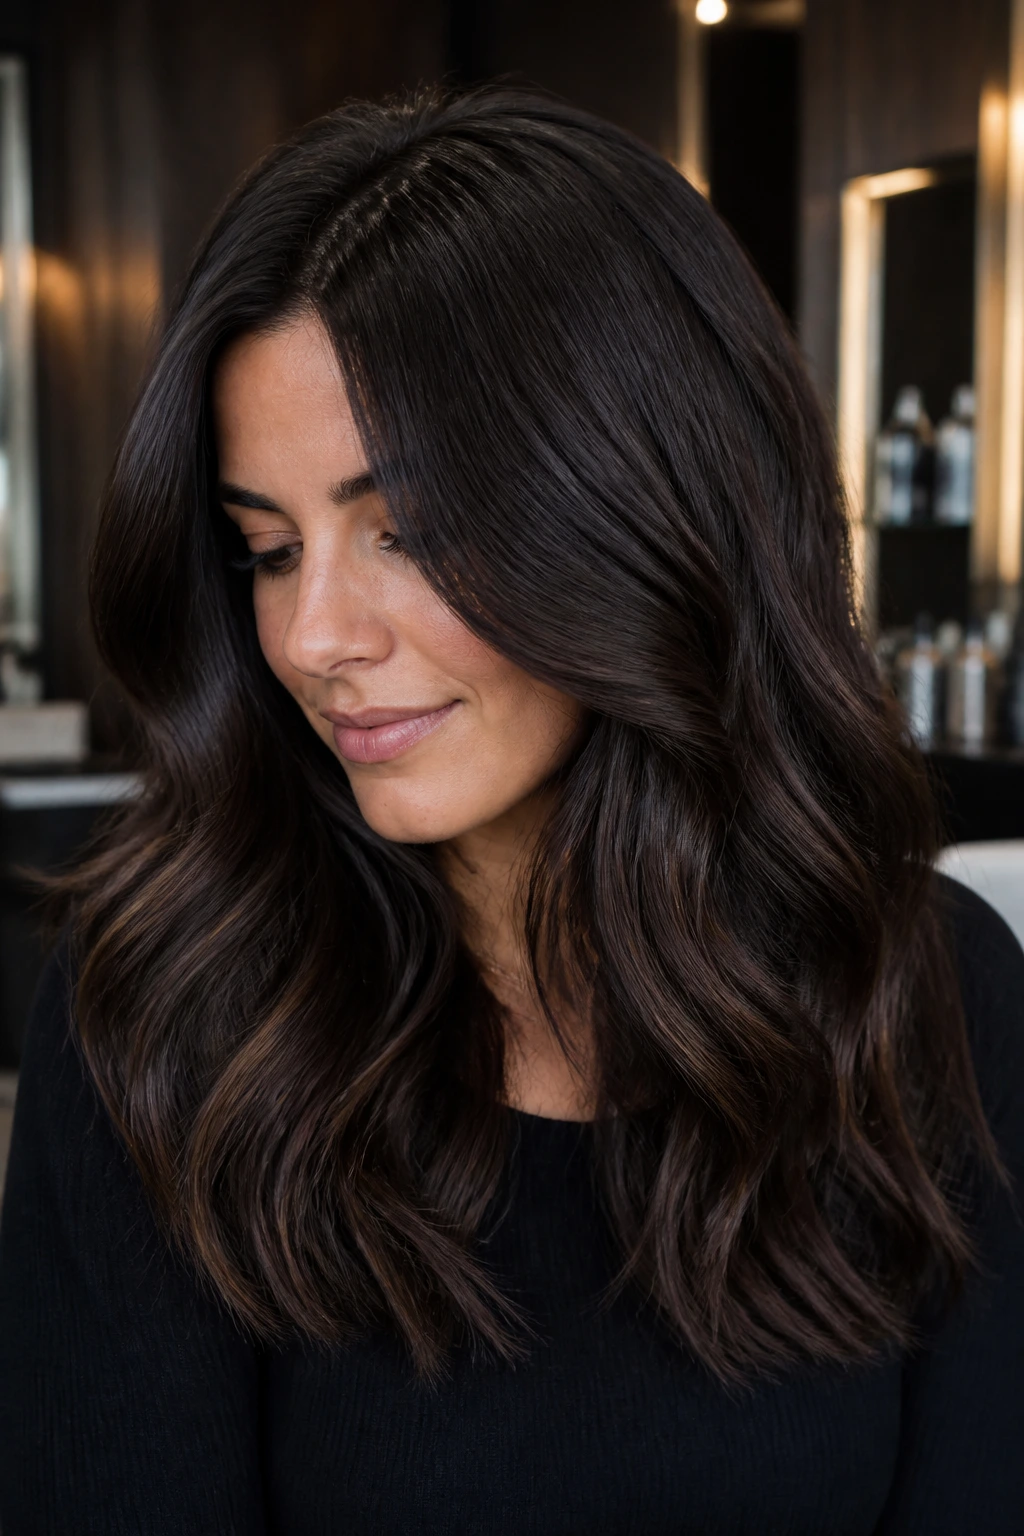
If your natural hair is nearly black, light brown lowlights will look jarring and stripey. You need something that provides depth without creating a color block. Espresso lowlights use a rich, dark coffee shade that is just a half-shade lighter than your base.
This is all about adding dimension rather than contrast. Think of it like adding layers of shadows to a painting. By adding espresso, you break up the monotony of a single-process dark color, which makes your hair look thicker and healthier.
Why Depth Matters
Thinning is a common concern when hair begins to grey. Single-process dark color makes the scalp visible through the hair, highlighting every single grey. Dimensional espresso lowlights create the illusion of density by adding varying tones, which makes the hair look fuller and more complex.
6. Cool-Toned Mocha
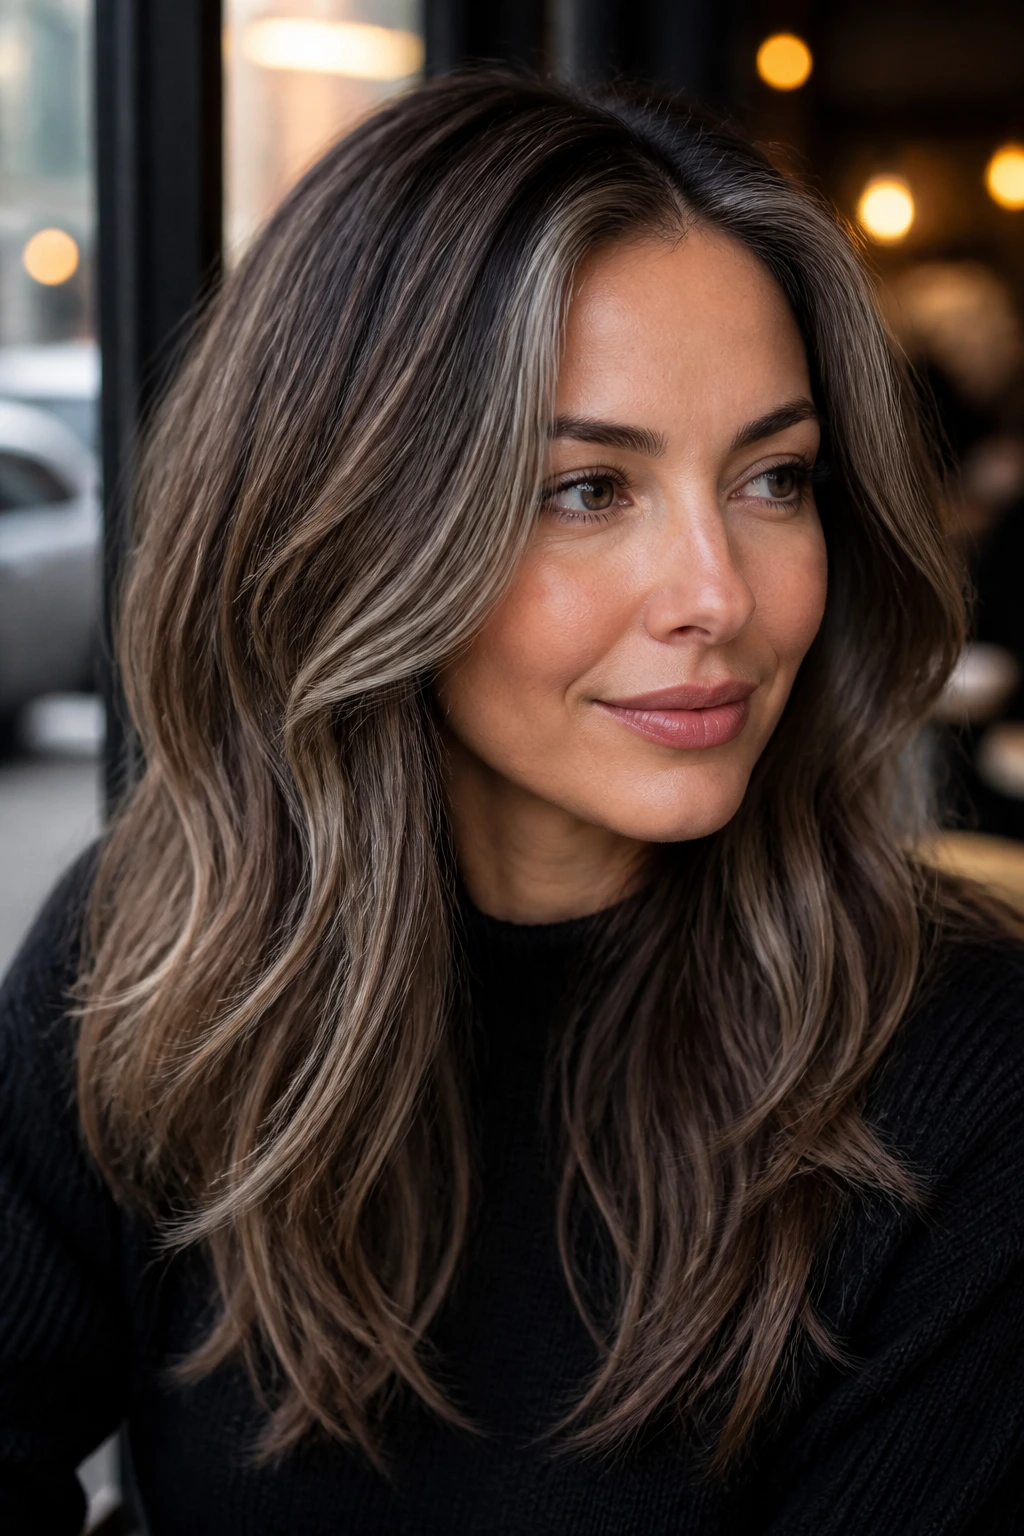
Mocha is a beautiful, drinkable shade of brown. A cool-toned mocha pulls away from the red and copper spectrums. It is a fantastic option for someone who wants a “brunette” look but whose greys are coming in very silver or white.
The coolness of the mocha acts as a filter for the grey. Instead of the grey looking like a bright white wire, it takes on a slight metallic sheen that blends into the mocha.
Practical Application: Ask your stylist to use a “shadow root” or “root smudge” technique in conjunction with the mocha lowlights. This melts the color into your roots, so even when your hair grows an inch or two, it still looks like an intentional balayage rather than roots that need touching up.
7. Silver-Streaked Ribbons
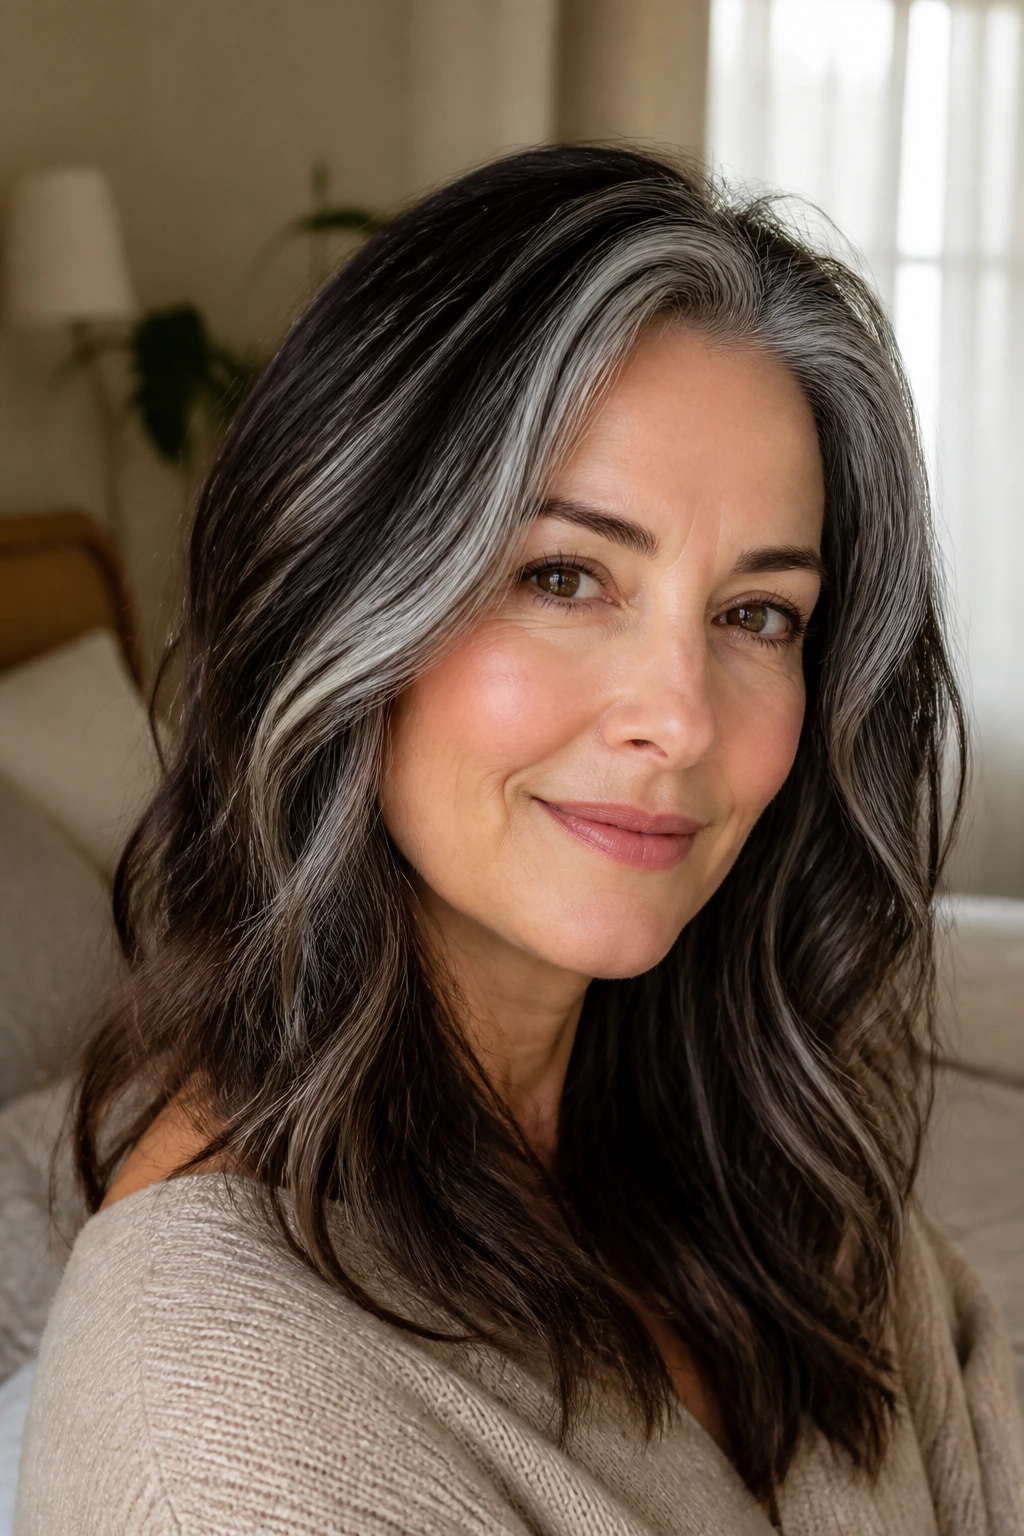
This is for the confident client who is ready to embrace the transition. Instead of hiding the grey, these lowlights use silver or slate-grey permanent or demi-permanent color to mimic the grey strands.
By adding intentional, silver-toned lowlights, you are effectively “pre-greying” the parts of your hair that haven’t turned yet. This creates a cohesive, silver-fox look.
- The Benefit: You stop fighting the grey and start directing it.
- The Commitment: This requires professional maintenance. Silver hair can yellow, so you must use a toning conditioner religiously.
- Who It Suits: Those with a high percentage of grey (50% or more) who want to look like they have a full, blended head of silver.
8. Dark Slate Blend
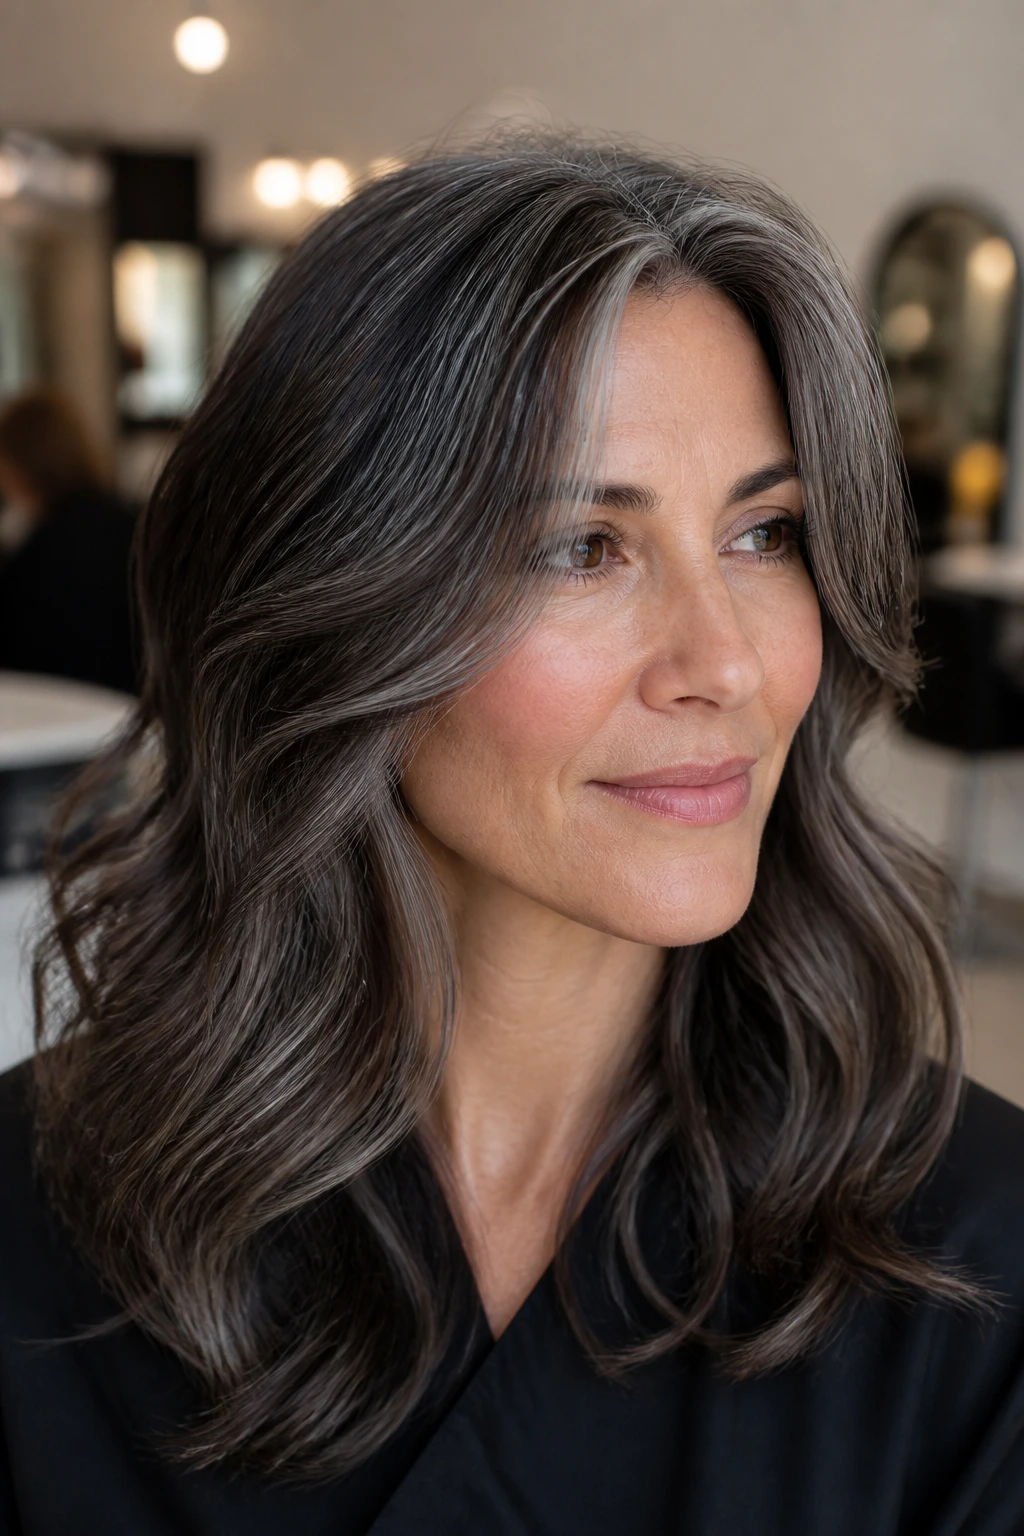
Slate is a beautiful, muted, grey-blue-brown hybrid. It’s sophisticated and slightly edgy. If you have cool-toned skin, this is arguably the most flattering option for grey blending.
A dark slate lowlight acts as a buffer between your dark brown roots and your silver strands. It creates a gradient effect that is very pleasing to the eye.
Why Muted Tones Work
Bright colors can make grey hair look more obvious. Muted, dusty colors like slate, mushroom, or taupe tend to absorb light and create a soft-focus effect. This makes the sharp edges of your grey hairs blur into the rest of your mane.
9. Toasted Walnut
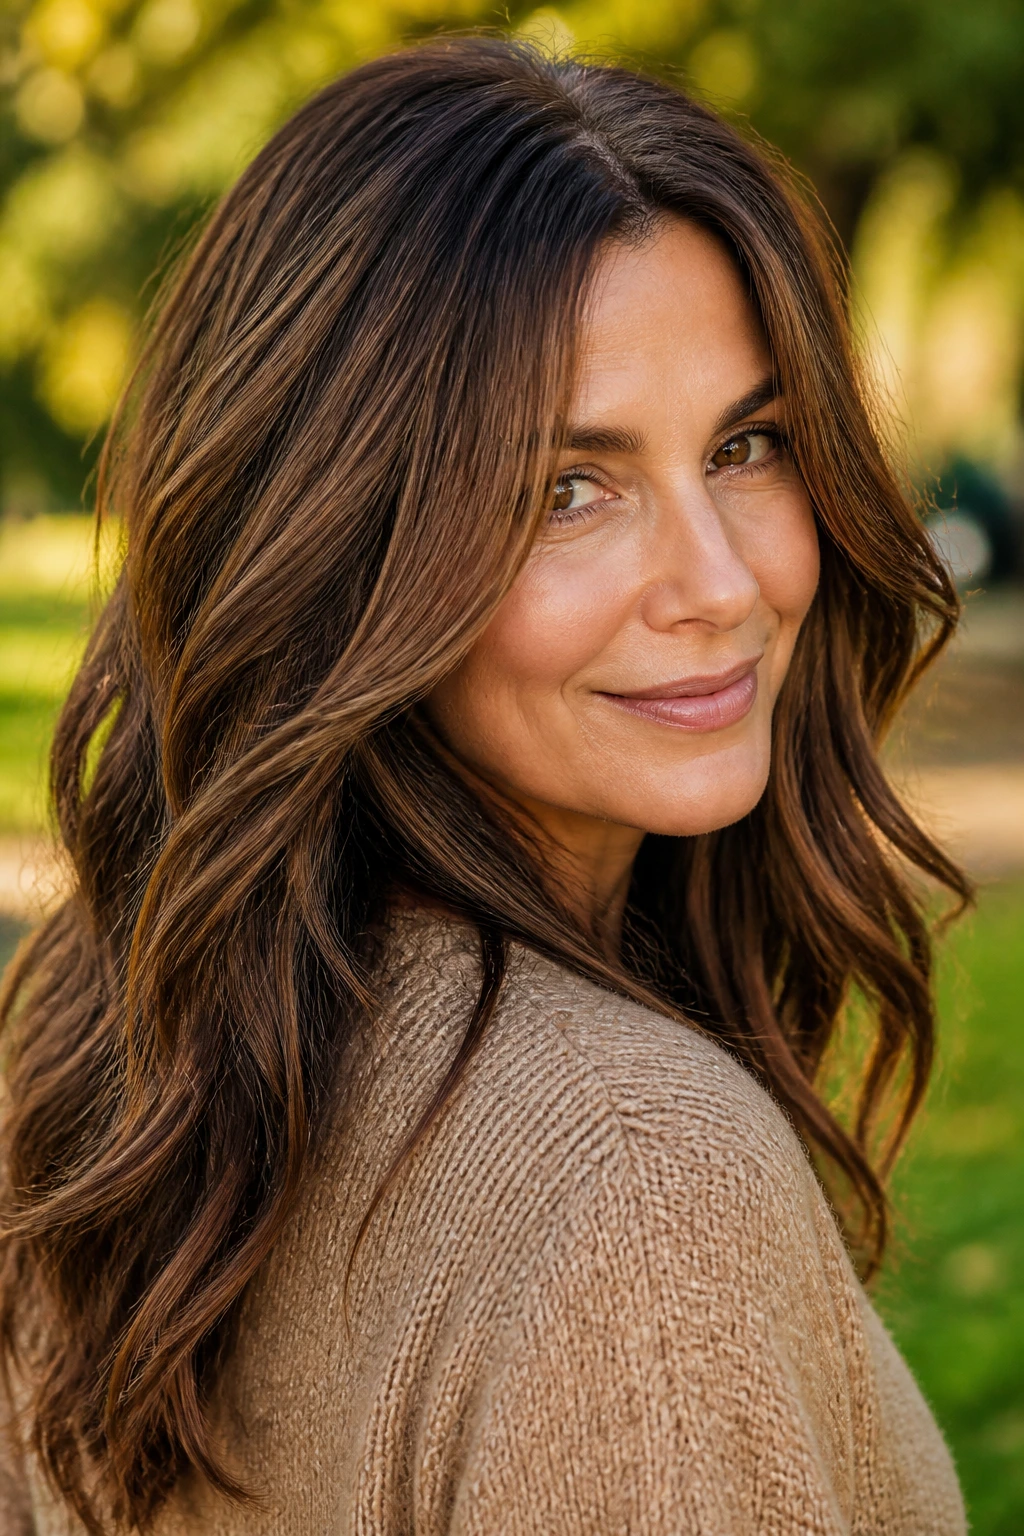
Toasted walnut is a warmer, nuttier shade of brown. It is less intense than espresso and less “fashion-colored” than slate. It is a classic, timeless choice for brunettes who want a natural appearance.
This shade works wonders for people whose greys are more “salt” than “pepper.” If you have a decent amount of dark hair left, toasted walnut provides a rich, warm layer that makes the overall color look expensive and well-cared for.
Application Tip: Use these as lowlights in a balayage placement. Focus the color on the mid-lengths and the tips, leaving your natural root color to grow out gracefully.
10. Deep Charcoal Contrast
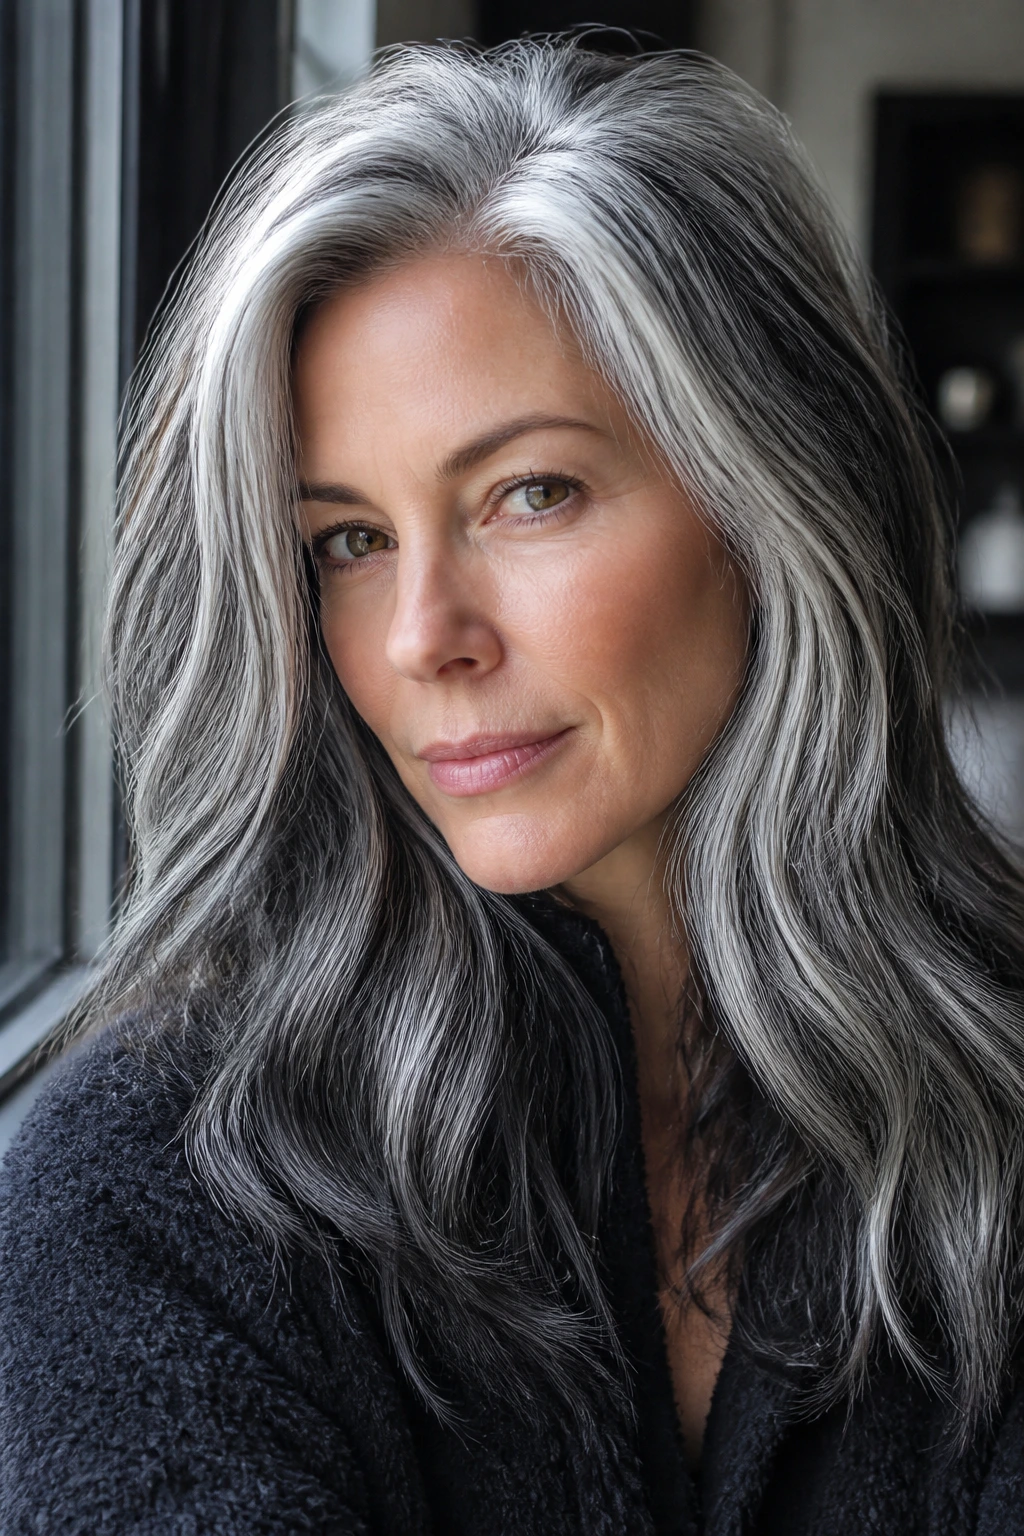
Charcoal is a very deep, cool, almost black-grey. Using this as a lowlight is a bold move. It creates high contrast if you have a significant amount of white hair.
This is essentially the reverse of traditional highlighting. In traditional highlights, you lighten dark hair. Here, you use charcoal lowlights to add depth to white or silver hair, effectively creating a “salt-and-pepper” look that is balanced and even.
The “Reverse” Strategy
For those who have gone almost entirely grey but have patches of dark brunette, adding deep charcoal lowlights helps harmonize the disparate sections. It makes the grey look like a design choice rather than a lack of pigment.
11. Warm Chestnut Depth
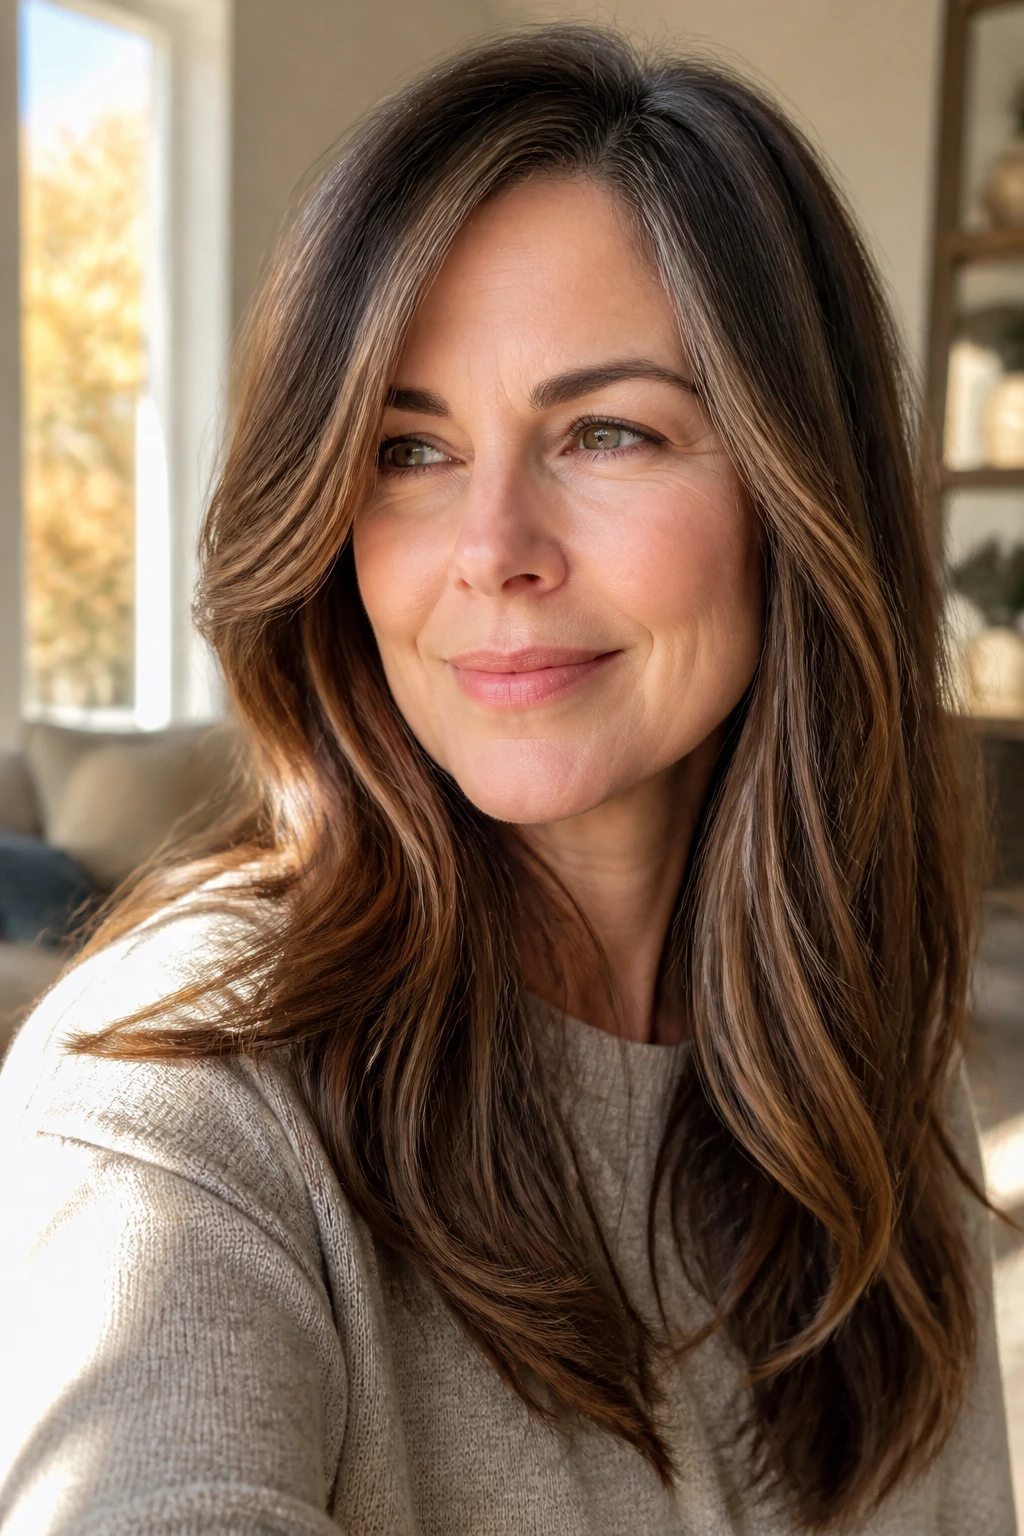
Chestnut contains enough red and gold to add life to dulling, greying brunette hair. Grey hair can often look flat and matte. Chestnut lowlights add a reflective quality that mimics the shine of healthy, youthful hair.
While we usually advocate for cool tones for grey blending, sometimes a touch of warmth is necessary to stop the hair from looking “ashy” or “ghostly.”
- Best Placement: Around the face and at the ends.
- The Result: A healthy, vibrant appearance that makes the skin look radiant. Avoid placing chestnut too close to the roots if you want to avoid a harsh line as it grows out.
12. Salt-and-Pepper Reverse Balayage
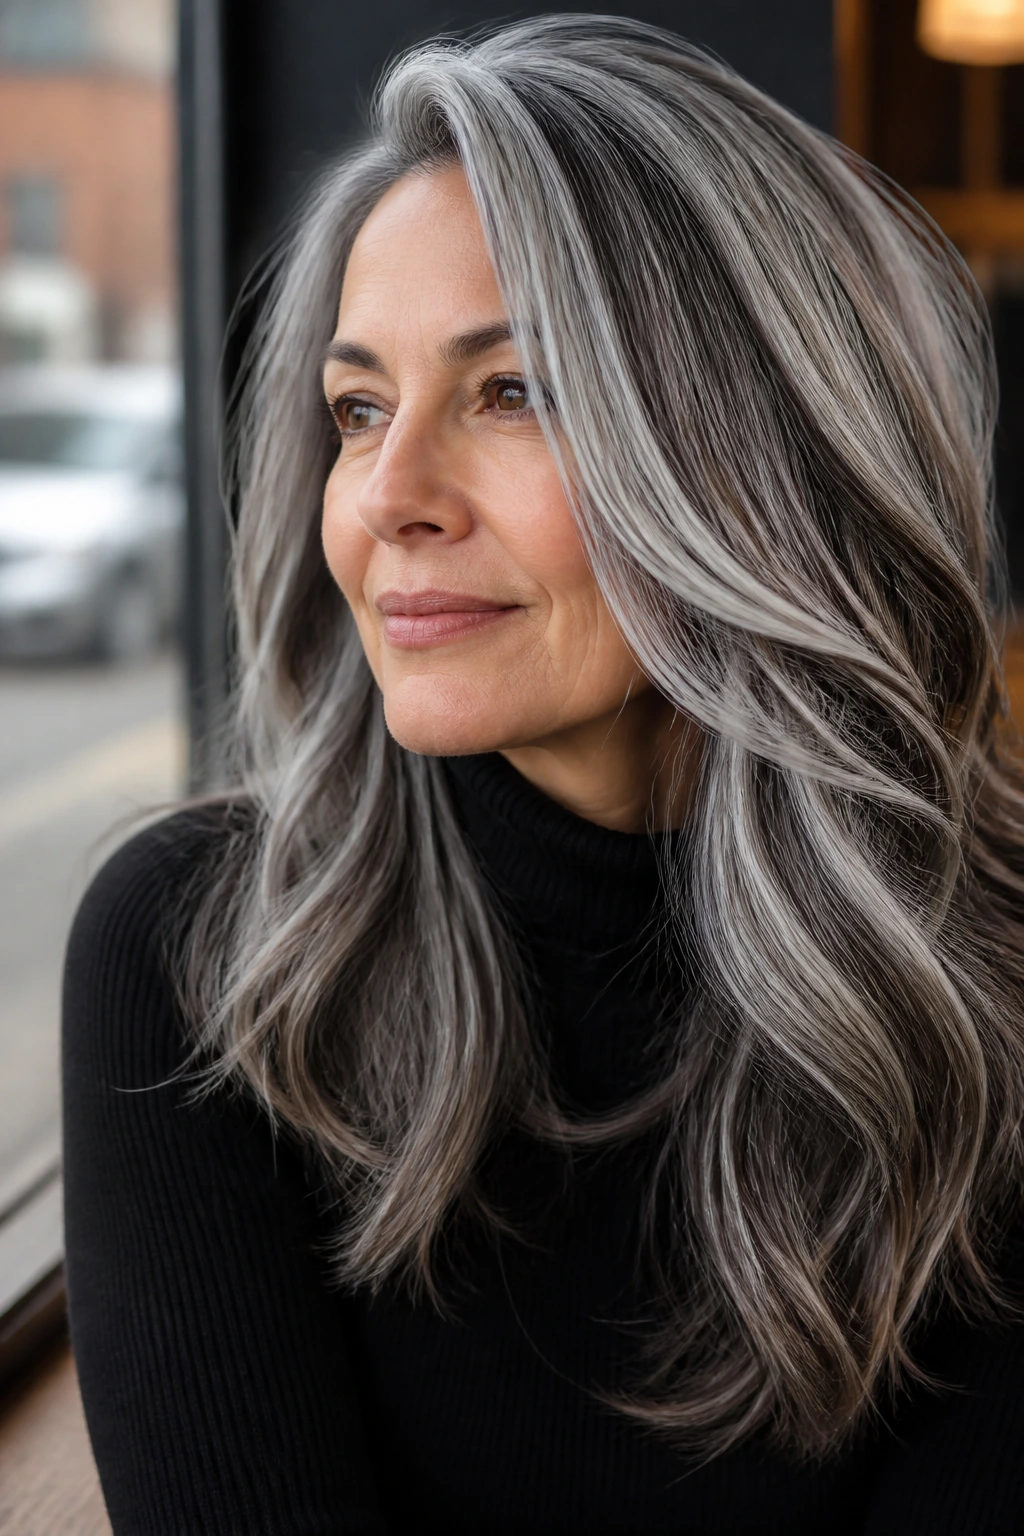
This is a technical request you can make to your stylist. Instead of a standard balayage where the ends are lighter, a reverse balayage uses dark lowlights painted in a V-pattern from the roots down to the mid-shaft.
This is the ultimate solution for someone who has gone grey too quickly and feels like their hair is “washed out.” By weaving in dark, natural-looking brunette lowlights through the silver, you regain the structure and definition that your hair had when you were fully brunette.
Why it saves time: Because you are painting in dark ribbons, you are not touching your actual roots with a harsh dye. This means your grow-out is completely seamless.
13. Coffee
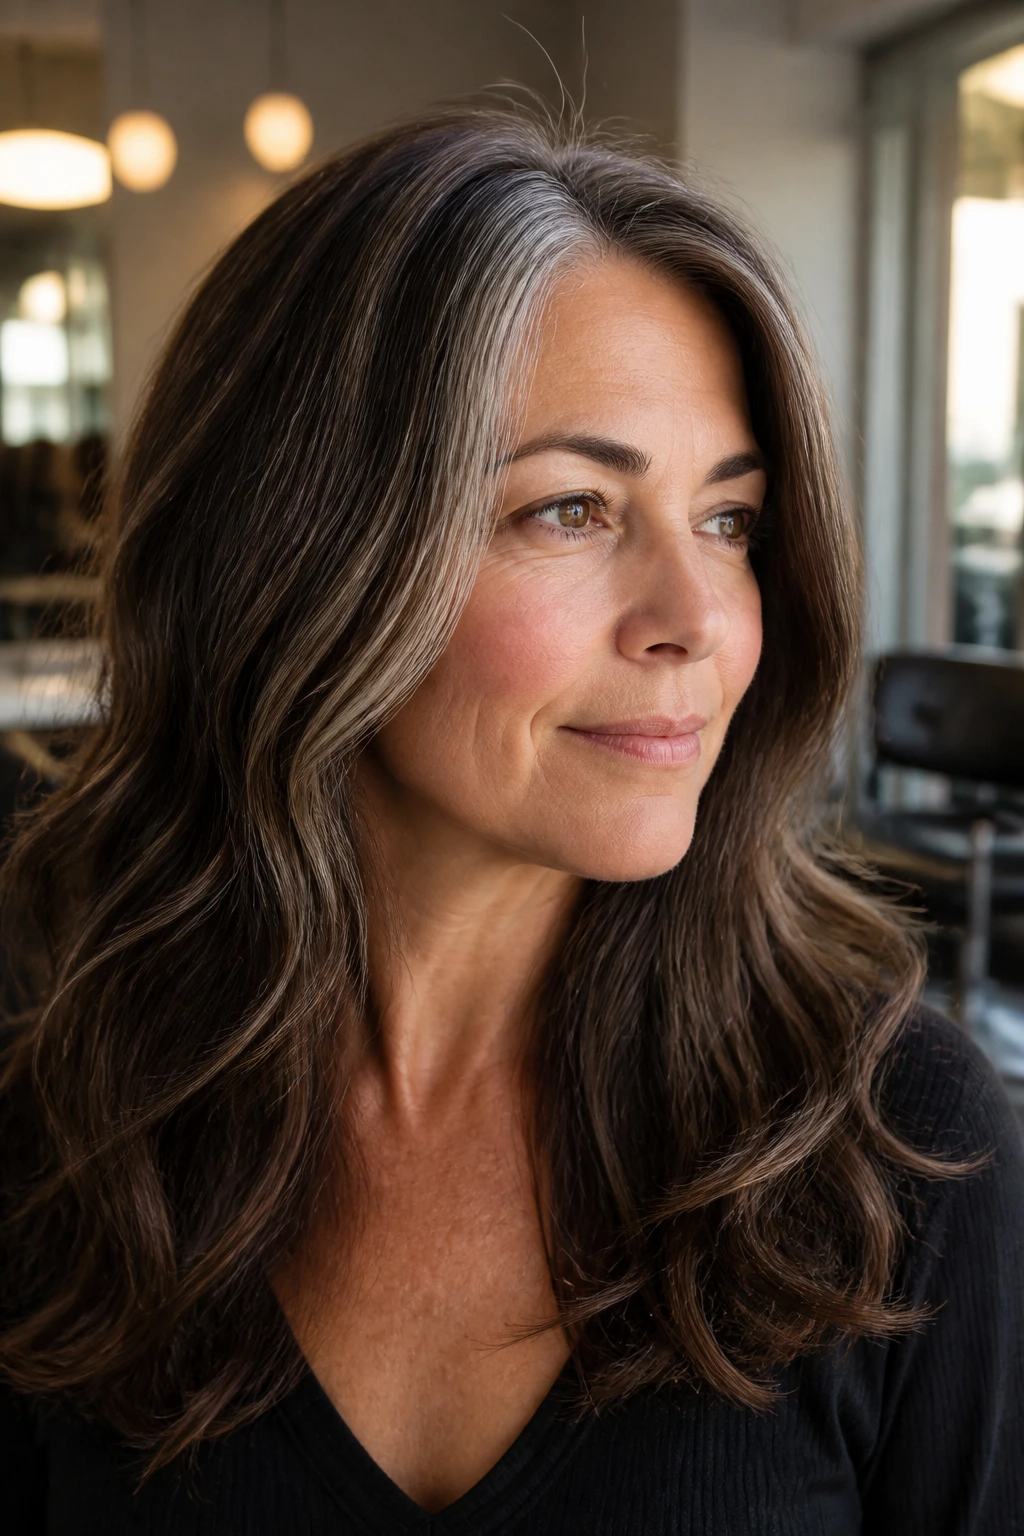
Coffee brown is a neutral. It is neither too warm (red) nor too cool (ash). It is the “I just want my hair to look like brown hair” shade.
For grey blending, neutral coffee lowlights are the safest bet. They don’t fight with the tone of your grey, and they don’t introduce jarring colors that might clash with your skin tone.
Why Neutrals Prevail
When you enter the world of grey blending, it is easy to get caught up in trendy shades like mushroom or silver. But sometimes, you just want to look like you. Neutral coffee lowlights restore the richness of your base color without changing your overall vibe. It is the most low-maintenance option on this list.
14. Dusty Cocoa Tones
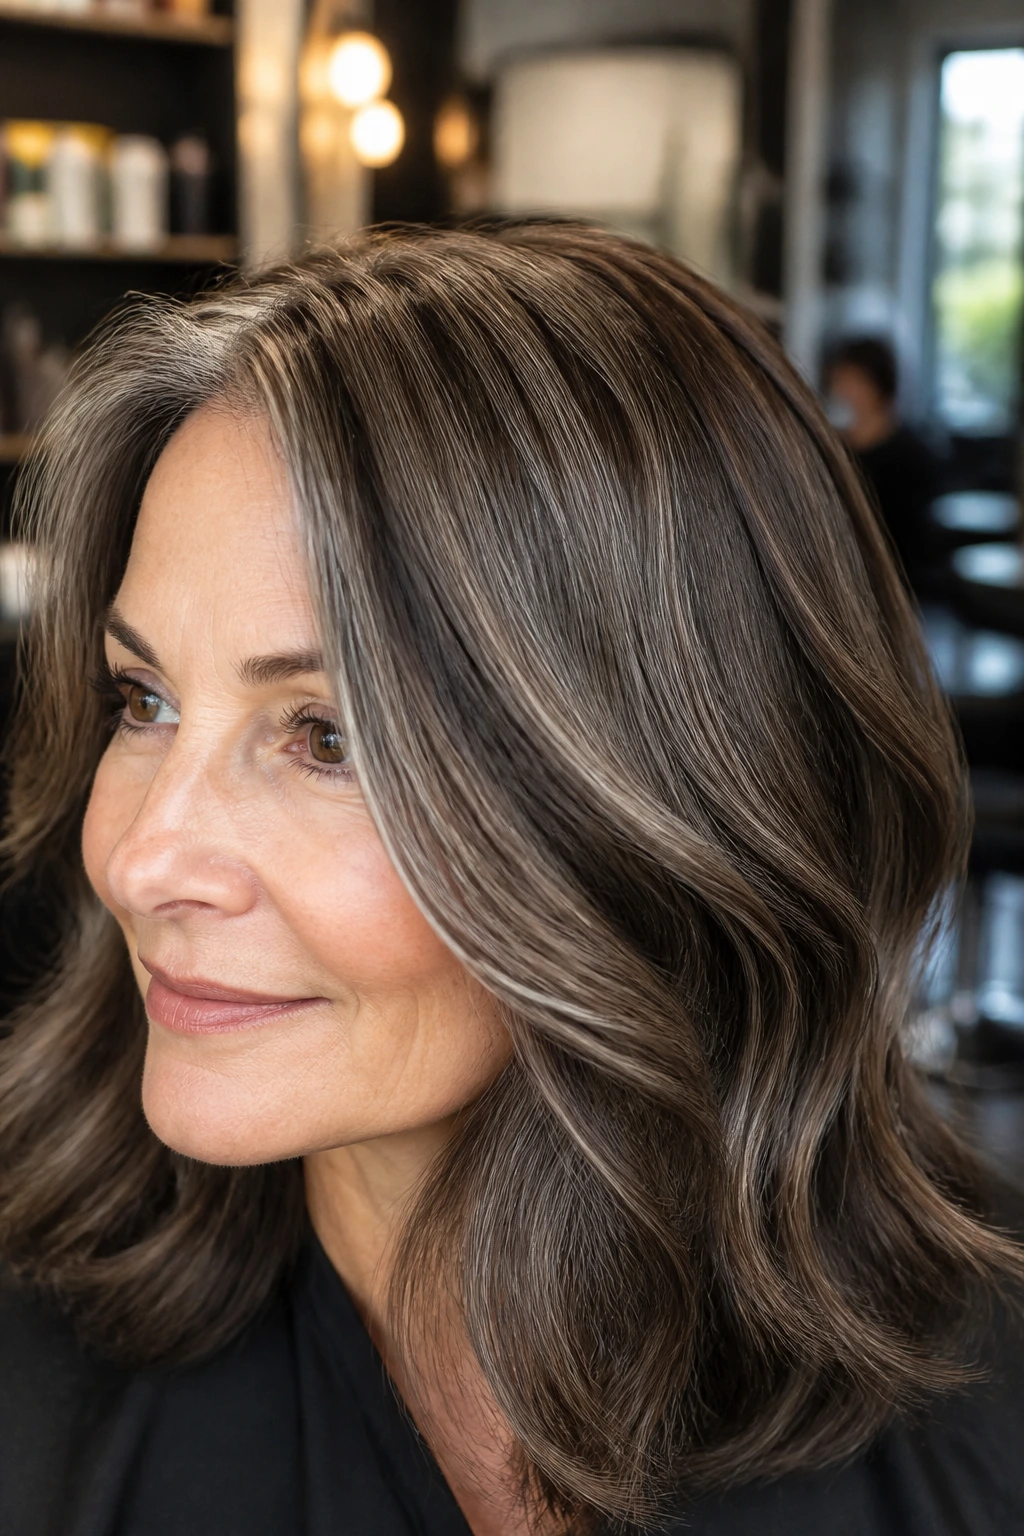
Cocoa is a lighter, slightly warmer version of chocolate. When you make it “dusty,” you are muting the warmth, creating a soft, brown shade that has a hint of grey itself.
These lowlights are excellent for clients who are thinning slightly. The dusty nature of the color adds a texture-enhancing quality to the hair. It makes the hair look “fluffy” rather than flat.
Pro Advice: Pair this with a volume-enhancing mousse. The combination of the dusty color and the added volume will make your hair look significantly thicker than it actually is.
15. Midnight Brown Depth
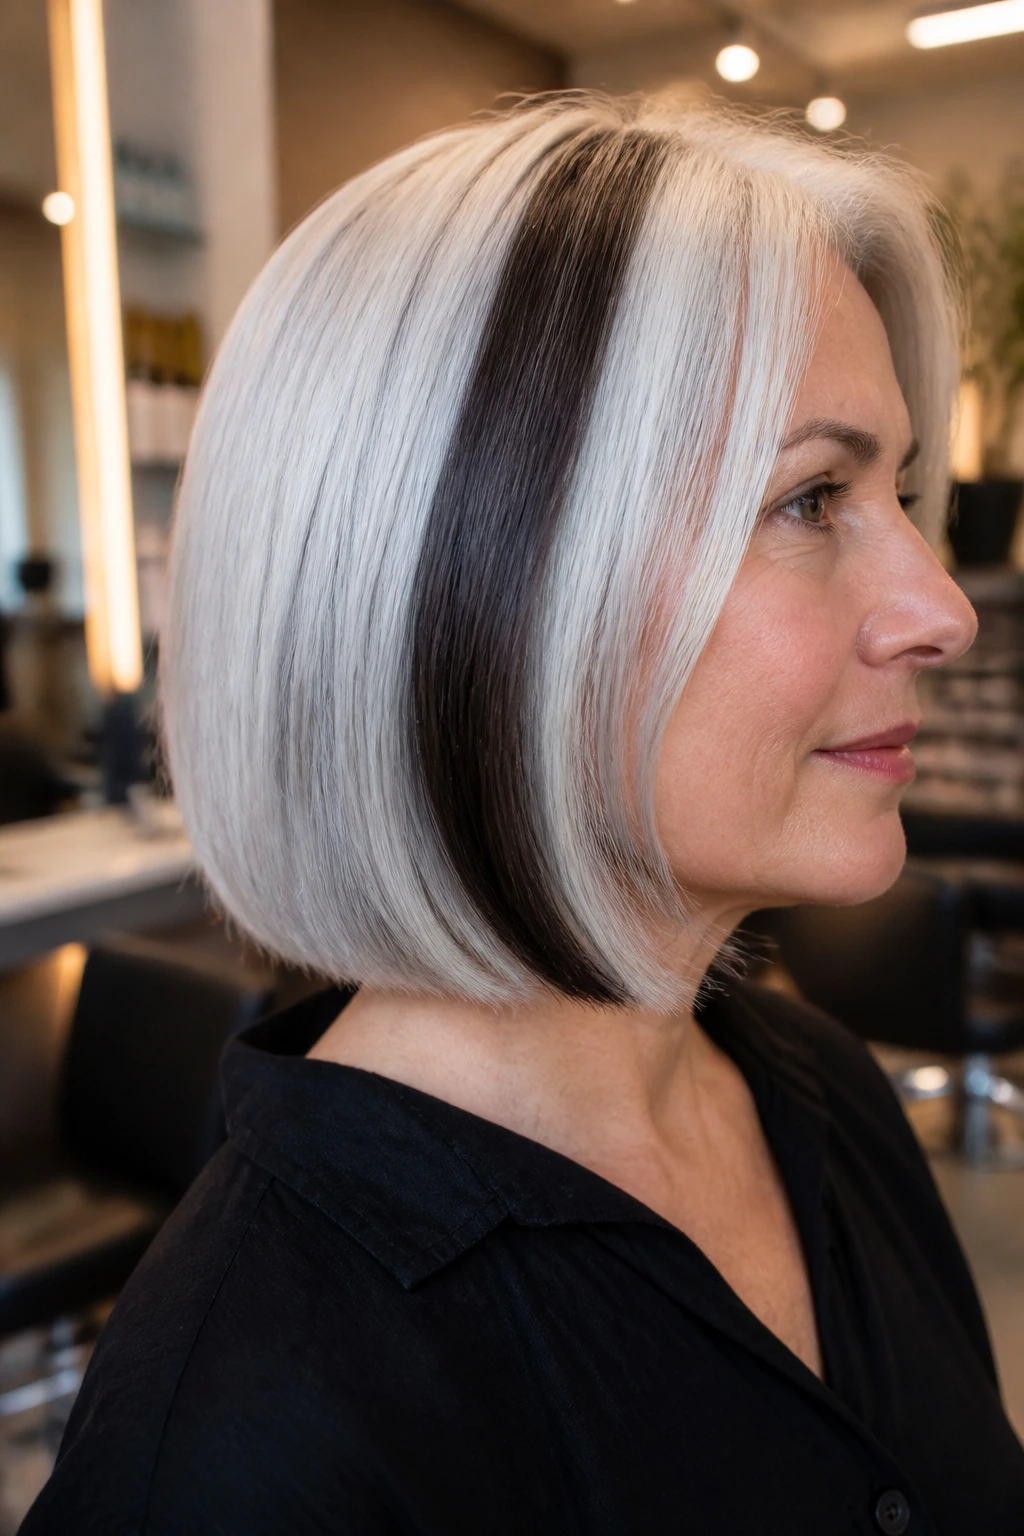
This is a very dark, nearly black-brown shade. Use this sparingly. It is not for all-over lowlighting; it is for strategic “ribboning.”
If you have a section of hair that is entirely white or silver, adding a single thin ribbon of midnight brown can create a stunning, sophisticated contrast. This is a very stylized, intentional look. It says, “I am not hiding my grey; I am styling it.”
Style Pairing
This look pairs beautifully with a blunt cut, such as a sharp bob or a lob. The strong lines of the cut combined with the high-contrast color ribbons create a very architectural, modern aesthetic.
16. Slate Grey Ribbons
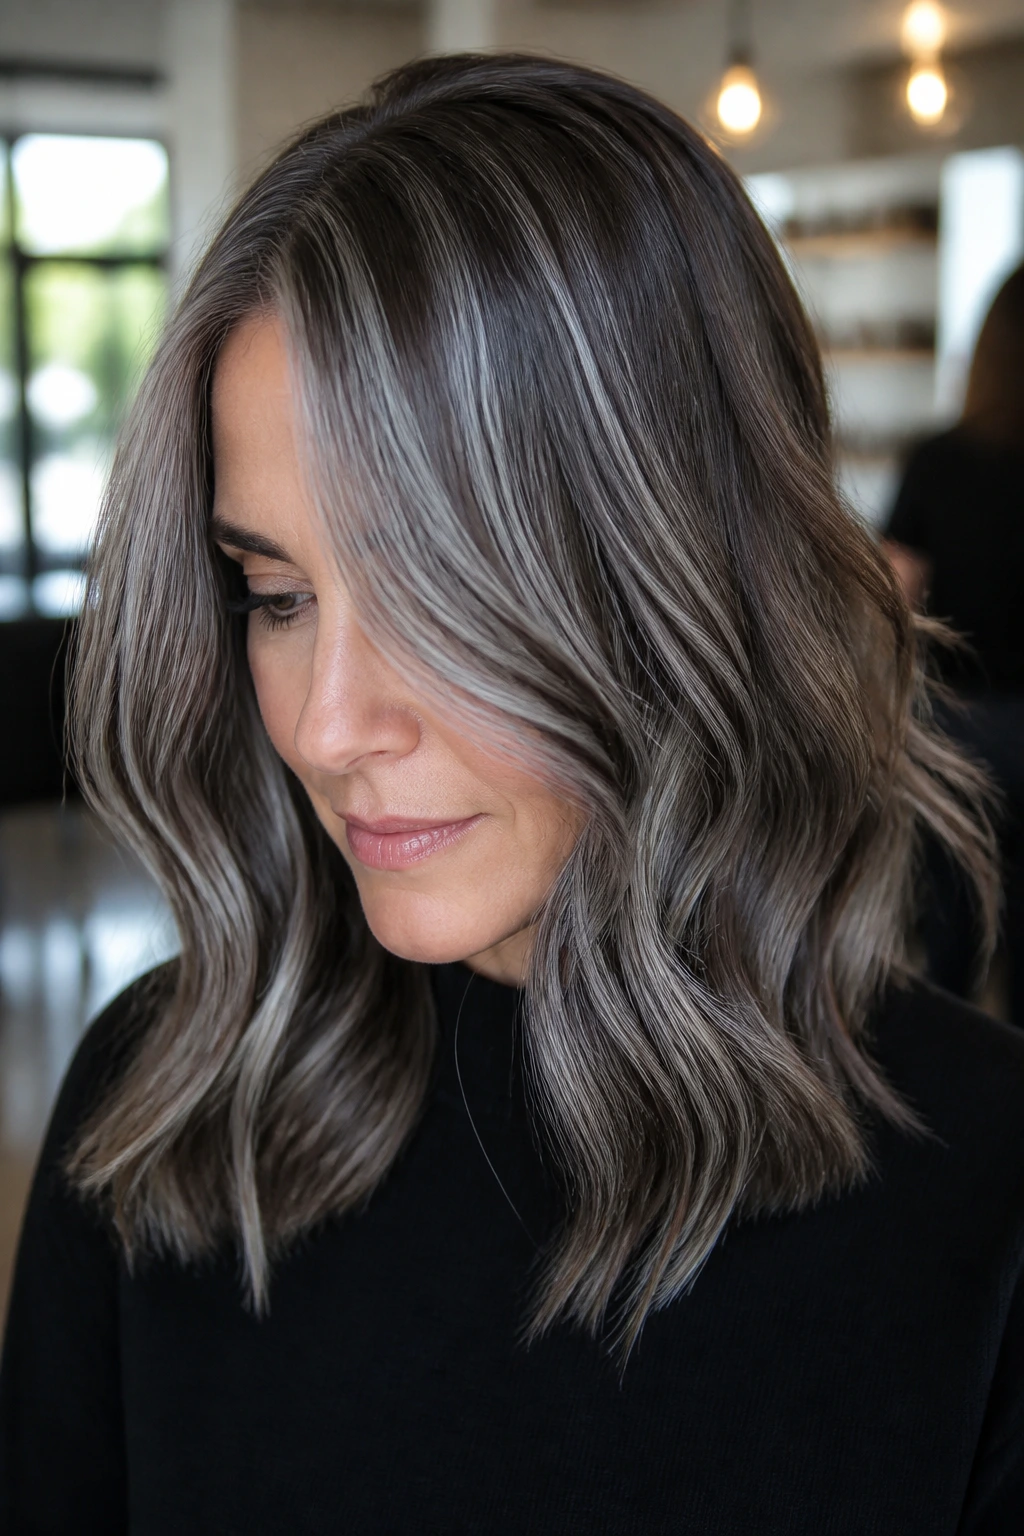
We mentioned dark slate earlier, but pure slate-grey ribbons are a different game. These are slightly lighter than the base shade.
This creates a shimmering effect, especially when the light hits the hair. It blends the natural greys with the dyed greys, creating a multi-tonal, metallic effect. This is widely considered the most modern “grey blending” technique. It doesn’t look like hair dye; it looks like expensive, professional-grade highlights designed to show off the silver.
17. Rich Bronze Undertones
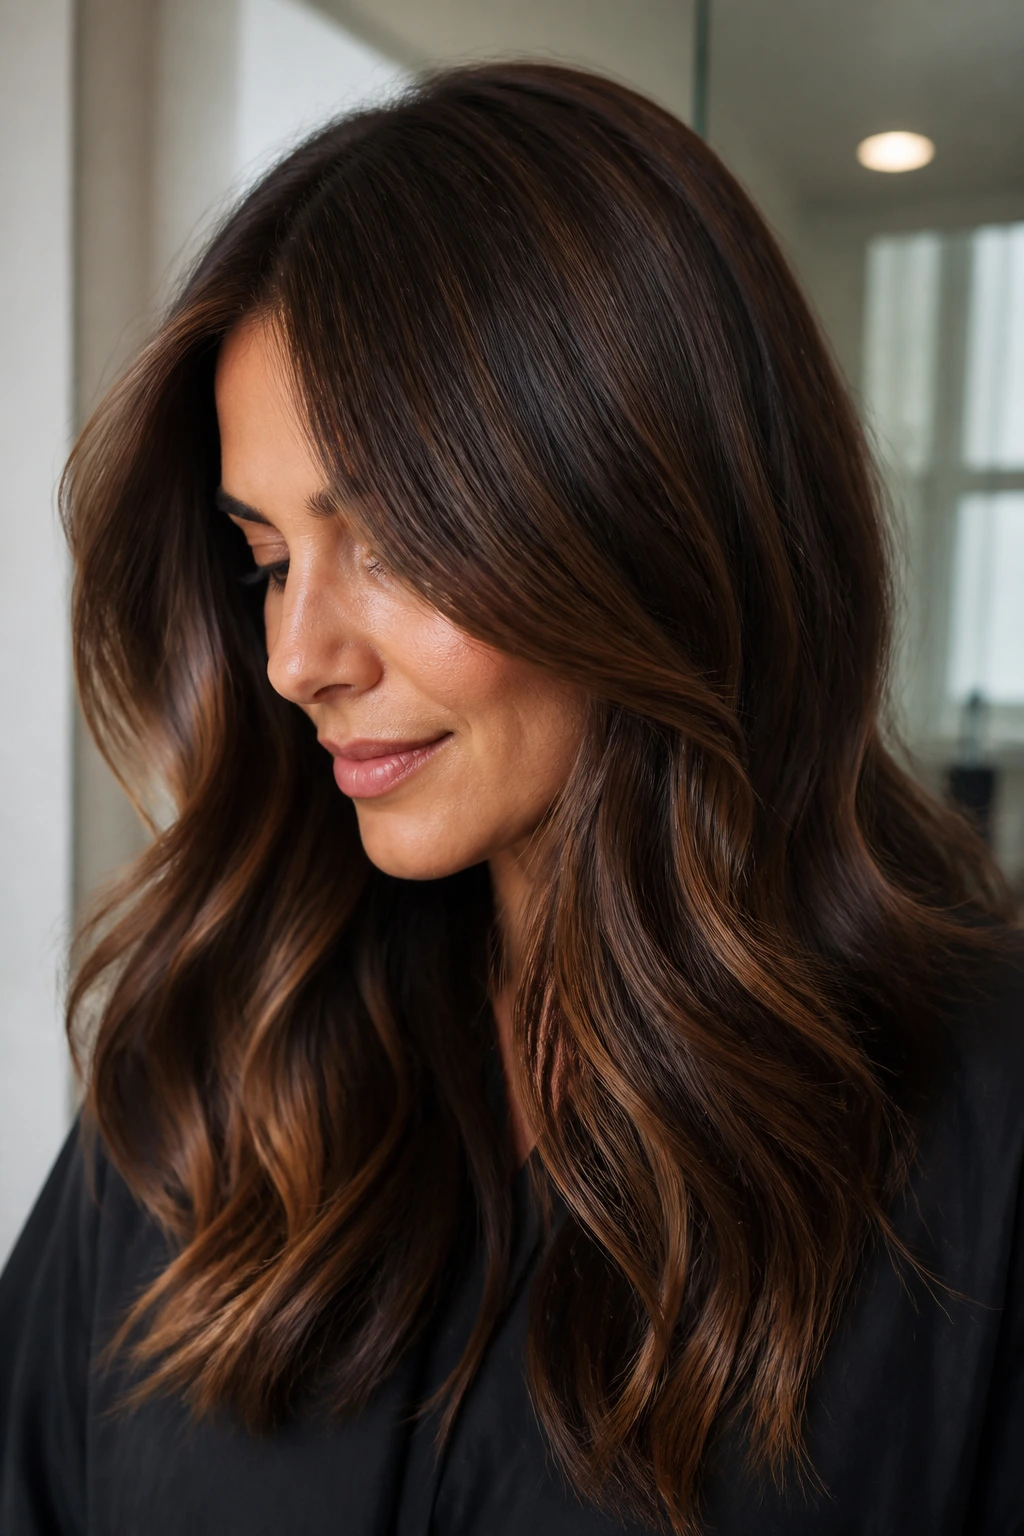
Bronze is a complex color. It has brown, gold, and a hint of copper. When used as a lowlight for a brunette, it adds an incredible amount of shine.
Grey hair can be dry. It lacks the natural oils that coat the hair shaft, which is why it often looks frizzy. Bronze lowlights, which often come in oil-based or gloss formulas, can help reflect light and provide the appearance of moisture.
Use Caution: Bronze is warm. If you have very cool skin, this might make you look sallow. Always test a swatch or hold a color ring against your skin in natural light before committing.
18. Subtle Licorice Strips
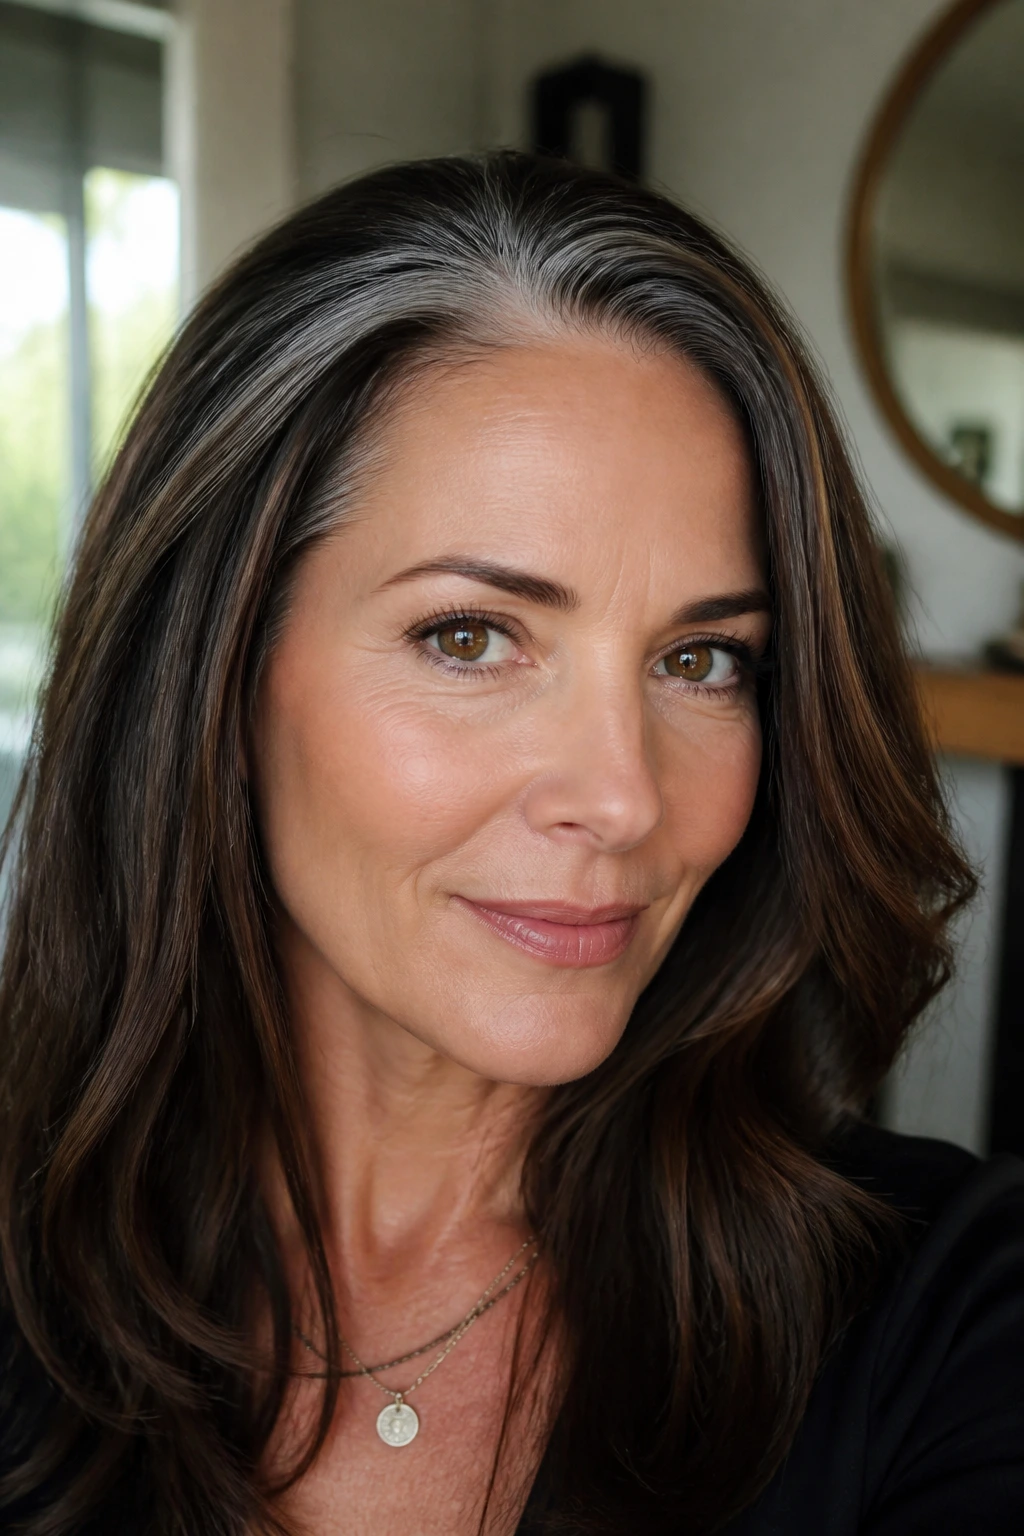
This is for the minimalist. Licorice is a very deep, cool black-brown. Instead of weaving this throughout the whole head, you place it only in the areas where the greys are most concentrated—usually the temples or the front hairline.
By placing a few thin “strips” of dark color in the areas that frame your face, you anchor the color and make the rest of the grey-blended hair look intentional. It provides a visual frame that prevents the face from being washed out by an abundance of grey.
The Power of Placement
Sometimes you don’t need a full head of lowlights. You just need to fix the framing. If you are happy with your current hair color but dislike how the grey creates a “halo” effect around your face, try adding just a few subtle licorice strips to break up that pattern.
Understanding Your Starting Canvas
Before you rush to the salon, you have to look at what you are working with. Not all grey is created equal. Some people go white in patches, others go grey all over, and some develop the dreaded “skunk stripe” right at the front hairline.
Your starting point dictates which of the 18 ideas above will work best. If you have 80% grey, dark lowlights will look like high-contrast stripes. If you have 10% grey, you only need a few subtle, low-impact lowlights to blend them.
The Role of Porosity
Grey hair is chemically different from pigmented hair. It has a tighter cuticle, which makes it harder for color to penetrate, but once it gets in, it can sometimes stay there too long, or it can fade unevenly.
Always tell your stylist if your greys are wiry. A professional will know to treat those areas differently—perhaps by leaving the dye on a few minutes longer or using a slightly different formulation to ensure the color takes hold.
Why Lowlights Work Better Than All-Over Color
I have seen many clients come in with “box dye fatigue.” They have spent years applying a single, dark, permanent color to their roots every month. The result? The ends of their hair are so over-processed they are almost black, while the roots are a different, flat, non-dimensional brown.
Lowlights fix this. By selectively choosing strands to darken, you allow your natural color—including the grey—to remain part of the equation.
This is a much more forgiving maintenance cycle. When your roots grow out, there is no hard line of demarcation. Instead, the roots simply blend into the dark lowlights, which blend into your natural, greying hair. You can stretch your salon visits from four weeks to eight, or even twelve.
Choosing the Right Toner for Grey Blending
Toning is where the magic happens. A lowlight is essentially a deposit of color. Once that color is deposited, it needs to be maintained.
If you choose a cool ash lowlight, you must be prepared to use a blue or purple-based shampoo. These shampoos are not just for people with bleached blonde hair; they are essential for anyone with grey or silver in their hair. They deposit a tiny amount of pigment that neutralizes yellowing, keeping your lowlights looking fresh and your greys looking silver rather than dingy.
The Golden Rule of Toning: Do not over-tone. If you leave the purple shampoo on for ten minutes every time you shower, you might wake up with purple hair. Use it once a week, and always follow with a deep conditioning mask. Grey hair—even when lowlighted—needs more moisture than pigmented hair.
Why Over-Processing Makes Greys Worse
There is a temptation to “fix” the grey by using stronger and stronger developers (the chemicals that mix with dye to open the hair shaft). Do not do this.
High-volume developers will damage the cuticle of your hair. When the cuticle is damaged, the hair becomes frizzy and porous. Porous hair absorbs color unevenly, meaning your lowlights will end up looking patchy and muddy.
Stay with low-volume developers (typically 10 or 20 volume) whenever possible. They are gentle, they deposit color effectively without unnecessary damage, and they help you maintain the hair health you need for the color to actually look good.
The Reality of Texture Changes
It is a fact of life: when hair turns grey, the texture changes. It often becomes coarser, drier, and sometimes more unruly. This is because the sebaceous glands in the scalp produce less oil as time goes on.
Lowlighting alone cannot fix texture. You need to adjust your styling routine. Move away from alcohol-based hairsprays, which dry out the hair. Embrace oils, serums, and creams. A lightweight argan or jojoba oil applied to the ends will do more for the appearance of your lowlights than the most expensive salon treatment.
If your hair feels wiry, stop using high-heat settings on your blow dryer or flat iron. Greys burn more easily than pigmented hair. Use a heat protectant spray every single time, without exception.
Talking to Your Stylist About Your Goals
The biggest mistake clients make is assuming the stylist knows exactly what “grey blending” means to them. To some, it means “I want to look like I have no grey at all.” To others, it means “I want to grow out my grey and look natural.”
Bring pictures. But do not bring pictures of 20-year-olds with Instagram-filtered hair. Bring pictures of people with your hair texture and your level of grey.
Essential Questions to Ask:
- “Will this technique create a harsh line of demarcation when my roots grow out?”
- “How often will I need to come back for a refresh?”
- “Can we use a demi-permanent color instead of permanent for these lowlights to minimize damage?”
- “What products should I use at home to keep these cool tones from turning brassy?”
Be clear about your budget and time constraints. A full head of custom-placed, multi-dimensional lowlights is a luxury service. If you only want to come in twice a year, be honest about that. A good stylist can give you a “low-maintenance” version of these ideas that still looks intentional as it grows out.
Managing Expectations During the Transition
The transition period is the hardest part. You are essentially growing out the old color while incorporating the new grey. It takes patience.
There will be a phase, usually around the six-month mark, where you feel like your hair looks “messy.” This is normal. You are essentially dealing with two or three different color stories happening on your head at once.
Stay the course. The lowlights act as the glue holding those stories together. They are the transition element. As your natural grey grows in, your stylist can adjust the placement of the lowlights, gradually moving them lower and lower until, eventually, you have a full head of beautiful, blended hair without a harsh line in sight.
The Bottom Line
Embracing your grey does not mean looking unkempt or tired. It simply means evolving your approach to hair color. Brunette hair with grey requires a strategic touch—the right shade, the right placement, and the right level of commitment.
Whether you choose a soft mushroom brown or a daring slate ribbon, remember that the goal is depth, dimension, and ease. You are not covering up your life experience; you are framing it. Choose the shade that makes you feel confident, invest in the right toning products, and let your hair be the dynamic, shifting, and beautiful accessory it is meant to be.
